Sunday, 15 January 2023

A January purchase

But not by me. This red plastic box was in a suitcase of vintage patterns and assorted sewing stuff which I bought at an auction ages ago (and it made a fair contribution to the overall weight of the suitcase).

Mystery box

I looked inside, thought "Ooh, interesting", and put it on a shelf in my workroom to investigate properly later. And there it has sat, for about 4 years, until it caught my eye during a recent tidy-up, and I decided that it really was time to look at it properly.

The detail on the box lid, below the Singer logo, gives a hint of what's inside.

Can you guess?

It's an attachment for making buttonholes on a straight-stitch machine, such as my 66s and 99s (but also models such as 15, 128, 185 and 201). The box is cleverly designed to hold all the pieces securely, so there's no danger of anything getting lost.

Everything neatly in place

This (important) piece actually screws into the box

Tucked right at the bottom of the box was the receipt. I assume that of the three items bought from the Singer shop in Chester, this was the one which cost four pounds, 18 shillings and fourpence. Sadly, although the receipt clearly shows the purchase date as 20 Jan, it does not give the year.

I wonder what else they bought?

There is no year mentioned anywhere in the instructions, either. There is however a reference to the "new "Featherweight" portable", so based on this I'm guessing at a date somewhere in the 1950s. This particular buttonhole attachment doesn't seem to have been sold in the States, so there's limited information about it online.

It's a complicated beast, as is apparent from the illustration and parts list (three pages long!) in the instruction manual.

All the parts

I love the fact that if a washer snapped or a spring broke, you could simply get a replacement part from Singer, rather than have to buy a whole new attachment. Mind you, that approach to sales may go some way to explaining why Singer eventually went bust!
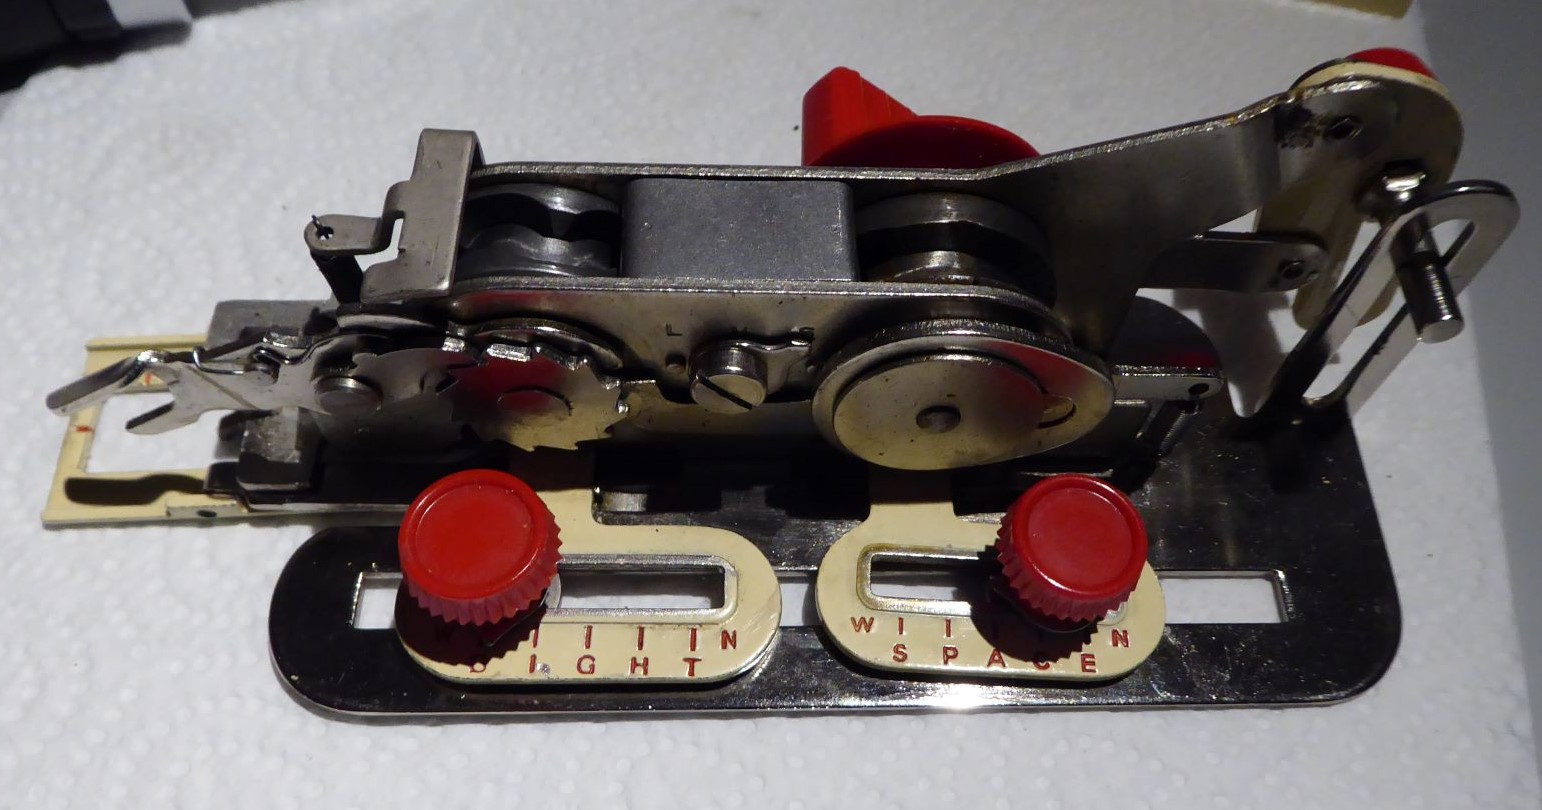
With the cover removed

The attachment works by moving the fabric from side to side between stitches, so the machine's feed dogs have to be covered with the plate, which is screwed in place using the same holes as the seam allowance marker.

Feed cover plate in place

The attachment has a fork which is positioned around the needle clamp, and the whole thing is screwed onto the presser foot bar. It's a bit of a challenge to do all this without bending the needle!

Showing how the attachment is attached

Unlike later models, which used drop-in templates to make different styles such as keyhole, this version can only make straight buttonholes. It is possible to alter the density and width of the stitches and the width of the centre gap, however. The buttonhole length can be between ⅜" and 1", and it's possible to extend it up to 1⅞" with manual intervention.

I tried doing some test buttonholes, with red thread on top and cream in the bobbin. The initial attempts were not a success.

From 'very, very bad' to 'not much better'

The underside looked even worse.

This is the underside - there may be some tension issues!

At this point I took the buttonhole attachment off, checked the tension with ordinary straight stitching, and made a few adjustments until I was entirely happy with it. Then I tried again (this time with yellow bobbin thread).

The right side

The underside - at least it's mostly yellow

It's obvious that there's still a lot of work to be done, but I think that it's mostly in improving the skills of the operator! The instruction manual for Olive, my mum's (now my) 1953 Singer 99, has the threading diagram annotated with little felt tip arrows which I added because 50 years ago I couldn't follow the instructions - now I could probably thread a 99 or a 66 in my sleep. So the fact that I can't make perfect buttonholes on my first attempt isn't too much of a worry.

I should add that I did all this on Tilda, my original 66 treadle. I thought that treadling for long enough to do a buttonhole would be exhausting, but it took far less effort than I expected, even going round it twice. The instructions stress the need to work slowly, so a treadle rather than an electric machine is probably ideal.

I've written many times on this blog about hand sewing and slow sewing, and if I only have a few buttonholes to do on a garment then I think that hand-sewn buttonholes would remain my first choice. However, I have a couple of shirtwaist patterns on my 'would like to make' list, and even I balk at the idea of that many buttonholes. So there's a good chance that machine buttonholes may be making an appearance in my wardrobe sometime.

Lots of buttonholes - Hollywood 805, from 1942

Sunday, 8 January 2023

Vogue 8388 - part 2, success!

"The past is a foreign country; they do things differently there."
L.P. Hartley, The Go-Between

I found myself thinking about this quote as I worked on my last project of 2022, As was apparent in last week's round-up post, I finished my 1970s blouse before the year end. It wasn't especially difficult to make, but I did find the instructions strangely old-fashioned. I first started sewing for myself in 1978, a mere six years after this pattern was issued. Plus, as anyone who reads this blog regularly will know, I've used a lot of 1979 patterns. And yet, Vogue 8388 felt as though it had more in common with my 1940s and 1950s patterns than ones from later in the same decade.

I wonder if this is all down to interfacing. I can't remember a time when I didn't use iron-on interfacing, but this pattern assumes that the maker is using the sew-in variety, and some of the construction details may be connected to this.

For starters, the back facing is not interfaced on any view, only the front facing, cuffs, and collar for view A.

Cutting diagrams for interfacing

Instead of a separate piece, the blouse front and facing are cut as a single piece. The interfacing is then applied to the blouse part, and stay tape is added over that.

Instructions for view C

I chose to apply the interfacing to the facing section and stay-stitch the blouse edge, as I would with a modern pattern. I also interfaced the back facing and stay-stitched the blouse back.

The sleeves are attached by reinforcing the corners of the blouse front and back, snipping to the corner, and then sewing in the sleeve in a single line of stitching. The excess fabric at the corner of the sleeve is then trimmed away and the cut edges sewn together, so that the seam allowance lies flat under the sleeve.

Sleeve instructions

Because my fabric was quite fluid, I sewed small pieces of tear-away stabilizer onto the blouse when doing the reinforcing. The end result was four perfect joins with no puckers, so I was very happy.

Smooth join = happiness

The neck ruffle is long. Very long. And it took a lot of gathering. The instructions are to baste the ruffle to the blouse and then fold the facing over.

Ruffle instructions

However, because I had interfaced the facings, I sewed these together and then basted the ruffle onto the facing. Then I folded the blouse over, and stitched through all the layers. I was very glad that I had stay-stitched the section without interfacing, as that long V neck would almost certainly have stretched out of shape otherwise.

Attaching the super-gathered ruffle

For once, I found some perfect buttons. Even better, my local fabric shop was selling them off cheaply! With small gold beads set into clear resin, they add the perfect touch of seventies glam.

Buttons in all their sparkly glory

The final oddness in the instructions concerns the bottom of the blouse. Instead of a hem, it should be stitched ¼" from the edge, trimmed to ⅛", and then overcast. As the blouse is shorter below the waist than modern patterns, I just overlocked the raw edge to preserve what length there is.

When I tried the finished blouse on, I was delighted to find that my various pattern adjustments had worked, and it fits perfectly. Even better, despite the fact that it is black and frilly, two things I usually avoid, I absolutely love it! Everyone I've shown it to has loved it as well - there's just something about its sheer exuberance.

With this in mind, I decided that I needed to do it justice when I photographed it. For reference, here's the picture in the Autumn 1972 Vogue Pattern Book.

Inspiration - can I get my hair that big?

And here's my take on it.

Yes, I can!

My stash management in 2022 may have been woeful, but it was lovely to end my sewing year on a high. Onward and upward into 2023!

Sunday, 1 January 2023

2022 review

Happy 2023! The start of a new year can mean only one thing in blogland, namely a review of the year just gone.

In terms of numbers, it's been a very poor year. There are just nine sewn projects to report on, and precisely none of them were in my MakeNine plans for 2022.

2022's output

I made three dresses - Butterick 6866, Style 1271, and New Look 6594. I also completed a remodel of my third version of Vogue 2787. And I managed to finish my 1970s blouse, Vogue 8388, just in time to be included in the round-up. I'll blog about it next week.

Most of my other sewing was practical. I made draft excluders (stoppers) from stash fabric and a huge bag of scraps cut up for stuffing. A stocking case for when I'm travelling has been on my to-do list for some time, and finally happened. And once I realised that my recycled plastic cable tote bag, while pretty, was of limited use as it was, I set about improving it.

On the subject of bags, I learned a lot about bagmaking (strictly speaking, made up a lot about bagmaking) in the process of creating my sunray clutch bag, and love the end result.

So little sewing, combined with multiple fabric purchases, has had a dire effect on the stashometer. This is, by a long way, the worst it's ever been. Even if I hadn't included fabrics carried over from previous years, it would be very poor. Clearly I need to stay away from fabric retailers, however tempting they may be.

The Stashometer of shame

The state of the 'used' column isn't helped by the number of PHDs (Projects Half-Done) in my workroom. I have yet to pick up work on my winter coat again, largely because I'm not happy with the collar but can't work out a way to fix it. My second version of Style 1271, made from the 1960s 'jewel' cotton I bought at the Festival of Vintage, is cut out but not started. And my 1930s Butterick dress has stalled because trying to sew black trim onto a black dress in poor winter light is a migraine waiting to happen.

Despite all this, while the number of items completed is small compared to some previous years, I'm very happy with what they represent in terms of where I'm going with my sewing. I have more than enough clothing to meet my practical needs. I sew because I love the acts of sewing and creating, and it's good for my mental health, so I have no intention of stopping. But I do want to make sure that I'm not just sewing for the sake of sewing, and most of what I’ve completed this year reflects that.

The draft excluders have proved very effective at keeping my living room cosy - particularly helpful as energy prices soar. The stocking case has become my main storage for my most worn colours of stocking. And adding a pocketed lining to my tote bag has made it vastly more useable.

Most of my dressmaking this year has involved regrading and/or fairly extensive alterations to patterns. All of which makes the process slower (good), adds to my drafting skills, and so contributes to my new goals. But the dressmaking project which I'm most proud of is remaking Vogue 2787. The dark red contrast section looks so much better than the blue which was there before, and the dress has become a firm favourite. Every time I wear it, knowing that I put in the effort to rescue it makes me happy.

I've finally come to accept my "Squirrel!" tendencies, and realise that there’s little point in setting out to make specific items in a year. So instead, I'm carrying over my goals from 2022. I really do want to complete the coat somehow, but otherwise I'm planning to concentrate on things which give me my dressmaking 'fix', but slowly.

2023 goals

Sunday, 25 December 2022

Season's greetings

There's good news and bad news. The good news is that amid dental appointments, out-of-town hospital appointments, and all the general rush of this time of year, I did still manage to get some sewing done on Vogue 8388. The bad news is that I didn't get enough done for a blog post. So instead, here’s Maud looking very festive.

I won't get much done with this set-up

I'll be back next week with a more sensible post. In the meantime, Merry Christmas to all who celebrate it!

Sunday, 18 December 2022

Vogue 8388 - part 1

From bad to worse. Even more issues this week, many connected to the severe cold snap we've had here in the UK, have reduced my sewing time to practically nil. On top of that, for various reasons, I was unable to go to the dinner after all. Sigh. At least I hadn't rushed to make a new dress.

After all this, I decided that I just wanted a silly, no-pressure-if-it-goes-wrong, project to perk me up a bit. Step forward Vogue 8388.

I posted about this the other week, and its general ridiculousness just stuck in my mind. Plus, I had a suspicion that I had some 'suitable' fabric in my stash.

Indeed yes, I did

I have absolutely no idea how, or why, I acquired this. Possibly it was part of a mixed lot of sewing stuff which I bought at an auction. Either way, the design and colours look quite 1972 to me. It's like a thick georgette, so far more drapey than the taffeta used in the Vogue Pattern Book examples.

The huuuge collar of view A was a bit much, even for me, so I decided to embrace the silliness and go with view C.

Frilled to bits

But before I could cut it out, there were alterations to consider. I needed to make the bodice both wider and shorter. The instructions on the pattern are to lengthen or shorten pieces 1 and 2 just above the waistline.

The pattern pieces

However, I would need to shorten the pattern so much that this would make the sleeves start pretty much at the waist. And because I sometimes have to narrow the shoulders on patterns these days, I didn't want to include all the extra width in the bodice pieces, either. So instead I made some of the changes on the main part of the bodice, and some where the sleeve fits into it. This meant that I had to alter the sleeve as well, but hopefully it will improve the overall look.

The narrowing at the top of the sleeve was tapered away to nothing lower down, because I wanted to keep the glorious seventies fullness at the cuff.

Blue lines - widening, red lines - shortening

It’s now all cut out and ready to go. I’ve got another busy week coming up, but hopefully I’ll manage to squeeze in a little sewing time somewhere.

Sunday, 11 December 2022

Emilie

Family issues have taken up a lot of what was meant to be my sewing time this week, to the extent that there's no chance of my completing my evening bag in time for the fancy dinner. I have a much simpler Plan B, but it's nowhere near advanced enough to make a blog post. So instead . . .

My latest acquisition

Vintage machine-wise, I've always been a Singer Girl, so with this I feel as though I've crossed over to the dark side! It all started ages ago, when I spotted this machine on an auction website.

It was all the fault of this picture

I had never seen blue and green decals before; most designs I've come across are gold, with occasional hints of reds, oranges or yellows. Courtesy of this webpage, I discovered that it was actually one of the many machines which Jones made under other names for various retailers, and that 'Kildare' was the brand name for Wm Whiteley Ltd in London.

Clearly, I am a sucker for a pretty decal - it's what first drew me to Deltic Elsie. So when I spotted a familiar image in the catalogue of my local auction house, of course I had to go to the viewing to take a look. I know almost nothing about shuttle machines but. . . everything moved, the shuttle was there (the one thing which I do know is crucial), the machine appeared to be in good condition, there were no dodgy electrics to consider and, well, one thing led to another!

The all-important shuttle

The case is different from either Singer bentwood cases or the more rectangular 'coffin tops'. The finish on both it and the machine base is in a poor state - when I peeled off the lot number sticker, the varnish underneath came away with it. I may end up sanding all the wood down and redoing it. On the plus side, the key is there, and the lock works.

Looking rather battered

The back of the machine is as ornate as the front.

More decals

I'm not sure how much it has been used. It is dusty/grubby on the outside, but there's no accumulation of fluff or grot inside. When I lifted the machine up, I found a pristine underside.

Well cleaned or barely oiled? I can't decide

I also found the instruction manual in the space under the machine. It appears to be dated September 1935, which fits in with the information I could find about the decals and serial number on this website.

'9/35' just visible at the bottom right

Looking though the instructions I discovered that Emilie (at some point, I will write a post about how my machines got their names) possesses a feature which none of my other vintage machines have, not even Mum's 1952 99K - reverse stitching!

Luxury!

She also still has all the feet which came as standard and, importantly, a couple of spare bobbins.

Feet for hemming, binding, braiding and quilting

There are also a couple of packets of needles, condition not yet checked. Pretty much the only thing which I know about vintage Jones machines is that they don't take what are now 'standard' needles i.e. 15x1. Instead, they take 128x1, which aren't readily available. Fortunately, I have discovered that Helen Howes sells them, and in a variety of sizes as well.

There isn't the wealth of information about the Jones CS that there is about Singer 66s and 99s, so cleaning and restoring Emilie is definitely going to be a voyage of discovery!

Sunday, 4 December 2022

The lampshade bag - part 1, the design

Yes, it's happened again.

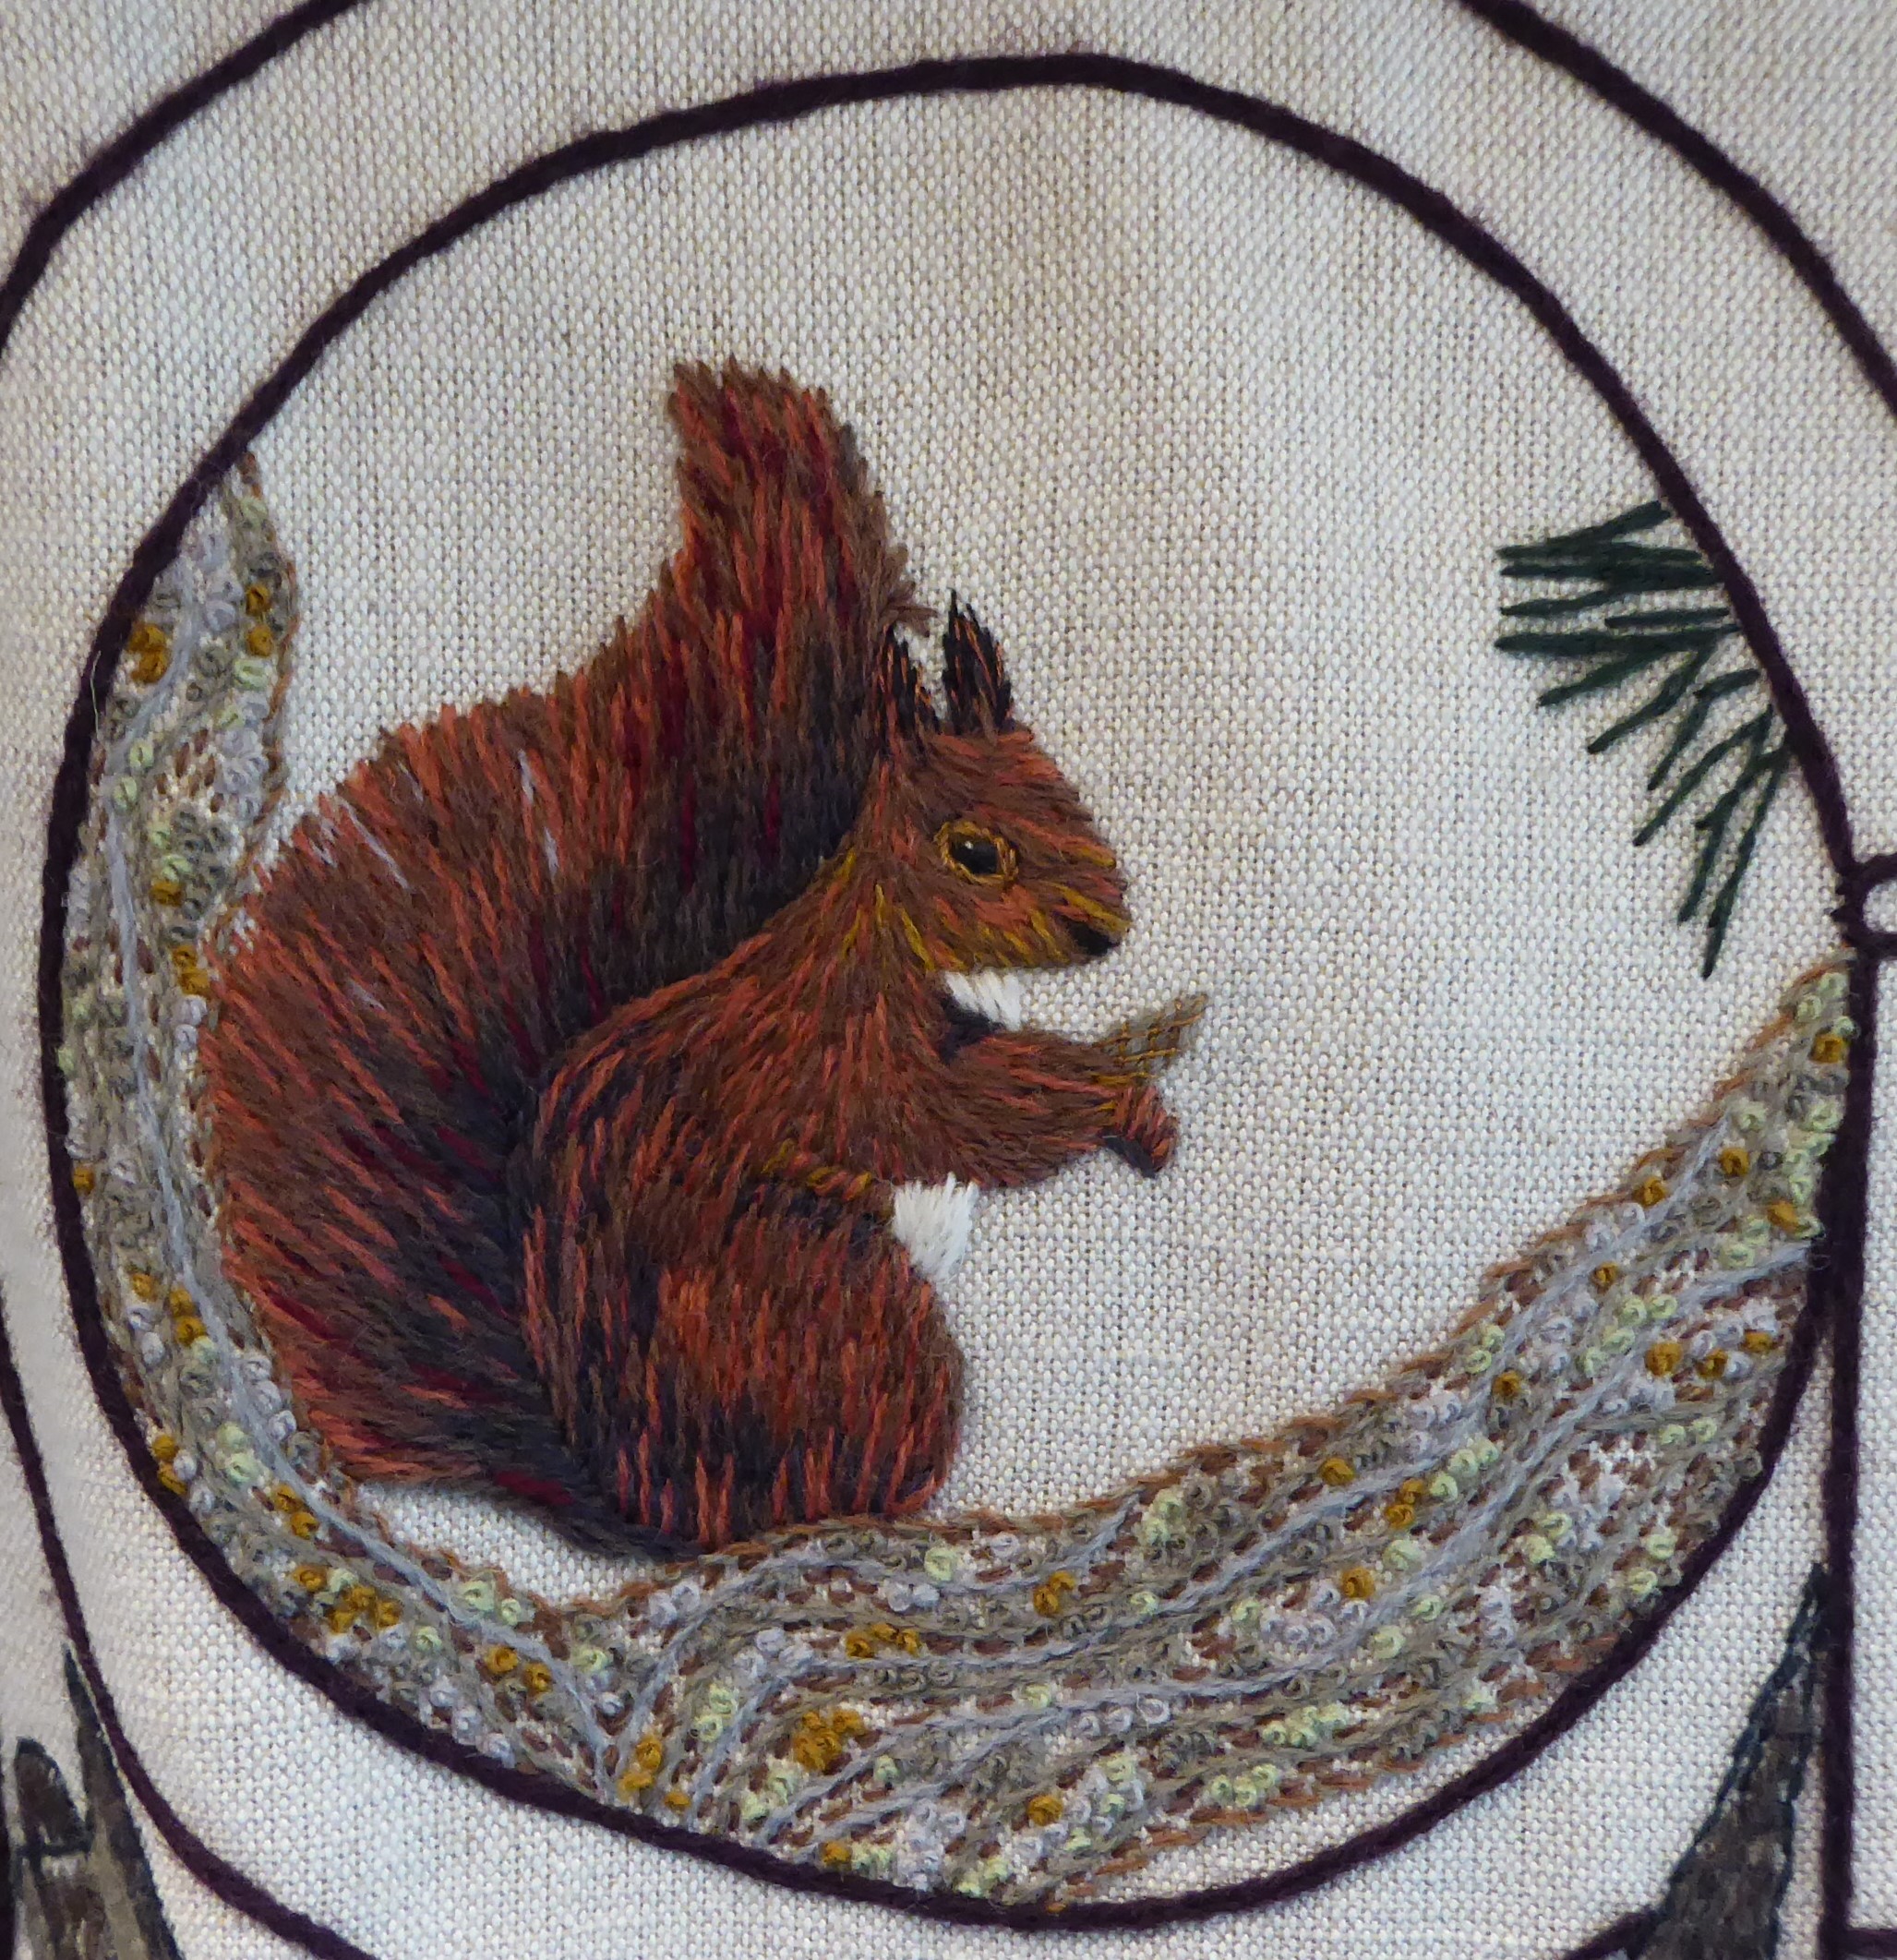
Detail from the Great Tapestry of Scotland

For once, there is actually some justification for an entirely new project, other than my usual, "I just fancy doing it". I'm going to a fancy dinner in a couple of weeks - so fancy that the dress code is 'black tie'. Ooh er.

Reader, I do not inhabit that sort of world. This will be, at most, the second black tie event I have attended in my entire life. (I was a friend's 'plus one' at a formal dinner when we were students, but that was so long ago that I can't now remember just how formal said dinner was.) A quick google has revealed that for women, 'black tie' equates to 'long dress'. I don't possess any modern long dresses and, given that on current form I won't need one again for another 35 years, I don't intend to make one. So instead, I'm going to wear the one long dress I do have, my faux-Fortuny Delphos.

The one problem with this plan is that I don't have a suitable evening bag. My sunray bag is completely wrong and my wedding bag, while definitely a good match for the dress, is just too small - it dates, obviously, from a time when I could rely on Mr Tulip taking care of paraphenalia. So a new, appropriate, bag is needed.

Because I possess a brain which carefully stores useless information while gleefully discarding why-I-went-upstairs in the time it takes me to get upstairs, I remembered that as well as clothes and textiles, Mariano Fortuny also designed light fittings. This seemed like a good starting point for a possible bag design. If I had the time, I would love to make something based on this shape.

Silk Fortuny lamps on sale in Venice

But I don't, so instead I'm using these as my inspiration.

More Fortuny lamps - painted silk and wooden frames

As ever, I began by considering what I would have in the bag - glasses, phone, keys etc. I had this small carboard box to hand, and discovered that it was just the right size to hold everything.

My starting point

Using the dimensions of the diamond I'd drawn on the box, I tried to sketch out the overall design.

Attempting the design in two dimensions (and failing)

I realised however that this would simply replicate the box shape, which wasn't what I wanted. It was only when I drew the base onto the box that I could see what I needed to change.

The corners need to be 'cut off'

I really struggle to visualise size and capacity, so the only thing to do was make a mock-up, as I would with dressmaking. I rescued an old cereal packet from the recycling drawer, and set to work on my 'toile'.

Showing the lower part of the structure from two different angles

I added further large triangles at the top to complete the bag shape, and then smaller ones to make the 'lid'.

The completed 'bag'

The basic structure will be made from the same very sturdy pelmet interfacing as I used for the sunray bag. The next step is to cut out the pieces, and cover them with plain cotton. I can then start thinking about the outer layer.