Showing posts with label squirrel project. Show all posts

Sunday, 9 August 2026

Family ties

A scurry (yes, that is the collective noun)

Regular readers of this blog (thank you) will know that the choice of animal in the picture above can mean only one thing; I'm considering a new project.

Actually, it's not entirely new. The cylindrical things are lace bobbins, and I used to make bobbin lace.

The bobbins in full

It was a long time ago, well before I started the blog. My lace has only appeared on here once, when I used some pieces which I had made years before to trim my Armistice Blouse.

The lace was made specifically to fit the blouse pieces

Close-up of the lace in situ

Because it was so long ago, I don't have any pictures of me making lace or work in progress, so I'm using a book cover to show what is involved. A very simple explanation is that thread is wound around the bobbins, which are then passed over and under each other to weave or plait the threads to form the lace.

Lacemaking in progress

Bobbins were traditionally made from wood or bone. They can be plain, but also carved, turned, or painted. The beads at the bottom provide weight to tension the thread, and also stop the bobbins from rolling on the pillow - the working surface. They are usually used in pairs.

A selection of my bobbins, from different makers

Mum also made lace for many years; in fact, I can't remember which one of us started it first. We had a lot of hobbies in common, and regularly swapped supplies and other items as we each needed them. She gave me her bobbins years ago, when arthritis started to make lacemaking too difficult for her, but I must admit that they just sat in the box she stored them in. Then this week, on a whim, I took out both her bobbins and mine. So many memories came back - of swapping notes and patterns, and of going to lace fairs together and buying the bobbins.

From talking to friends after Mum died I've become aware that not all of them have/had good relationships with their mothers, and some have been very strained indeed. I was so lucky that not only did we get on well, but we had so many shared interests which brought us even closer. Which is why, despite not being short of things to do, I'm considering taking up lacemaking again. With my own bobbins and with Mum's.

Sunday, 25 June 2023

A UFO completed

And it's not even my UnFinished Object! I've completed my latest squirrel project - making a dress out of a part-made skirt which I acquired in an auction lot.

The bodice pattern I was using had been drafted with a centre back zip, but the skirt consists of two panels sewn together at the sides. I didn't want to cut into the back panel to make an opening, so instead I moved the zip to the side. This involved opening up one side seam of the skirt enough to accommodate the lower part of a 30cm/12" zip once it was attached to the bodice.

Unfortunately, even though I unpicked the overlocked edge to retain all of the seam allowance, it was still too narrow to support a zip. Rather than make the skirt narrower, I increased the seam allowance by adding strips of the deadstock cotton for the top underneath and overcasting the seam allowance onto them. The neat selvedge of the cotton came in very handy, as it acted like seam tape, and the raw edge of the strip was tucked into the fold.

Widening the seam allowance with fabric strips

The top was very easy to make, as it is only three pieces plus the facing. Even though I had changed to a side opening, I could not cut the back on the fold as it is not cut on the straight grain. I included an opening at the back neck, but as I have since taken the completed dress off without remembering to undo the buttons (from my button box) first, I think that this was probably unnecessary!

The back, with superfluous opening

Once the top was complete, I pleated the skirt to fit it. Purely by chance, the patched area ended up hidden inside an inverted pleat - yay! My local fabric shop had run out of white zips of the length I needed so rather than wait for a new delivery, and in line with the general make-do ethos of this project, I used a longer zip from my stash and cut it to length.

When I was cutting the top out, I had been careful to place the pieces on the fabric in a way which left a long section down one side intact, and I used this to make a long sash. Finally, I attached the three remaining buttons to the front to add interest.

And here is the end result. It isn't especially vintage (although 1990s and 2000s are now classed as 'vintage', and I think that the skirt is older than that), but I've styled it here with vintage accessories.

Not bad for deadstock and leftovers!

It's nothing special, but I think that it's going to be a real everyday workhorse dress. My two maxi dresses (the same design, in two different colourways) are about the only RTW items which I still regularly wear, so it's great to have a me-made replacement for them. The skirt is a very lightweight cotton - as is apparent from this photo taken in a slight breeze - so it should be cool while providing some sun protection.

Even a slight breeze catches the skirt

And I really love this neckline. I may add some lingerie straps because it is so wide, but my favourite What Katie Did bra works fairly well with it. Plus, the grown-on sleeves provide a bit of cover without the hassle of fitting a separate sleeve. I can see a lot of iterations of this bodice appearing on this blog in the future.

#sewnshownseated shows off the neckline

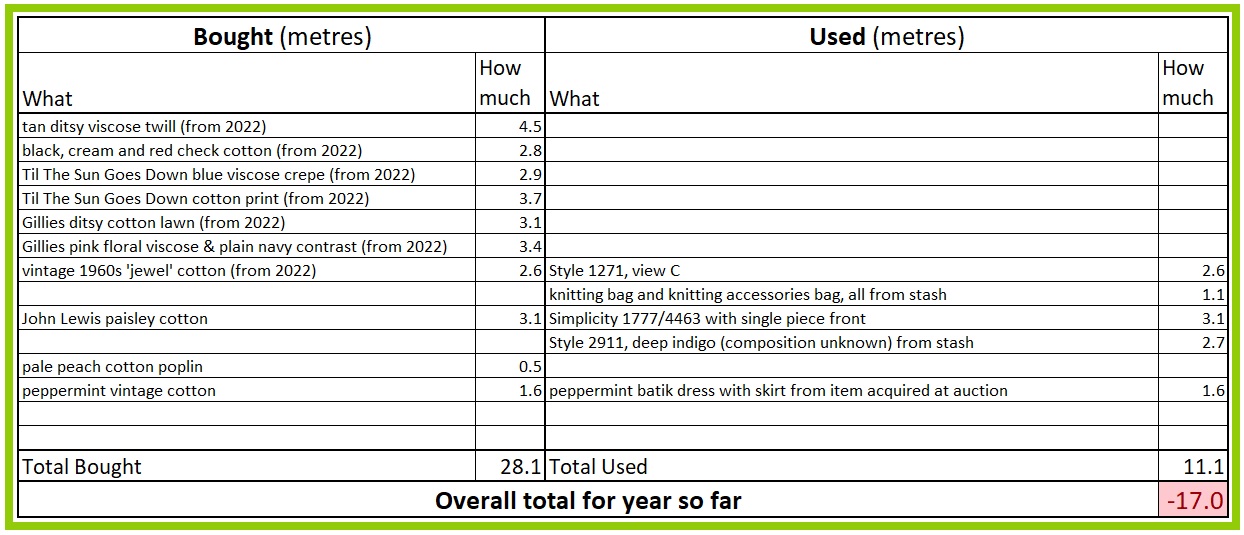
And for once, that new fabric on the Stashometer has gone straight back out again.

Back down to a mere 17m deficit!

Sunday, 18 June 2023

Whoops

Yes, again.

"At the Sign of the Three Squirrels" - Goslings Bank *

At least it gives me a chance to use this photograph I took last time I was in London. (And yes, we have reached the stage where I take photos of squirrel-related things when I see them, because I know they will at some point be useful for this blog!)

This is what I should have been working on.

Exhibit A

And this is what I am working on.

Exhibit B

The two are actually related. When I am making a bodice toile, I always struggle to get the length right. What seems fine initially can change completely once a skirt is attached. To get round this problem with the bodice of the pineapple dress, I decided to use a skirt which I had acquired in a box of sewing stuff bought at an auction. It appeared to be part made - two panels of batik fabric sewn together at the sides and hemmed, with what I'm guessing was a very haphazard channel for a drawstring at the top but no drawstring. I had unpicked the top, closed up the misaligned drawstring holes with tape, pressed under the top edge to a uniform length, and got no further.

Drawstring holes (I assume) from right side and wrong side

It has been folded up in my workroom ever since, until I had the idea of using it as a 'mock skirt' by pleating it roughly to size and basting it in place.

Attached to the bodice mock-up

It worked very well for checking the bodice, but you can guess what happened - it looked so good that I immediately wanted to make it up as a dress. To speed things up, I decided to use the bodice pattern I had just drafted but with the neckline of Simplicity 3662. Unfortunately, despite having lots of plain blue cotton in various shades, none of them really worked with the skirt fabric. So it was back to the fabric shop to look at yet more plain blues. While I was there, I spotted a roll labelled "original vintage cotton". The staff couldn’t tell my anything about it, but the fact that it is only 90cm/36" wide, has a proper woven selvedge instead of a modern fluffy one, and also has some discoloration along said selvedge makes me think that it is indeed vintage deadstock. Either way, the colours blend perfectly with the skirt.

Such neat selvedges!

So now I have not one but two dresses on the go, and more fabric.

Another 1.6m


* - Goslings Bank was a very old bank on Fleet Street, which eventually became part of Barclays. While geese might seem more appropriate for the sign, squirrels were chosen for their thrifty habit of storing nuts for the winter. Sadly all of this history did not protect the branch from the onslaught of online banking, and Barclays closed the branch in May this year. I wonder what has become of the sign?

Sunday, 4 December 2022

The lampshade bag - part 1, the design

Yes, it's happened again.

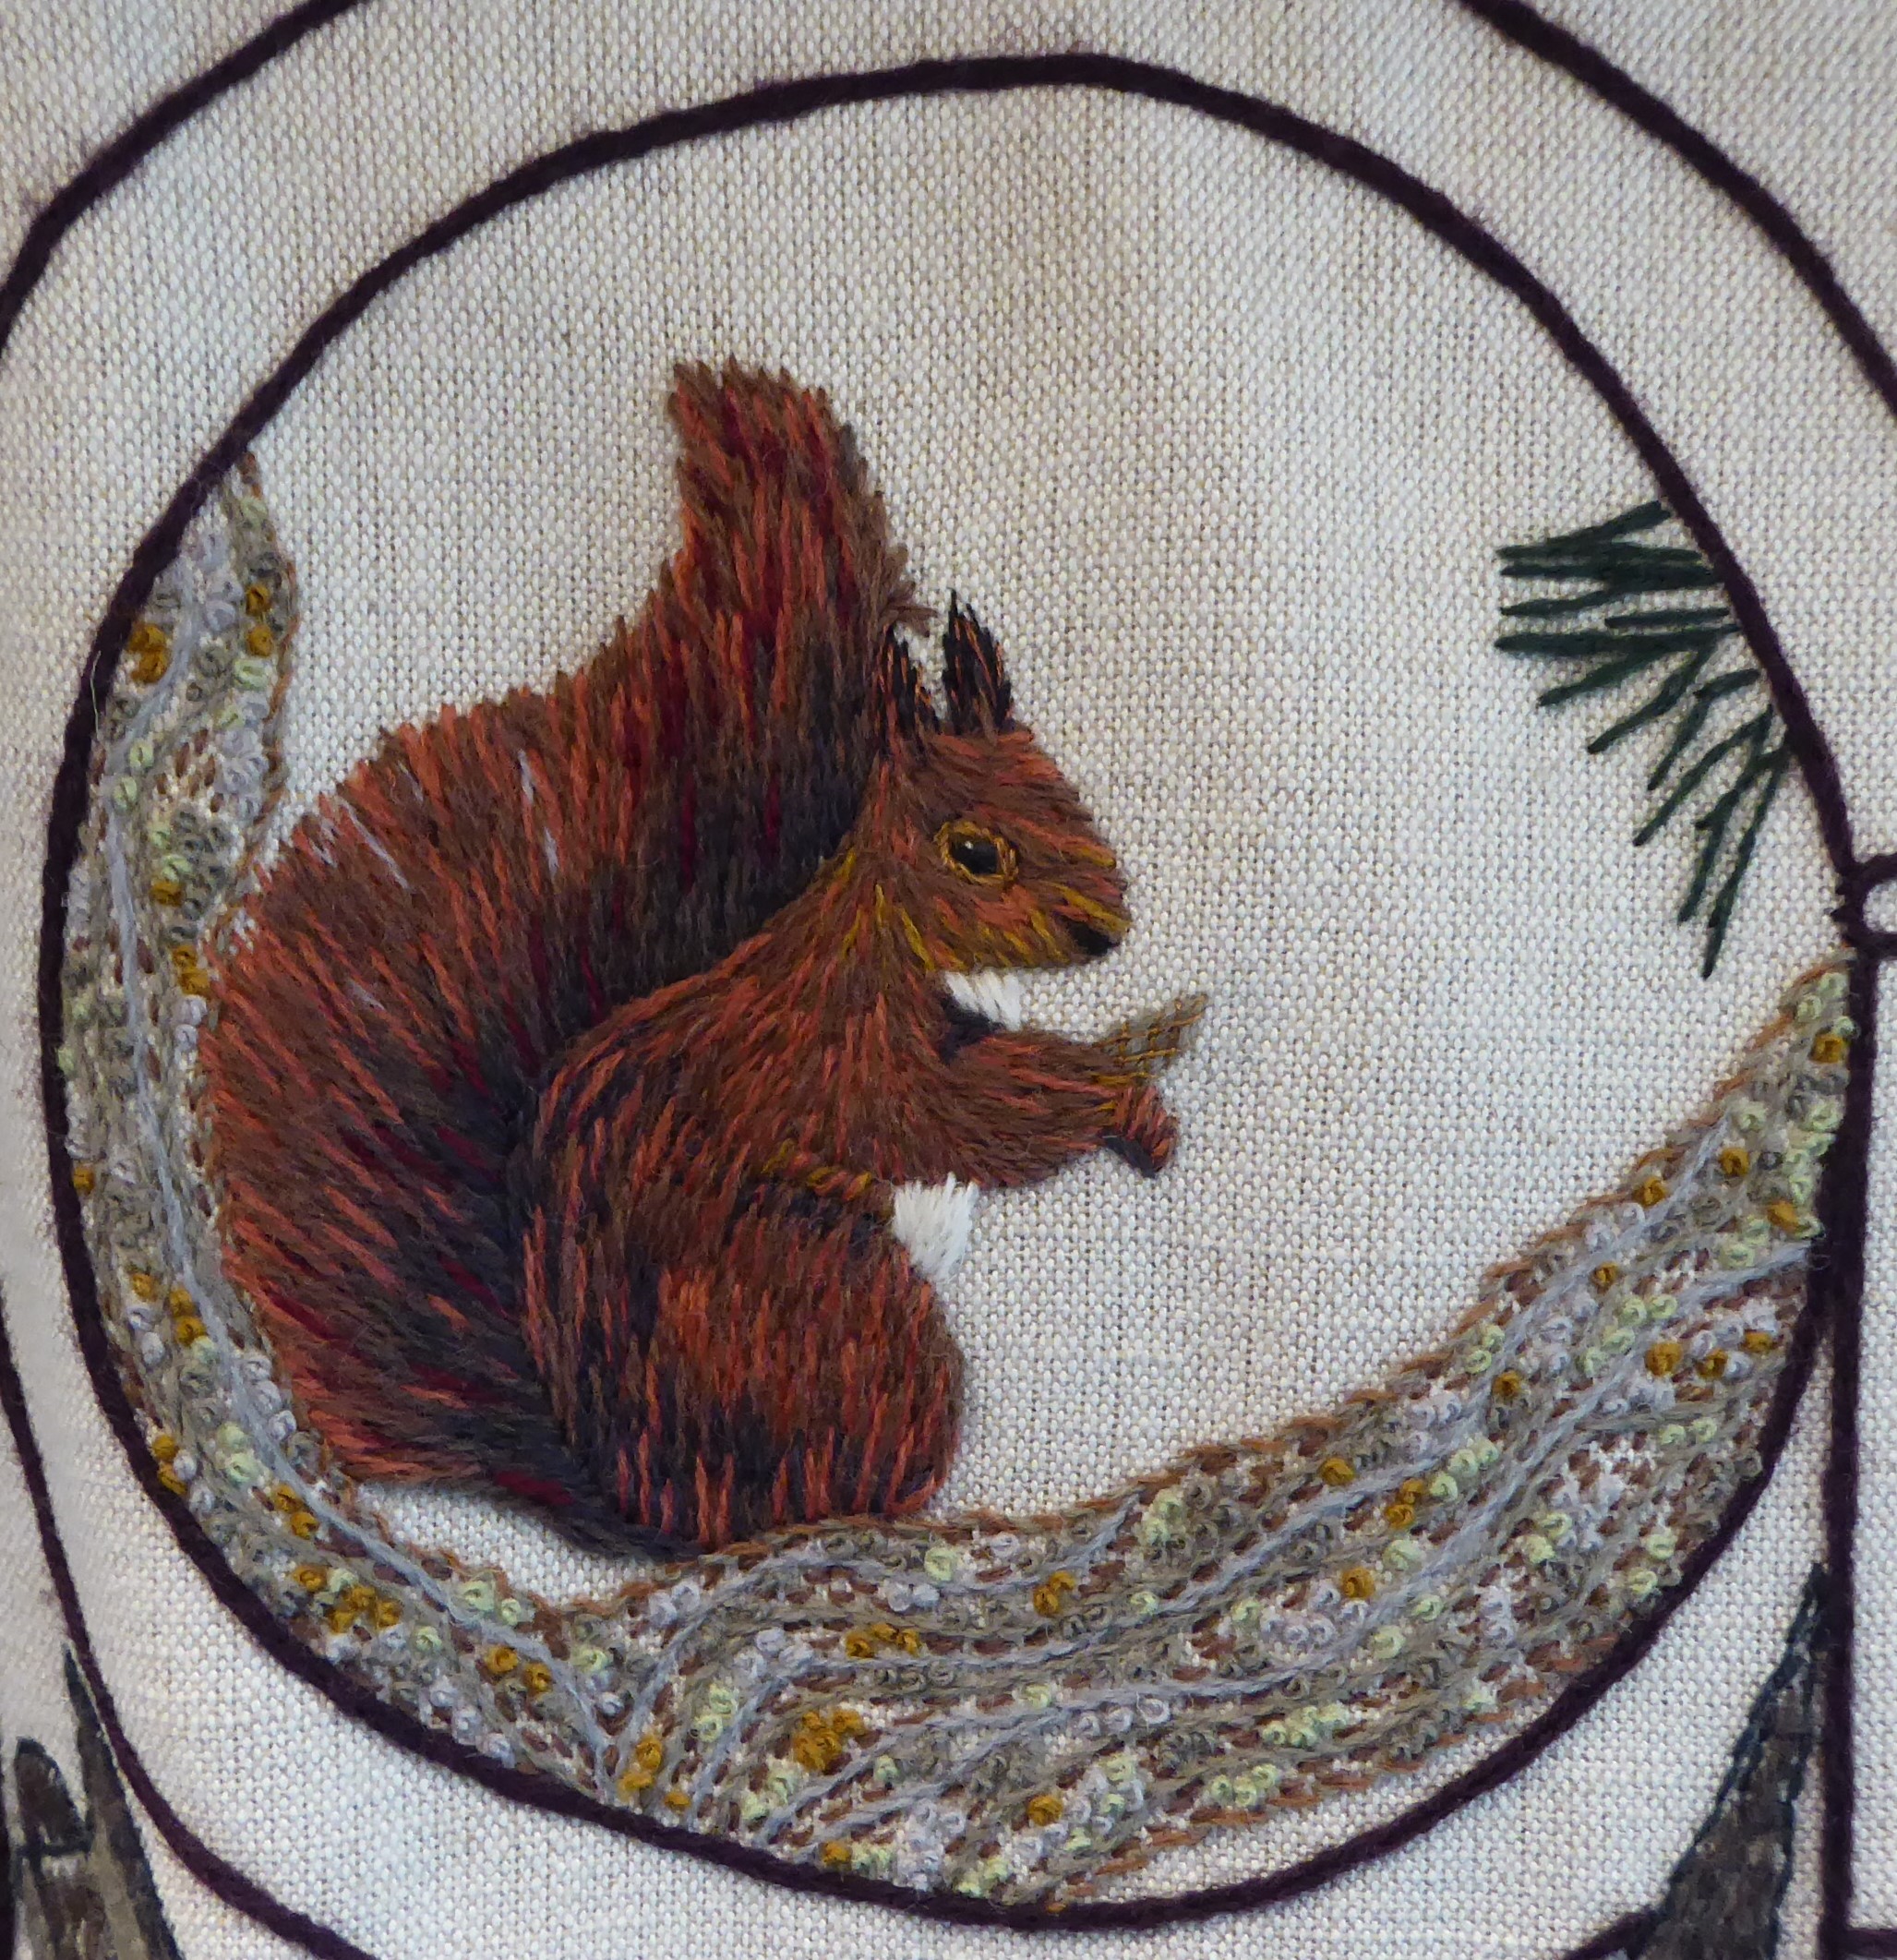
Detail from the Great Tapestry of Scotland

For once, there is actually some justification for an entirely new project, other than my usual, "I just fancy doing it". I'm going to a fancy dinner in a couple of weeks - so fancy that the dress code is 'black tie'. Ooh er.

Reader, I do not inhabit that sort of world. This will be, at most, the second black tie event I have attended in my entire life. (I was a friend's 'plus one' at a formal dinner when we were students, but that was so long ago that I can't now remember just how formal said dinner was.) A quick google has revealed that for women, 'black tie' equates to 'long dress'. I don't possess any modern long dresses and, given that on current form I won't need one again for another 35 years, I don't intend to make one. So instead, I'm going to wear the one long dress I do have, my faux-Fortuny Delphos.

The one problem with this plan is that I don't have a suitable evening bag. My sunray bag is completely wrong and my wedding bag, while definitely a good match for the dress, is just too small - it dates, obviously, from a time when I could rely on Mr Tulip taking care of paraphenalia. So a new, appropriate, bag is needed.

Because I possess a brain which carefully stores useless information while gleefully discarding why-I-went-upstairs in the time it takes me to get upstairs, I remembered that as well as clothes and textiles, Mariano Fortuny also designed light fittings. This seemed like a good starting point for a possible bag design. If I had the time, I would love to make something based on this shape.

Silk Fortuny lamps on sale in Venice

But I don't, so instead I'm using these as my inspiration.

More Fortuny lamps - painted silk and wooden frames

As ever, I began by considering what I would have in the bag - glasses, phone, keys etc. I had this small carboard box to hand, and discovered that it was just the right size to hold everything.

My starting point

Using the dimensions of the diamond I'd drawn on the box, I tried to sketch out the overall design.

Attempting the design in two dimensions (and failing)

I realised however that this would simply replicate the box shape, which wasn't what I wanted. It was only when I drew the base onto the box that I could see what I needed to change.

The corners need to be 'cut off'

I really struggle to visualise size and capacity, so the only thing to do was make a mock-up, as I would with dressmaking. I rescued an old cereal packet from the recycling drawer, and set to work on my 'toile'.

Showing the lower part of the structure from two different angles

I added further large triangles at the top to complete the bag shape, and then smaller ones to make the 'lid'.

The completed 'bag'

The basic structure will be made from the same very sturdy pelmet interfacing as I used for the sunray bag. The next step is to cut out the pieces, and cover them with plain cotton. I can then start thinking about the outer layer.

Sunday, 7 August 2022

Style 1271 - part 2, view B completed

Big hair, who dis?

What can I say? It's a bit of a different look for me!

I've finished Style 1271 - my first version, but definitely not my last. There are a few things I still want to tweak, but this was meant to be a wearable toile, and I'm pretty happy with it.

As I hinted in part one, the cuffs were a bit of a struggle. For one, the pattern piece didn't match the instructions - never a good start. The pattern only has an overlap section, which is not sewn to the sleeve, at one end. However, the instructions show overlap sections at both ends.

Cuff pattern, with overlap on the left . . .

. . . but the instructions show overlaps at both ends

My guess is that the pattern was changed at some point in the development process, but either the instruction sheet or the pattern piece wasn't updated.

The next issue was that whereas a modern pattern would probably have a notch to match the cuff to the sleeve and a dot to indicate where the cuff should match the sleeve seam, this pattern has the notch only. So it's entirely possible to attach the cuff the wrong way round. Which, of course, I did!

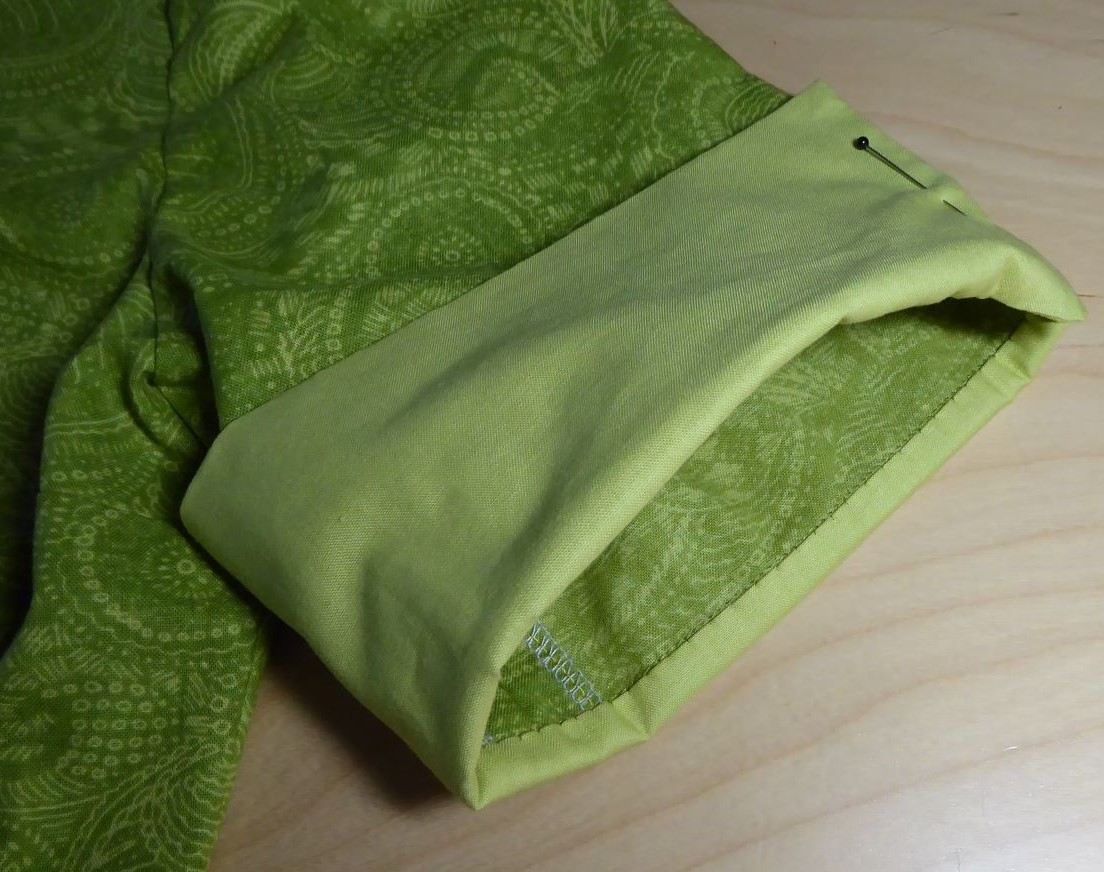
Once I had fixed that, I machined the cuff to the sleeve right sides together and slip-stitched the underside, as normal. Except that I hadn't taken into account that the cuffs are folded back, so now the stitching shows! Only a tiny amount, but enough to annoy me.

Grrrr!

All in all, the cuffs had me entirely bamboozled. Fortunately everything else was fairly plain sailing. The skirt has a back pleat with separate under panel, so just to add a bit of interest I made that from the same fabric as the cuffs. I also managed to pattern-match the centre back seam.

Contrast at the back of the pleat

The buckle for the belt has fairly narrow slots, and I was worried that once I had attached one end of the belt to the centre section, there wouldn't be enough space for the other end to pull through. So, I only used a single layer of buckram for the section which wraps around the buckle. This made it far more pliable, and left enough room for the buckle to be usable - phew.

Narrow buckle, but it worked

I couldn't find any buttons I liked for the cuffs (what else is new?), so instead I went through my button box for two plain, flat buttons, mismatched but the same size. I covered them in scraps of the patterned fabric wrong (domed) side out, and sewed them on round the edges of the fabric.

Cuff 'button'

When it came to taking pictures of the finished dress, I wasn't sure what to do with my hair. Then I noticed that the lady in blue on the pattern envelope seemed to have some sort of bouffant up-do, and off I went! It came together far better than I had hoped, and was great fun. Admittedly the back didn't bear scrutiny, but for photos that didn't matter.

Posing like the pattern model

With handbag

And one more, because I was having so much fun!

I even remembered to wear one of my many brooches! Plus, a fabulous pair of earrings from Loved And Loved Again, which are a perfect match.

Jewellery

Due to the weather mostly being too hot-or-cold-or-wet to sit outside, I've never got round to putting the outdoor chairs in the yard. So for the seated shot I had to perch on the meter cupboard - oh, the glamour!

#sewnshownseated


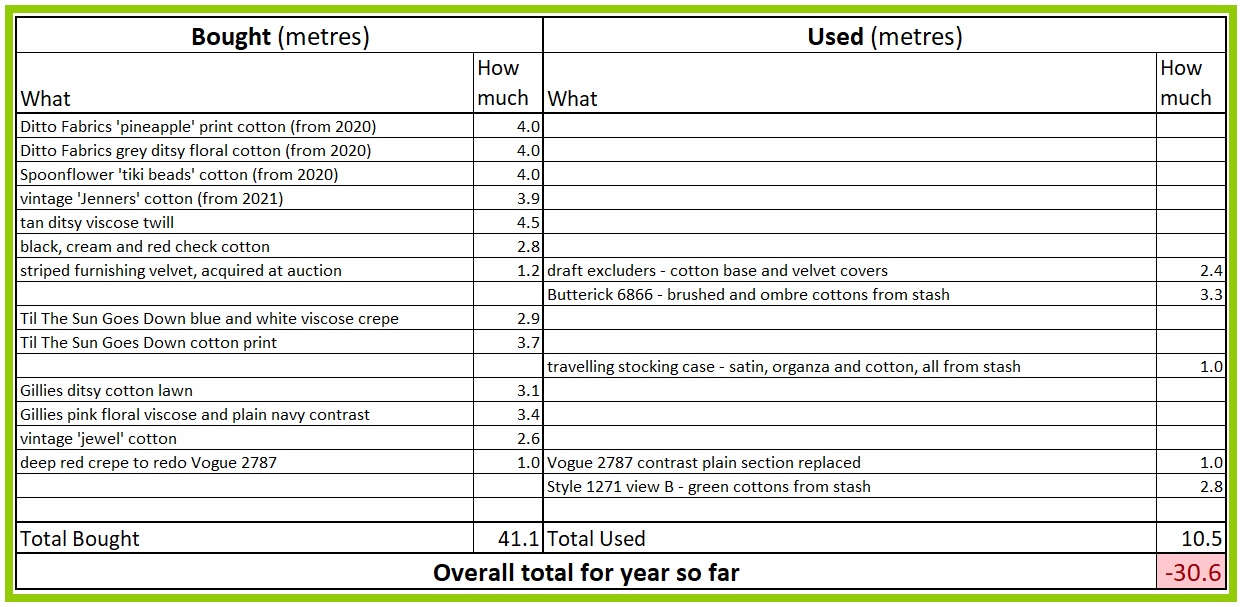
This is the first entirely new item that I've completed for months. For once, the Stashometer can be updated in the right direction.

Still a long way to go

Now I just need to create a record all the pattern alterations I made, and I'm good to go with Style Print patterns.

Sunday, 24 July 2022

Style 1271 - part one, laying foundations

There wasn't an opportunity to do a fitting session on my black dress with Mum this week, so instead I've started (yet) another unscheduled project!

New project

Back views

I want to use views A and C of this pattern with two lengths of vintage fabric which I've got. Obviously, with both of these I have limited yardage and no room for error. So my new project is to iron out any possible issues by making a wearable toile of the pattern, using some cotton print fabric which has been in my stash for ages.

The original plan was to make a very basic version of view C, with plain short sleeves and a tie belt, a quick and easy project - ha! (When will I ever learn that such a thing doesn't exist in my world?) Then I remembered that I still had some of the plain green cotton I'd used for the lining of my sewing bag and my 1950s Butterick top. It turned out to be a perfect match, so the plan was amended plan to view B, with contrast cuffs.

Such a good match

Amazingly, I found a buckle of suitable size and colour in my buckle box - well, it seemed rude not to use it. So now a proper belt has been added to the project.

And the perfect buckle, too

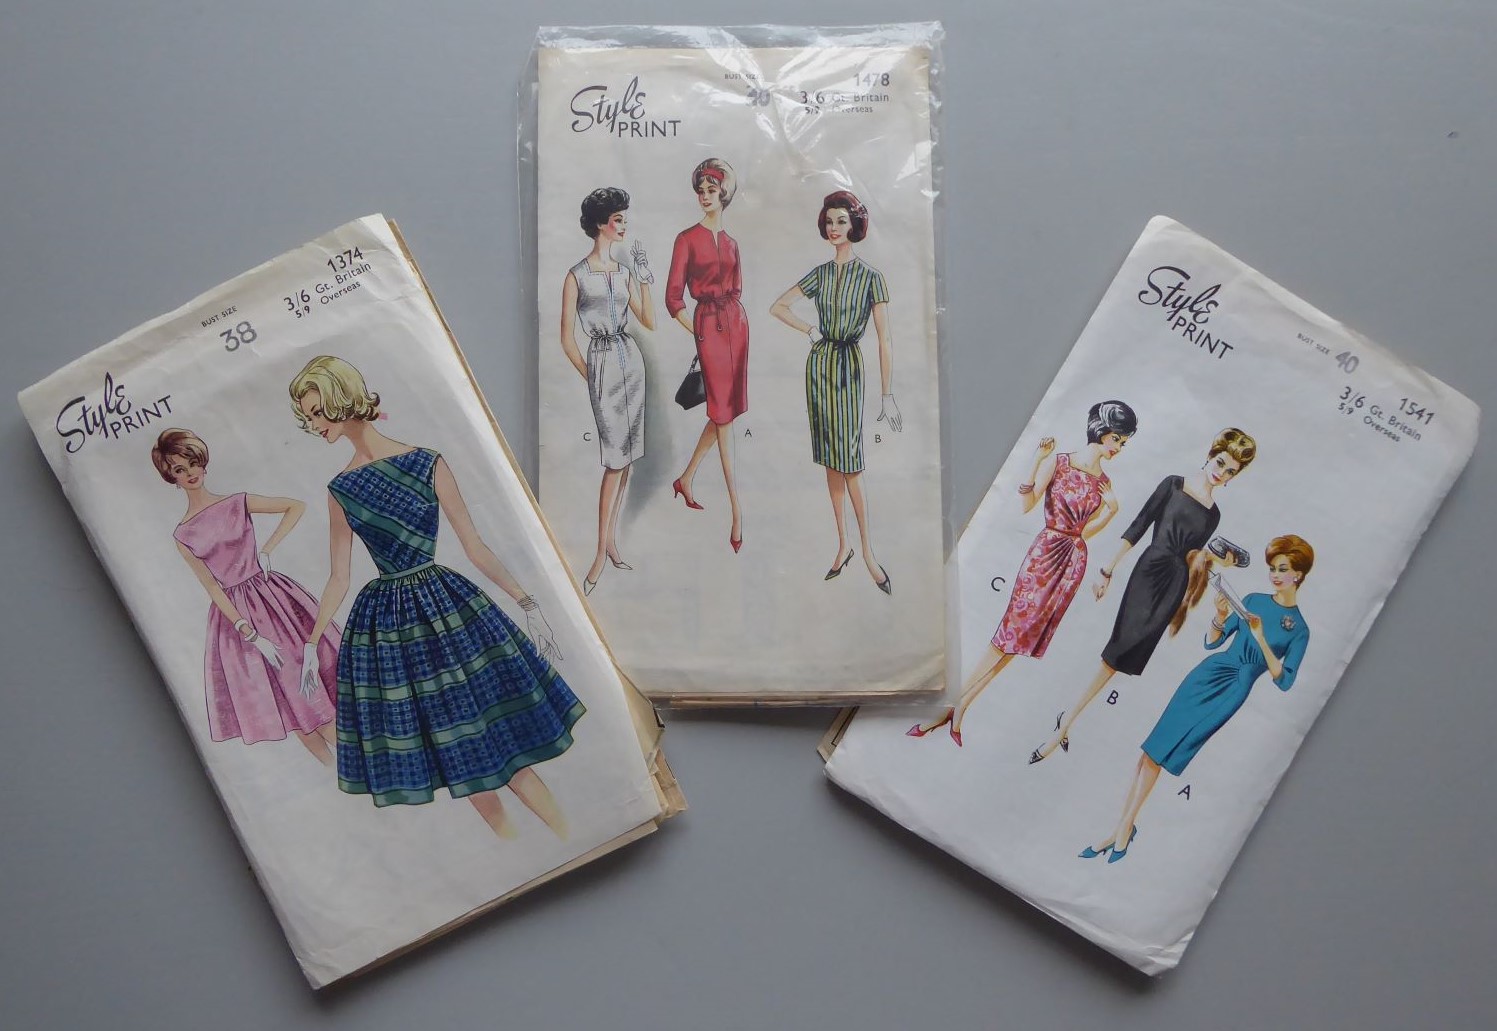
For someone who doesn't much like 1960s fashions, I seem to have quite a few late 50s/early 60s Style patterns in my collection.

Patterns I have definite plans for . . .

. . . and ones I just liked . . .

. . . and more

As I have so many 'Style Print' patterns, and as this dress is such a simple design with no complicated shapes, I decided to use it as a 'fitting shell'. Most of the big pattern brands issued fitting shell patterns; a very basic design based on the pattern sloper from which all their other patterns were derived. The idea was that a dressmaker could use this shell to identify what fitting alterations they required, and then apply these to all patterns from that brand rather than having to fit each new pattern from scratch.

Vogue fitting shell pattern

Progress has been slow, as I have to stop and check the fit after every step, but I think that the exercise will prove worthwhile. I have already established that both the shoulder width and the shoulder angle for these patterns need to be changed. In fact, the shoulder could be made slightly narrower still, but as this is just a wearable toile, I'm leaving this version as it is.

Progress so far

The cuff proved surprisingly complicated, but that's a story for another time.

Sunday, 17 July 2022

Butterick 7598 - belt and pockets

Not a lot to report this week, as progress has been very slow.

The belt was made by my usual method of buckram wrapped in cotton and then covered with the dress fabric - in this case, satin side out. I added two rows of machine sewing for a decorative effect; both because it is a very 1930s detail, and also to mimic the stitching on the trim. As ever Tilda, my trusty treadle machine, purred though all the layers effortlessly. The buckle was bought at the Festival of Vintage, specifically for this dress.

Belt buckle and stitching detail

Because the belt was made with satin fabric cut lengthways, I cut the strips for the trim the same way. There was no need for bias cutting as all the decoration is in straight lines, and I wanted to be sure that all the satin parts would look the same in any light. (This is probably being overly fussy, but that's just me!)

I decided to make the pockets first, as they involved handling shorter lengths of trim. The pockets on the inspiration dress are triangular, with none of the base fabric showing.

Inspiration dress from Carnivale Vintage

I experimented with paper cut-outs held against the skirt of the dress until I got a size and shape I was happy with, then thread-traced the pocket shapes onto a spare piece of fabric. I made both pockets simultaneously; partly because a larger piece of fabric was more stable to work on and partly so that they would look the same. I learned the hard way many years ago that if you are making two identical items one after the other using a new-to-you technique, the second one will look very noticeably better!

Partway through making

Once all the strips of trim had been sewn on, I checked if there had been any shrinkage, cut out the pocket shapes, then neatened the raw edges and turned them under. The pockets are now ready to be attached to the dress.

Pocketses!

Then it was on to the dress itself, and this is where things got tricky. I want three rows of trim across the front, sleeves and back, evenly spaced out and horizontal. But of course, the lengths of the dress bodice front and back are not the same; because the back goes straight down and the front, ahem, does not. Plus, what looks horizontal when the dress is laid flat will not necessarily look horizontal once the dress is worn. I tacked the whole dress together, and then considered how to tackle the trim.

A dress form helps, but only to a certain extent. Nancy, my main dress form, is an accurate representation of my shape, apart from around the neck. This dress is close-fitting at the neck, so it’s impossible to do it up at the back on Nancy.

Nancy - shoulders good, neck bad

My other dress form has a narrow neck, so the dress can be done up. However, the shoulders are a completely different shape from my narrow, sloping ones.

Norah - shoulders bad, neck good

Both of these issues mean that what looks right on a mannequin doesn't look right on me. I can do a certain amount of the trim positioning on myself, but not all. As ever, the solution is to take it to my Mum's for help and a second pair of hands. Unfortunately though, both our homes are in the 'red alert' area of the current heatwave, so driving between them will have to wait for a few days. Still, it's not as though I'm desperate to complete a black dress with three-quarter sleeves to wear in this weather!