Showing posts with label slow sewing. Show all posts

Sunday, 7 January 2024

Review and plans

Last week's post got taken up by my last-minute green velour dress, so here is a rather late review of 2023, with a brief look at my plans for 2024.

I didn't make a lot this year, for a variety of reasons, but I'm happy with that.

Completed 2023 projects

Looking back on my post for 2023, it's fair to say that my plan to finish my winter coat, Vogue 1266, has been a complete failure. Nothing has been done. Mainly because I bought a beautiful 1950s black coat from the wonderful FantoucheVintage, and all my winter coat needs were instantly met. In fact, I almost enjoy cold weather as an excuse to wear it! I've not got very far with my 1930s Butterick dress, either.

On a cheerier note, looking at what I did make, my version of Simplicity 4463 (top left) was a definite success and gets a lot of wear. I much prefer its flared skirt to the pleated version of its reissue, Simplicity 1777. Style 1571 in a vintage glazed cotton (top centre) has become something of a 'best' dress, as I don't want to lose the fabric finish through too much laundering. Meanwhile, Style 2911 (top right) continues my love affair with 1979 Style patterns!

My sewing triumph of the year, however, was the Peppermint Batik dress (second left, bottom). It was totally unplanned project, created from someone else's part-made skirt found in a second-hand sewing box, and a bodice made from deadstock cotton found in my local fabric shop (which never normally sells deadstock) in colours which blended perfectly with the skirt. It's super-comfortable, especially in hot weather - of which we had a lot this summer.

My non-dressmaking sewing consisted of some soft furnishings, and a new workbag.

The workbag was needed because 2023 was the year I took up knitting. Yes, I had made a couple of minor attempts before, but nothing very complicated. This time, thanks to a fantastically well-written pattern by Tasha, a whole potential world of knitwear which actually fits has opened up to me. I made a blue version first, and then a pale green version, and as a knitting newbie marvelled at the effect that different yarns can have on the same pattern.

So what are my plans for 2024 (other than actually knitting the tweaked Wondrella which I have been planning for ages)? Not a lot for the first few months, as I am doing a college course and my assignments are due this term. After that - more of the same, really. I have realised that there is no point in my planning a 'Make Nine' or similar, as my ability to go off on tangents knows no bounds. Instead, I want to continue to concentrate on slow sewing and stash reduction. I do want to finish my Riviera dress, but there is no need to tackle complex trim application until the weather gets warmer. I'm slowly documenting my stash in the 'stash shop', and have quite a lot to choose from.

The 'stash shop' so far - a couple of items have sold out

The Stashometer has been reset for 2024

On the subject of which . . .

Whoops!

I do have projects in mind for all of it, but I can see that I'll have to make sure that my new yarn stash doesn't get out of hand!

Sunday, 1 October 2023

Trim tribulations

As I hinted last week, I have decided to perk up my not-quite-right Riviera dress by adding a trim of ruched ribbon around the neckline. So I duly set off to my local fabric shop, leftover piece of dress fabric in hand, to look at the ribbons available. There were lots of them. I looked at blues, pinks, golds, and even white, but nothing was quite right. Then on a separate stand I spotted some double-faced satin ribbons, including one which was dark green on one side and pale green on the other. The darker shade was just right.

After some experimenting, I decided to position the trim ⅝" in from the neckline - which is the same measurement as the width of the ribbon. I ran a line of basting stitches round the neckline to mark the position.

Trim position marked with orange thread

Then I ran tiny gathering stitches along each edge of the ribbon, pulled them up, and started sewing the trim onto the dress by oversewing the edges in place. I had to keep alternating between the top and bottom edges.

Even this much took some time

It quickly became obvious that this is going to be a long job. It's very tricky to keep the gathers even on the straight section, and round the curves will be even harder. Right now, I don't want to devote a lot of time to something which I won't wear for months. So, the dress is now on a hanger in my workroom, to be picked up whenever I feel like tackling a bit more.

Then I went back to another part-done project which has also been on a hanger for ages, Butterick 7598. The next job on this was to work out where the two lower bands of sleeve trim should go. This involved pinning them in place with an educated guess, trying the dress on, marking with pins where changes were needed, re-pinning the trim, trying the dress on again, basting the trim down once I was happy, trying the dress on again, more marking pins, unpicking some of the basting, redoing it, trying the dress on yet again - and all the while forgetting to take any photos!

Sleeve trim basted on - finally

Once I was satisfied that the trim was in the right place, I could undo the basting that holds the dress together. It's interesting to see that what look like parallel trim bands when the dress is worn are actually far from parallel on the flat sleeve pieces. The next job is to tidy up the rather wonky basting, and then machine the trim in place.

The bands are further apart at the back

It’s just as well that I am fully committed to slow sewing!

Sunday, 1 January 2023

2022 review

Happy 2023! The start of a new year can mean only one thing in blogland, namely a review of the year just gone.

In terms of numbers, it's been a very poor year. There are just nine sewn projects to report on, and precisely none of them were in my MakeNine plans for 2022.

2022's output

I made three dresses - Butterick 6866, Style 1271, and New Look 6594. I also completed a remodel of my third version of Vogue 2787. And I managed to finish my 1970s blouse, Vogue 8388, just in time to be included in the round-up. I'll blog about it next week.

Most of my other sewing was practical. I made draft excluders (stoppers) from stash fabric and a huge bag of scraps cut up for stuffing. A stocking case for when I'm travelling has been on my to-do list for some time, and finally happened. And once I realised that my recycled plastic cable tote bag, while pretty, was of limited use as it was, I set about improving it.

On the subject of bags, I learned a lot about bagmaking (strictly speaking, made up a lot about bagmaking) in the process of creating my sunray clutch bag, and love the end result.

So little sewing, combined with multiple fabric purchases, has had a dire effect on the stashometer. This is, by a long way, the worst it's ever been. Even if I hadn't included fabrics carried over from previous years, it would be very poor. Clearly I need to stay away from fabric retailers, however tempting they may be.

The Stashometer of shame

The state of the 'used' column isn't helped by the number of PHDs (Projects Half-Done) in my workroom. I have yet to pick up work on my winter coat again, largely because I'm not happy with the collar but can't work out a way to fix it. My second version of Style 1271, made from the 1960s 'jewel' cotton I bought at the Festival of Vintage, is cut out but not started. And my 1930s Butterick dress has stalled because trying to sew black trim onto a black dress in poor winter light is a migraine waiting to happen.

Despite all this, while the number of items completed is small compared to some previous years, I'm very happy with what they represent in terms of where I'm going with my sewing. I have more than enough clothing to meet my practical needs. I sew because I love the acts of sewing and creating, and it's good for my mental health, so I have no intention of stopping. But I do want to make sure that I'm not just sewing for the sake of sewing, and most of what I’ve completed this year reflects that.

The draft excluders have proved very effective at keeping my living room cosy - particularly helpful as energy prices soar. The stocking case has become my main storage for my most worn colours of stocking. And adding a pocketed lining to my tote bag has made it vastly more useable.

Most of my dressmaking this year has involved regrading and/or fairly extensive alterations to patterns. All of which makes the process slower (good), adds to my drafting skills, and so contributes to my new goals. But the dressmaking project which I'm most proud of is remaking Vogue 2787. The dark red contrast section looks so much better than the blue which was there before, and the dress has become a firm favourite. Every time I wear it, knowing that I put in the effort to rescue it makes me happy.

I've finally come to accept my "Squirrel!" tendencies, and realise that there’s little point in setting out to make specific items in a year. So instead, I'm carrying over my goals from 2022. I really do want to complete the coat somehow, but otherwise I'm planning to concentrate on things which give me my dressmaking 'fix', but slowly.

2023 goals

Sunday, 6 November 2022

Invisible progress, and sleeve experiments

Even though I've had quite a lot of sewing time this week, anyone expecting photos showing a radically different dress is going to be very disappointed. Most of that time has been spent replacing tacked-on trim with properly sewn-on trim. It was only once I had completed the machine sewing that I remembered that the edges all had to be hand sewn down, as I did with the pockets. This was done from the wrong side, and took some time as I had to constantly check that the stitches weren't visible on the right side.

Once all the trim was on, I could finish sewing the back facing in place.

This just needs buttons and loops now

The next job was working out how to attach the 'trim' (actually 19mm / ¾" straight grain strips of the dress fabric, satin side out, with the raw edges pressed under) in a more-or-less horizontal manner round a darted sleeve head. I decided that the only way to do this would be to use a shaped piece instead.

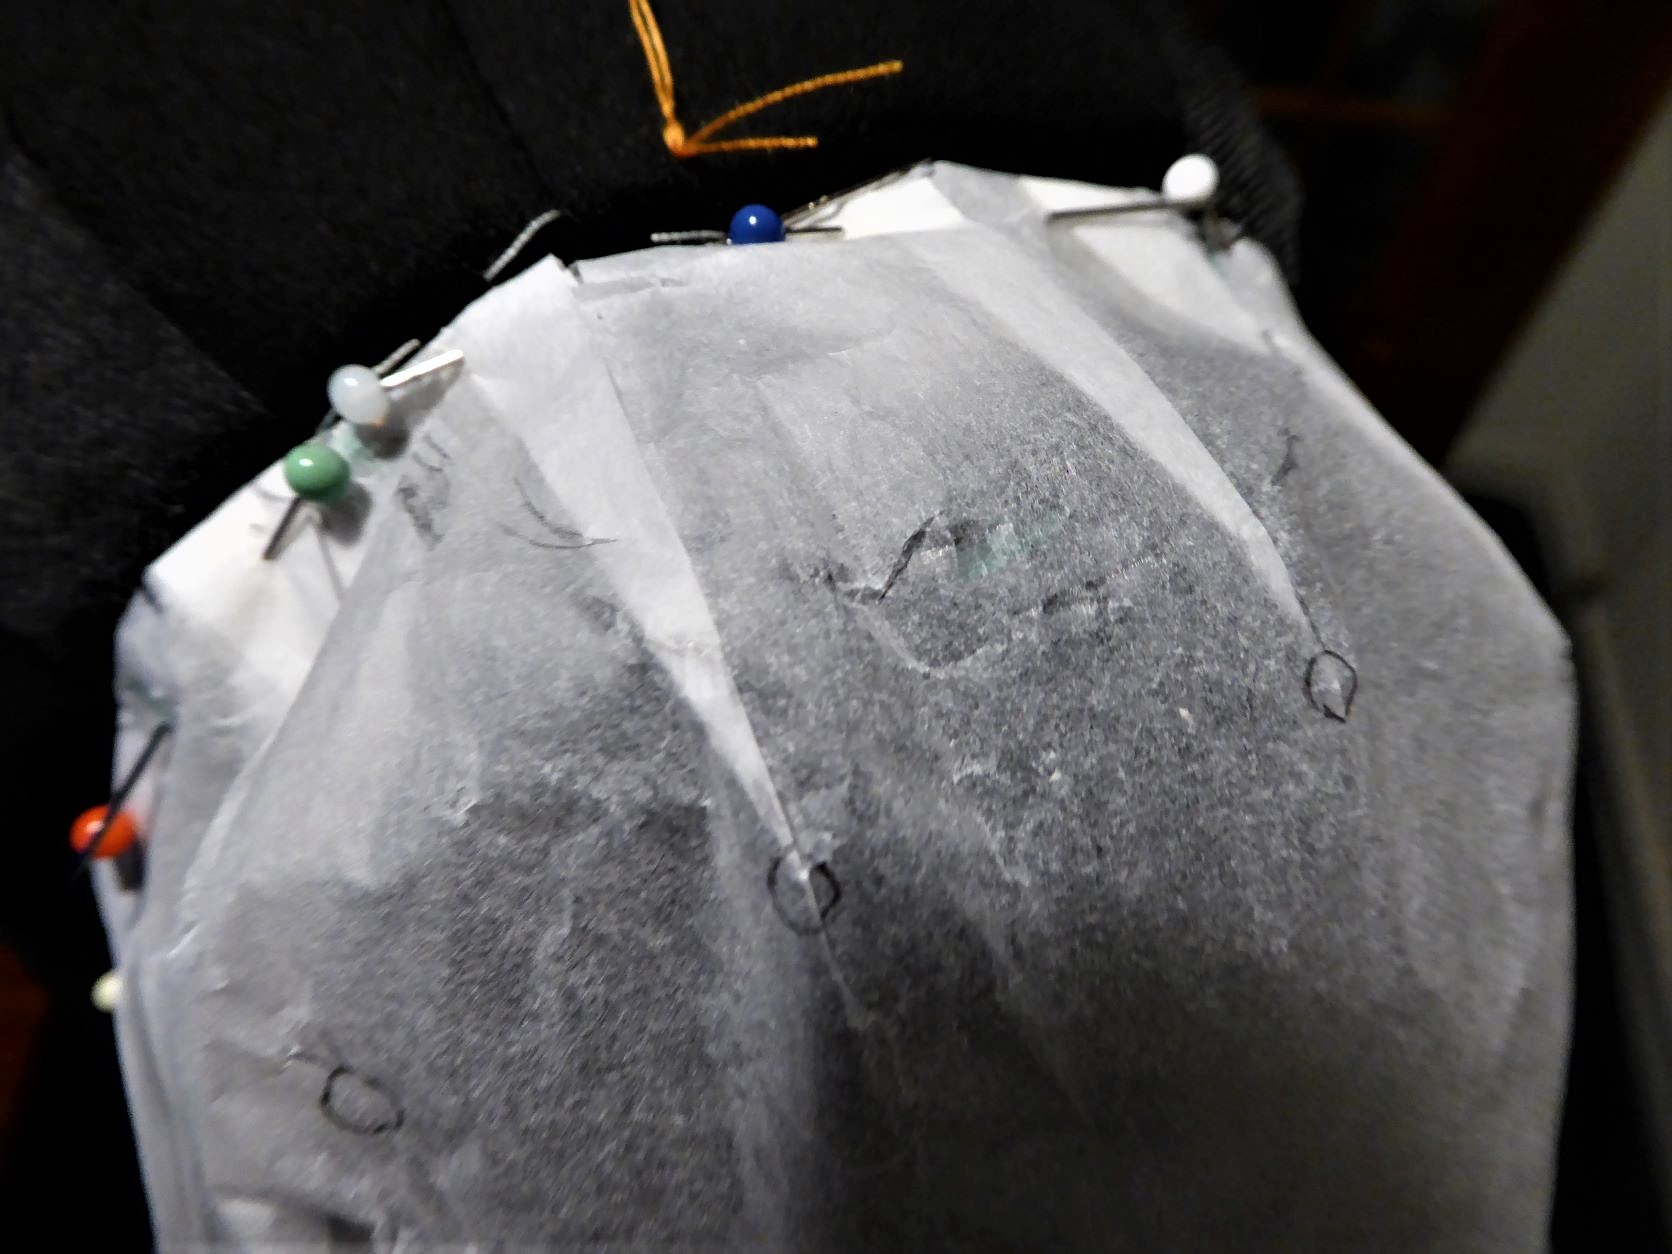
To work out the shape, I first cut a sleeve head out of tissue paper, taped the darts closed, and pinned it to the armscye.

Tissue sleeve in place

Then, I marked roughly where the top of the trim should be.

The marks are just visible

I removed my tissue sleeve, snipped open the darts, and laid it flat.

The darts created a slightly jagged line

I traced all this onto a second piece of tissue, so that I still had the original if I needed to make any changes. By this time the markings were getting quite busy, so I drew the darts in blue to identify them. I folded the darts on version two, smoothed out the upper curve, and added a second curve 19mm below.

It looks even more odd with both lines complete

Then I taped the darts closed, and cut along the curves.

I have a pattern!

I basted the sleeves back into the dress, and pinned the tissue pattern on. I think it works reasonably well. (Apologies for the very blurry image. I couldn't take a close-up in the mirror without blocking out the light, so I had to stand some distance away and enlarge the relevant part of the photo.)

Not bad

I had made some stiffeners to go inside the sleeve heads, just pointed ovals of silk organza folded in half and overlocked.

Sleeve stiffener

I’m not sure if I will actually need them, or if the applied 'trim' shape will fill out the sleeve enough on its own. Clearly more experimentation is needed. This is what slow sewing looks like!

Sunday, 30 October 2022

It’s been a while

I've picked up Butterick 7598 again, after a long break. Far longer than intended: I got stuck on the trim placement, then the height of (a very hot) summer didn't seem like the time to be working on a black dress, then the longer I left it the more daunting the trim issue became.

I finally decided that I needed to at least have a go, and guess what? Once I actually started, it didn't seem that bad after all! If anything, taking such an extensive break has helped - it allowed me to look at the project with fresh eyes.

This is the state in which the dress has been languishing on a hanger since July.

It had practically become part of the furniture

I tried it on, and discovered that the trim on the front only needed minor adjustments to make it look level. I also discovered that the shoulder seam is actually slightly back from the shoulder. This went a long way to explaining why positioning the front and back trims an equal distance from the shoulder seam had produced such a messy effect!

Once I had marked the true shoulder position and pinned the front trim in place properly, I was able to put the dress back on the dressform, and get to work on the back. I only pinned trim onto one side of the back, I can measure it to do the other side.

Back trim

I did, however, go to great lengths to make sure that the back and front trims were level. Years ago, I got a tiny spirit level keyring in a Christmas cracker, and put it in my workbox on the basis that it might come in handy sometime. And finally, it did!

Obsessive? Me?!

Next, I completed basting the front and back trim into place.

All tacked on

It was impossible to pin the trim onto the sleeves while they were part of the dress (and shaping the top row round the sleeve head is going to be very tricky indeed), so instead I just thread marked where it should be at the sleeve seam.

Orange threads mark where the trim should go

Once all this was done, I could unpick the basting which has held the dress together for over three months. I was very grateful that I'd thought to use different coloured threads for the seam allowance markings and the actual seams - it made unpicking much easier!

The next jobs are to make some more trim strips, and then to sew the trim to the bodice front and back. Hopefully without the project stalling again.

Sunday, 17 July 2022

Butterick 7598 - belt and pockets

Not a lot to report this week, as progress has been very slow.

The belt was made by my usual method of buckram wrapped in cotton and then covered with the dress fabric - in this case, satin side out. I added two rows of machine sewing for a decorative effect; both because it is a very 1930s detail, and also to mimic the stitching on the trim. As ever Tilda, my trusty treadle machine, purred though all the layers effortlessly. The buckle was bought at the Festival of Vintage, specifically for this dress.

Belt buckle and stitching detail

Because the belt was made with satin fabric cut lengthways, I cut the strips for the trim the same way. There was no need for bias cutting as all the decoration is in straight lines, and I wanted to be sure that all the satin parts would look the same in any light. (This is probably being overly fussy, but that's just me!)

I decided to make the pockets first, as they involved handling shorter lengths of trim. The pockets on the inspiration dress are triangular, with none of the base fabric showing.

Inspiration dress from Carnivale Vintage

I experimented with paper cut-outs held against the skirt of the dress until I got a size and shape I was happy with, then thread-traced the pocket shapes onto a spare piece of fabric. I made both pockets simultaneously; partly because a larger piece of fabric was more stable to work on and partly so that they would look the same. I learned the hard way many years ago that if you are making two identical items one after the other using a new-to-you technique, the second one will look very noticeably better!

Partway through making

Once all the strips of trim had been sewn on, I checked if there had been any shrinkage, cut out the pocket shapes, then neatened the raw edges and turned them under. The pockets are now ready to be attached to the dress.

Pocketses!

Then it was on to the dress itself, and this is where things got tricky. I want three rows of trim across the front, sleeves and back, evenly spaced out and horizontal. But of course, the lengths of the dress bodice front and back are not the same; because the back goes straight down and the front, ahem, does not. Plus, what looks horizontal when the dress is laid flat will not necessarily look horizontal once the dress is worn. I tacked the whole dress together, and then considered how to tackle the trim.

A dress form helps, but only to a certain extent. Nancy, my main dress form, is an accurate representation of my shape, apart from around the neck. This dress is close-fitting at the neck, so it’s impossible to do it up at the back on Nancy.

Nancy - shoulders good, neck bad

My other dress form has a narrow neck, so the dress can be done up. However, the shoulders are a completely different shape from my narrow, sloping ones.

Norah - shoulders bad, neck good

Both of these issues mean that what looks right on a mannequin doesn't look right on me. I can do a certain amount of the trim positioning on myself, but not all. As ever, the solution is to take it to my Mum's for help and a second pair of hands. Unfortunately though, both our homes are in the 'red alert' area of the current heatwave, so driving between them will have to wait for a few days. Still, it's not as though I'm desperate to complete a black dress with three-quarter sleeves to wear in this weather!

Sunday, 26 June 2022

Butterick 7598-ish

I've reached the stage in this project where I'm no longer working from the pattern but making it up as I go along* and, as a consequence, progress has been slow.

After some thought, I decided to redraft the back with a centre back seam. The back could have had a slashed opening, like Simplicity 4463, but the trim treatment that I want to add to the dress would work better with a proper seam. Somehow, I forgot to take the back opening into account when I cut out the back facings and had to redo them, but at least I realised before I had sewn the facings together.

Duh! Original and correct facings

My plan for the trim is inspired by this dress from Carnivale Vintage in Edinburgh. It was posted on their Instagram account ages ago, and I loved it. Unfortunately, as well as the usual problem that ready-to-wear bodices are too long for me, there was also the minor issue that it was a size 8 and I, categorically, am not! As usual when I spot something I like, I had kept all the images in my (now rather full) inspiration/ideas folder for reference.

1930s dress, front and back, images from Carnivale Vintage

Because I wanted to recreate this trimming method, I chose a crepe-back satin for the dress. The dress itself is made crepe side out, the trim will be made satin side out. This saves the hassle of trying to find one matte and one shiny fabric in the same shade of black, which is harder than you might think.

I experimented with laying tape across the toile, and marked the rough centre positions with a Frixion pen. Unfortunately, it's not just a case of extending these marked points across the pattern pieces. I know from this dress that working out pleasing lines on a three-dimensional body can only be done when wearing the dress.

Rough positions marked on the toile

This gives me a chicken-and-egg problem. I can only position the trim, and match it across front, sleeves and back, when I have a complete dress. However, I can only sew the seams to complete the dress once the trim is in position! My plan is to sew the shoulder seams and partially attach the facing, then baste the other seams. By a combination of putting the dress on Nancy and wearing it myself, I can (hopefully) position and pin the trim.

This is going to involve lots of handling and taking on and off a dress made from a fabric which frays quite easily. I may even need to overlock all the raw edges it gets too bad. Therefore I decided to thread trace the seam allowances on the bodice and sleeve pieces before I start, so that I don't lose track of where the seams should be. I did this by marking the seam lines in chalk, and then going over them with tacking thread. I'll baste the dress together with a different colour of thread, so that I know what I'm unpicking if/when I need to do so.

Thread tracing on a sleeve

The trim on the Carnivale dress looks like some sort of braid, sewn on in rows of three.

Close up of the trim, image from Carnivale Vintage

For the sake of my sanity, I am planning to use a single wide strip of satin with the raw edges turned under, and machined twice to roughly replicate the three rows. I have made a sample piece from scraps, following the pocket treatment of multiple rows close together, and I'm happy with it.

Trim sample, I may need to sew down the edges

I will need to be very careful to keep the rows of stitching straight and evenly spaced - thank goodness for the speed contol of a non-electric machine. I'm planning to do the pockets and belt first, as they should be simpler, and then move onto the bodice. Partly to get some practice, and partly to put off the tricky bit!


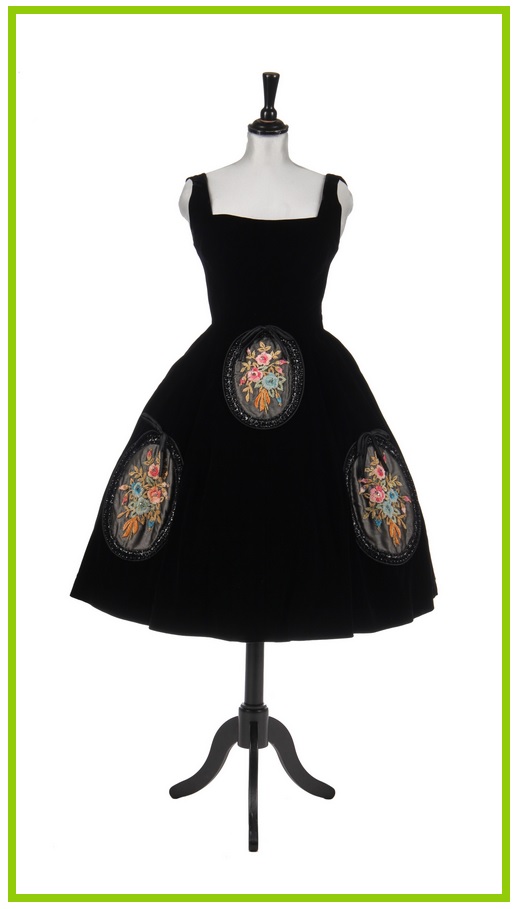
* - As an aside, this dress was in the 'Passion for Fashion' auction held by Kerry Taylor Auctions this week. Although it has no label, it was thought to be by Pierre Balmain, circa 1955. There were lots of interior shots in the online catalogue, and I was delighted to discover that most of my guesswork on the construction of my Holly Dress had actually been correct. My current project is really making me wonder if I've bitten off more than I can chew, so this was a welcome confidence boost.

Image © Kerry Taylor Auctions

(And no, I'm not thinking about recreating this. Not even a tiny bit. OK, so I may have saved all the images and details but oh no, definitely not....)