Showing posts with label accessories. Show all posts

Sunday, 4 December 2022

The lampshade bag - part 1, the design

Yes, it's happened again.

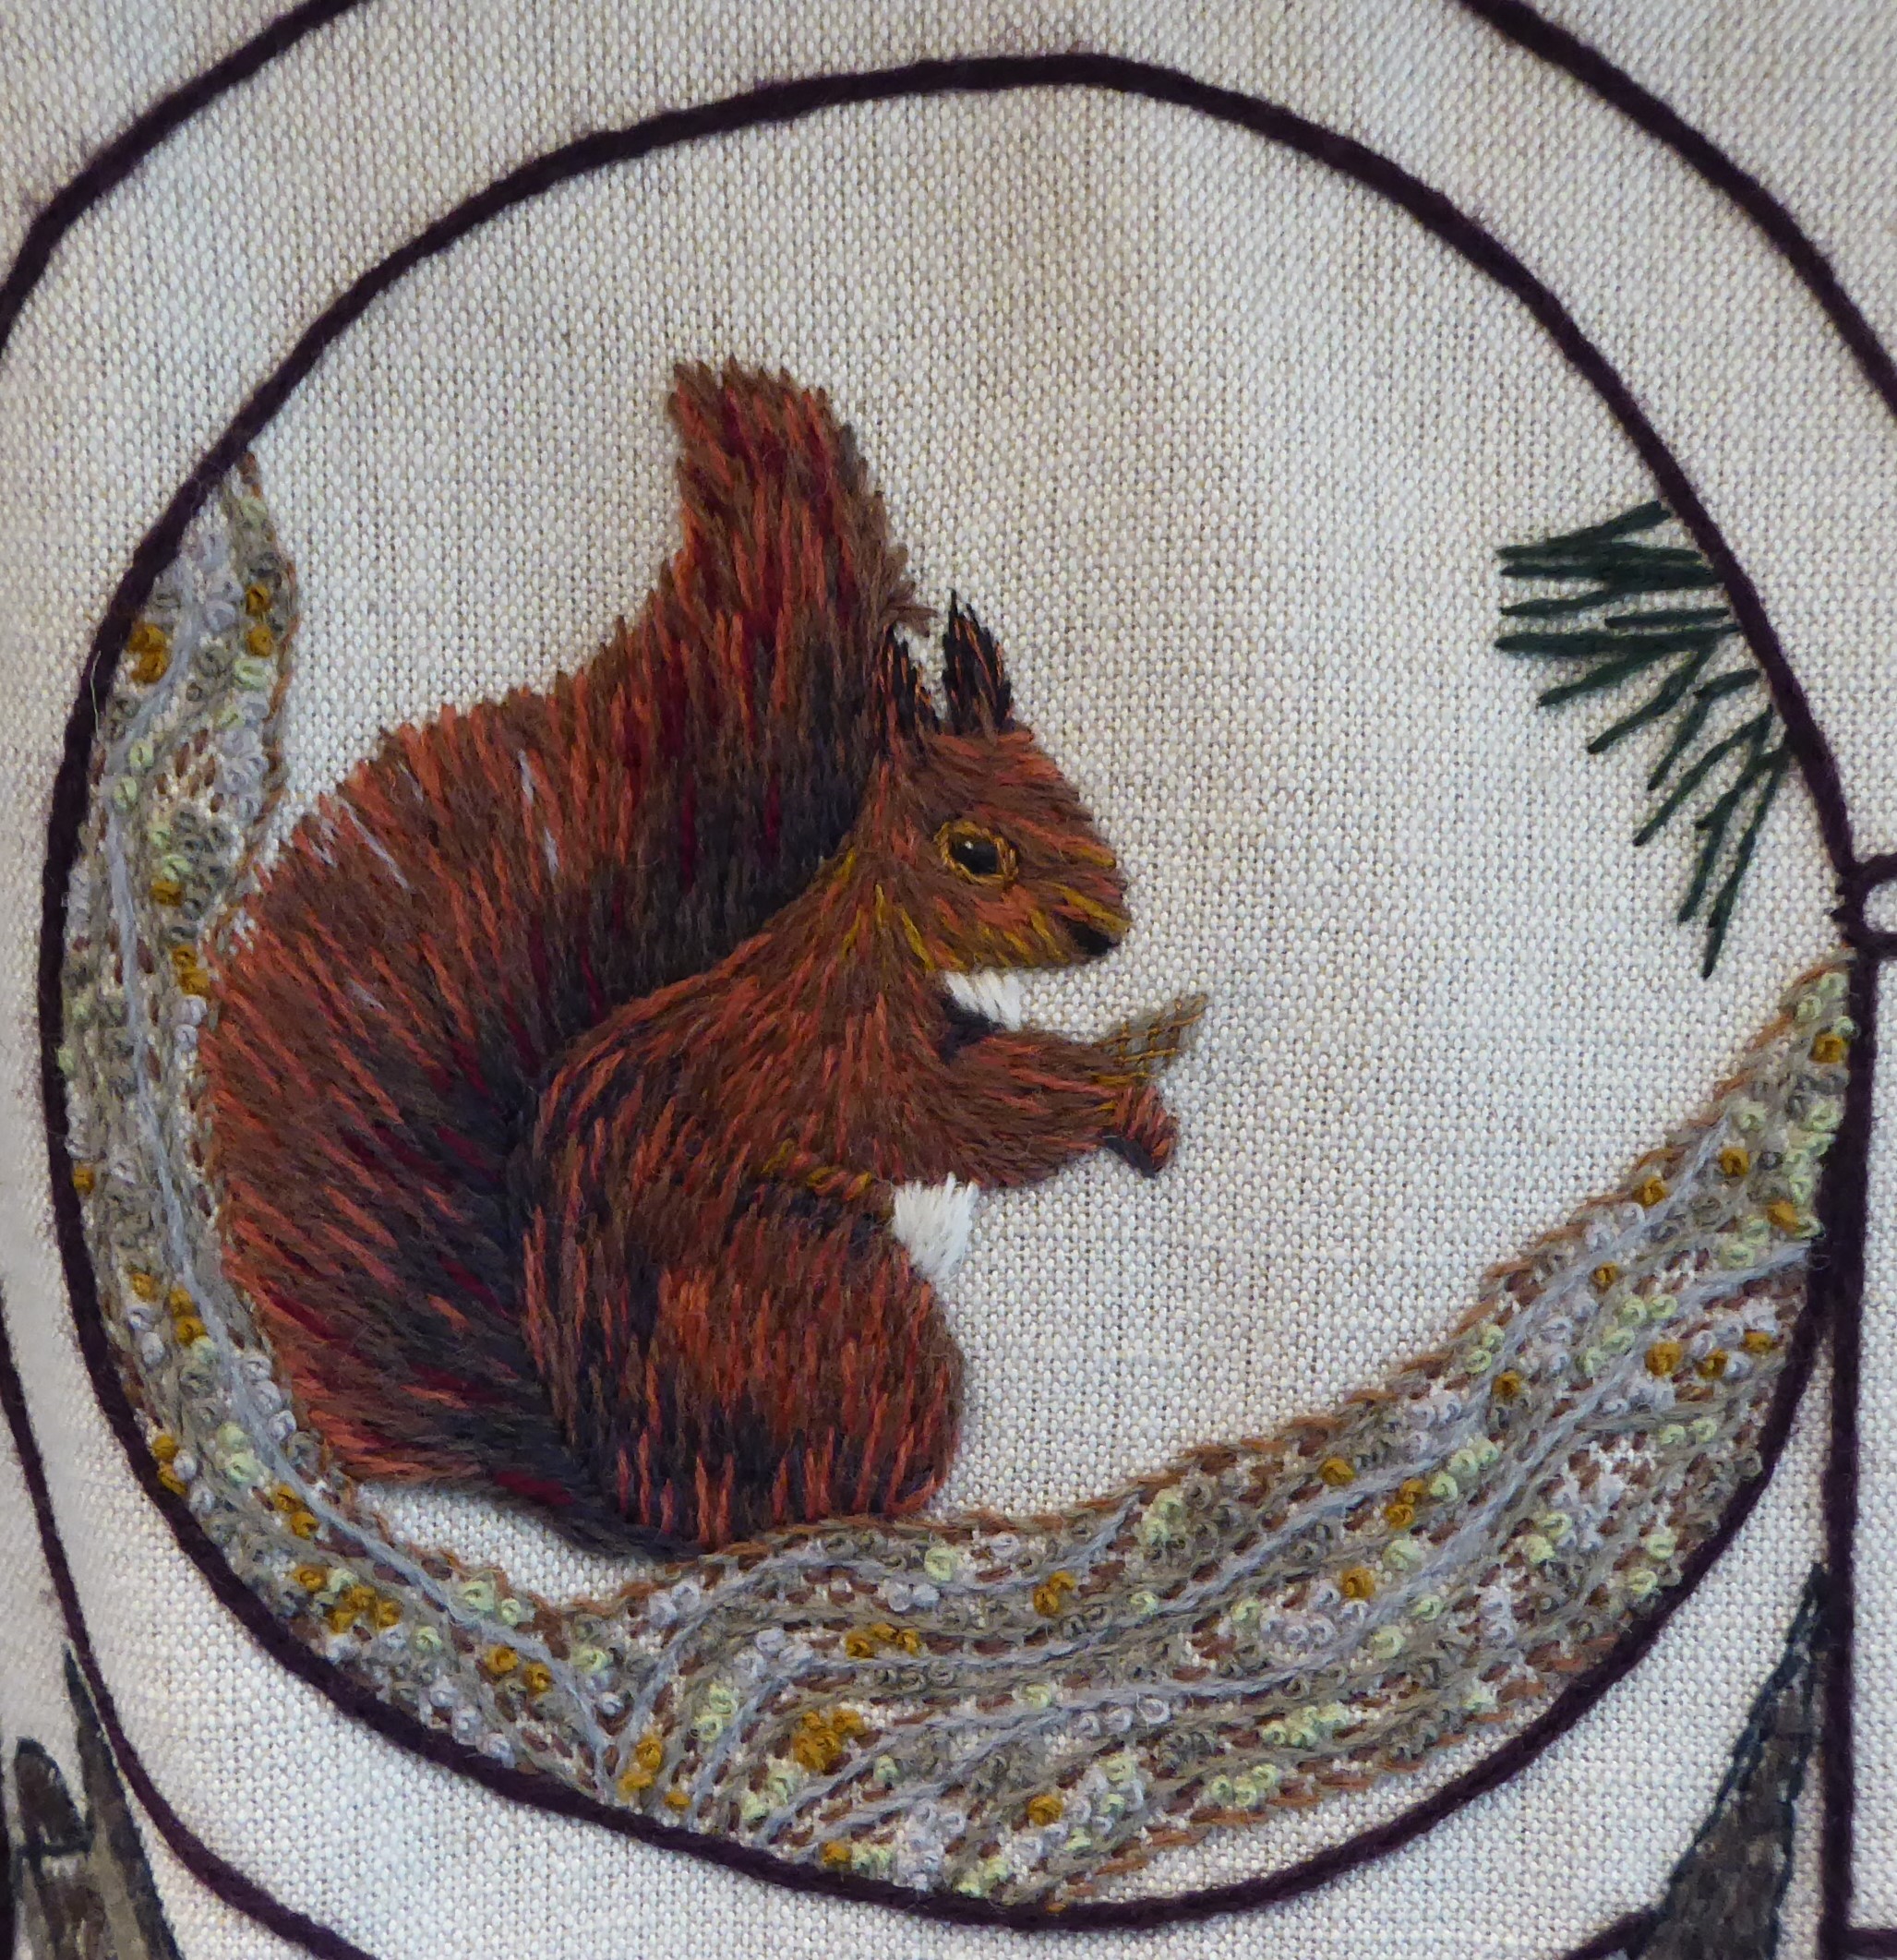
Detail from the Great Tapestry of Scotland

For once, there is actually some justification for an entirely new project, other than my usual, "I just fancy doing it". I'm going to a fancy dinner in a couple of weeks - so fancy that the dress code is 'black tie'. Ooh er.

Reader, I do not inhabit that sort of world. This will be, at most, the second black tie event I have attended in my entire life. (I was a friend's 'plus one' at a formal dinner when we were students, but that was so long ago that I can't now remember just how formal said dinner was.) A quick google has revealed that for women, 'black tie' equates to 'long dress'. I don't possess any modern long dresses and, given that on current form I won't need one again for another 35 years, I don't intend to make one. So instead, I'm going to wear the one long dress I do have, my faux-Fortuny Delphos.

The one problem with this plan is that I don't have a suitable evening bag. My sunray bag is completely wrong and my wedding bag, while definitely a good match for the dress, is just too small - it dates, obviously, from a time when I could rely on Mr Tulip taking care of paraphenalia. So a new, appropriate, bag is needed.

Because I possess a brain which carefully stores useless information while gleefully discarding why-I-went-upstairs in the time it takes me to get upstairs, I remembered that as well as clothes and textiles, Mariano Fortuny also designed light fittings. This seemed like a good starting point for a possible bag design. If I had the time, I would love to make something based on this shape.

Silk Fortuny lamps on sale in Venice

But I don't, so instead I'm using these as my inspiration.

More Fortuny lamps - painted silk and wooden frames

As ever, I began by considering what I would have in the bag - glasses, phone, keys etc. I had this small carboard box to hand, and discovered that it was just the right size to hold everything.

My starting point

Using the dimensions of the diamond I'd drawn on the box, I tried to sketch out the overall design.

Attempting the design in two dimensions (and failing)

I realised however that this would simply replicate the box shape, which wasn't what I wanted. It was only when I drew the base onto the box that I could see what I needed to change.

The corners need to be 'cut off'

I really struggle to visualise size and capacity, so the only thing to do was make a mock-up, as I would with dressmaking. I rescued an old cereal packet from the recycling drawer, and set to work on my 'toile'.

Showing the lower part of the structure from two different angles

I added further large triangles at the top to complete the bag shape, and then smaller ones to make the 'lid'.

The completed 'bag'

The basic structure will be made from the same very sturdy pelmet interfacing as I used for the sunray bag. The next step is to cut out the pieces, and cover them with plain cotton. I can then start thinking about the outer layer.

Sunday, 9 October 2022

The sunray bag - part 3, completed

My sunray clutch bag is complete at last.

Having made the bag lining and the semi-rigid bag former, the next job was to make up the outer. The bag front and back were joined together with a base strip of the patterned cotton. However, the lowest sun 'ray' had been designed to overlap the base a little, so that the orange continued right to the edge. Then one side of the bag, made from a strip of the plain orange cotton, was sewn in place. (All of the sewing for this week's post was done by hand, and I now have the slightly throbbing fingertips to prove it!)

Showing the base, and the orange side

Once the orange side was sewn in, the bag outer was arranged over the bag former, to see how well it fitted. The other side, made from the print fabric, had to be attached further out than I had expected. Fortunately I had left very generous seam allowances everywhere, just in case.

The yellow thread basting shows the original expected sewing line

The print side was completely sewn to the bag front, but only to the lower half of the bag back - this was so that the former could be slipped into position.

Attaching the print side

To hold everything in place, the seam allowances were stitched onto the cotton layer of the former. Adding the cotton turned out to have been an inspired move - not bad for someone who was making it up as she went along!

Interior shot showing the seam allowances whipped in place

I stitched the upper side edge of the bag back to the former, and then joined the side to the back using ladder stitch. Next, I folded over the top edges of the bag and sewed them to the former. Finally, I turned under the upper edge of the lining, and sewed that onto the outer with tiny overcast stitches.

Top view, closed and open

And here is the completed bag, front and back.

Front view

The back, with the design machine-sewn on

I'm pretty happy with the way it turned out, and I learned a lot in the process of making it. So I'm counting it as a win for both the 'details' and the 'self-drafted' goals that I set myself mid-year. Oh, and it used up some stash fabric as well.

I seem to be using stash rather than the listed fabrics

Sunday, 2 October 2022

The sunray bag - part 2, the structure

I'm back from my Scottish jaunt, and working on my sunray clutch bag again.

Having made the front and back panels, I then set about the element which will give the whole bag its shape. I want the front and back to be rigid, and also the base and the lower section of the sides - marked in red on the drawing below. The upper part of the sides, marked in blue, will just consist of the outer and lining fabric layers, to allow the bag to taper towards the zip at the top.

The bag design

After a browse round my local fabric shop, I settled on a pelmet stiffener which is sticky on both sides, with the glue covered with peel-off paper. I thought that this would be easier to use than iron-on buckram, which has glue on both sides activated by heat, as I could work on one side at a time.

First, I drew out the shape on the stiffener. It wasn't quite wide enough, so I had to add sections for the sides. Then, to made it easier to work with and to provide a way of joining it all together, I glued plain white cotton onto both sides.

I covered the inside first. I folded the stiffener to shape, and scored along the fold lines so that I could remove the paper one section at a time. I started with the base, then did the other four sections.

The inner cotton layer, from the outside . . .

. . . and from the inside

Next, I covered the outside, making sure that the cotton was arranged to go over the folds smoothly.

The outer layer, with excess allowed at the base folds

I used a rotary cutter to remove the excess fabric, except at the four corners. These I sewed up, to create the bag shape.

Starting to look slightly bag-shaped

Then I trimmed off the excess.

The seams trimmed down

The lining was made up with fabric panels up the sides, and two panels holding the zip were sewn along the top. To make sure that it stays in place, I secured it to the corners of the base and the top of the side panels of the stiffener (hence the blue threads in the photo above).

The lining, showing the zip

The lining, showing the side panels

I was concerned about the bulk of the seam allowances of the stiffened shape, so I stitched them down to the cotton layer. Even though it is glued in place, there was just enough give to pick up a few threads to sew into.

Seam allowances sewn down

Next, constructing the outer bag and bringing it all together!

Sunday, 18 September 2022

Mystery project

As in, it's a mystery to me, too! Usually when I make something, either I'm using a pattern or I've worked out all the details before I start - sketches, dimensions, notes etc. This time, it's very much making it up as I go along.

I've wanted to make a 1930s-themed clutch bag to use with my dress version of Vogue 2859 for some time. To me, few things sum up that decade like the sunburst design.

Pye radio, 1931 (image © Victorian and Albert Museum, London)

Browsing through images of 1930s bags online I came across this, and thought that the shape would work well with the sunburst motif. I experimented with variations on size and proportions until I came up with a pleasing shape which could hold everything I need to put in an evening bag.

1930s clutch bag, image found on Google

For once, I knew that I had the perfect fabrics in my stash. Years ago I bought a fat quarter of a quilting cotton with an orange branch print, for no reason other than I liked the design. I’d also bought a plain orange fat quarter to go with it. It’s not a 1930s print, but the colours are ideal for this project, and go well with the dress. Also in the stash I found a length of plain teal cotton (no idea where it came from!) which works wonderfully for the lining.

I drew the design onto a stashed piece of cream cotton, and thread-basted over the lines. Then I basted this onto a piece of the print fabric.

The bag outline and rays thread-basted in reverse

The rays were cut out from the plain orange with generous seam allowances, machined onto the print along one edge, then flipped into place and pressed. The excess fabric was trimmed off the seam.

Sewing on the rays

Then the other edge was folder under and pressed, and the excess trimmed off. This edge was hand sewn.

The rays completed

The back of the bag will just consist of the print fabric backed with the cream. However to hold the layers together, and to echo the design on the front, I machined them together using a mirror image of the sunray design.

The inside of the back, showing the complete design

It's barely visible on the right side, but holds everything together

Sewing the sunrays required more precision than I can manage on the treadle machine, so instead I used Maud, my 1917 hand-crank. Yesterday was a lovely sunny day, and as we will soon reach the time of year where the sun isn't high enough to come over the neighbouring house, I took advantage of my 'portable' machine (I use the word loosely!) to work where I could enjoy the direct sunlight.

Sewing in the sun

Once the outer parts were done, it was on to the lining. It consists of two layers of the teal cotton: one full size and one smaller, to create pockets.

The completed lining

As is obvious from the lining shape, the bag in going to have a flat base, and side panels. It is also going to have a zip along the top. I have several books which include instructions for making bags, but all of them are flat 'envelope' styes with just a front and a back. They also all have front flaps, which wouldn't really work with the sunray design I wanted. Hence the 'mystery project' title - I have most of the individual elements, but I now need to consider how I'm going to put them together. Gulp.

Sunday, 4 September 2022

More practical sewing

Vintage handbags. They're lovely, but they do tend to be small. It's hardly surprising. At that time few people, and certainly few women, would have had car keys. Purses only contained money, not a raft of plastic cards as well. And no-one carried a phone around with them!

If I'm using a vintage handbag, I usually end up with some sort of 'overflow bag' as well, such as this one from Moo and Boom. It's made from recycled plastics, and I love it, but there's no denying that small items tend to sink into the depths, never to be seen again. Also, I used it in the recent heatwave, and discovered that the woven handles were quite scratchy on my bare arms.

'Before' shot

The solution? Line it, and add pockets. (Actually, 'add pockets' is the solution to many dilemmas in my world!)

I found some plain cotton in my stash, slightly thicker than craft cotton and a good match for the grey in the bag, cut out a piece for the lining, and then ironed in creases where the 'corners' of the bag would be. This provided a background for deciding on pocket numbers and dimensions. After trying various ideas, I went for long pockets at each end for glasses and sunglasses, a single large pocket on one side, and four smaller ones for odds and ends on the other. These were all made up and attached while the fabric was flat.

Pockets, part one . . .

. . . and part two

The straps for the handles were narrow strips of cloth with the raw edges pressed in to the centre, like bias binding, but cut on the straight grain. There was also a strip of fabric sewn round the top of the lining, like a facing, to provide some stability and enclose the strap ends.

When it came to sewing the lining into the bag, of course I couldn't use pins to hold the two layers together. Instead, I used clothes pegs, and they worked very well.

Sewing in the pegged-on lining

And here is the finished, upgraded, bag. It turned out exactly as I had hoped, and I'm very pleased with the end result. Not the most exciting or glamorous project, but the sort of useful and satisfying fix which sewists have at their disposal.

Completed bag, with lined handles

Pocketses!

And another half meter added to the Stashometer - at this stage in the year every win, no matter how tiny, helps!

Ending the year in credit is looking very unlikely!

Sunday, 27 June 2021

Swings and roundabouts

I was originally going to call this post "Triumph and disaster", but that did seem slightly overdramatic!

The tie-on pockets are completed; all I had to do was finish off the binding and then add the waist tie. This was simply a long piece of white cotton tape, folded in half lengthways and sewn together. The pockets were attached within the fold, which covered the raw edges at the top. I'm really pleased with the end result, and have used them several times already.

Front view of the pockets

And the back view, with a 'secret bird'

So that was the triumph, what about the disaster? Well, during the week I went to launder my favourite dress - and discovered that it had actually worn into holes in a couple of places! It's the dress on which I had replaced the zip last year, and it's had a lot of use in the six years since I made it, but I was still really sad to lose it.

Noooooooo!

I had actually managed to start a new project, trying to catch up on my sadly neglected UseNine2021 challenge. The plan was to make view C of New Look 6594 in this pale blue viscose, and I had got as far as cutting out a first toile.

All ready to go . . .

I suspect that the two-part bodice will need a couple of mock-ups to get right, and as things currently stand this feels like a lot of work. I just want an easy, drama-free, project right now so making up another New Look 6093, a real tried-and-trusted pattern, was an obvious choice. And I found a printed blue floral (!) cotton in the dress-weight remnants bin at my local fabric shop which was an idea replacement for my worn-out dress.

. . . but set aside for this

Obviously, the Stashometer has taken a hit as a result, but as the dress is cut out already, I hope it won't be long before there's a matching entry in the 'used' column.

Going in the wrong direction

Sunday, 20 June 2021

New problem, old solution

I don't feel as though I've done a lot of sewing in the first half of the year, and this is unlikely to change in the second half. I've been dealing with family illness on and off since before Christmas, and even when I haven't actually been busy with that, I've often not felt like sewing. However, this has now prompted me to start a new project.

While some people simply cannot be without their phones, I am the complete opposite. Most of the time it is not even in the same room as I am, and I rarely remember to check it more than a couple of times a day. Usually this isn't a problem - my friends are used to me replying to texts hours later - but now that I need to be contactable by carers, social workers, physiotherapists etc, I need to make sure that my phone is always with me. Not all my clothes have pockets (I dislike patch pockets, so it's in-seam or nothing, and not everything lends itself to in-seam pockets), so my solution is to make myself some tie-on pockets.

For readers not familiar with historical costume, tie-on pockets were an integral part of women's clothing in the eighteenth century and well into the nineteenth. They could be worn over the skirt for ease of access, or underneath for greater security. In the latter case, they were reached through a slit in the side of the skirt. This book, co-written by Barbara Burman, is a fascinating and detailed look at the history of pockets and the important role they played in women's lives.

The woman on the right wears a (patched) external pocket

This is actually a project I've had in mind for some time, and I immediately knew what fabric I wanted to use. I bought this remnant years ago at an Adamley sale, but it is a furnishing-weight cotton twill, not silk. The design is not at all period accurate, it is far too large for a start, but is perfect for a set of anachronistic pockets!

The colours are almost right, but I suspect that is all

I decided to bind the outer edges rather than do French seams, as these would be bulky in such a sturdy fabric. The initial plan was to use some dark red cotton for the binding, but then I remembered that it had been banished to the 'toiles fabric' box because the colour bled relentlessly. I didn’t want to risk it rubbing off onto my clothes, so instead I used some leftover sashing scraps from the University Centre Shrewsbury banner.

The pattern is taken from the pocket in volume one of Patterns of Fashion. It is 16" long, and 10" wide at the bottom, tapering to 4" at the top.

My source material

I made the binding ¾" wide, and hand sewed it round the opening slit on the pocket front. Then the front and back were machine sewn together, for strength, with the wrong sides facing.

The bound opening, and machine sewing

The binding was then hand sewn over the raw edges. I had thought that this would be a quick project and that I would have finished pockets to show in this post, but I seriously underestimated the time and effort involved in sewing through four layers of binding fabric and two layers of furnishing cotton!

Outer binding complete on the other pocket

I think that the end result will be really useful, not just for my phone but for other things which I'm always mislaying, such as my glasses. Tie-on pockets are definitely long overdue a comeback!