Showing posts with label Simplicity. Show all posts

Sunday, 5 July 2026

The guilty secret

Only a short post this week, as I am not long back from my Edinburgh trip. Waiting for me when I got home was this new addition to my collection of dressmaking publications.

Simplicity Sewing Book, 1947

I must admit that this had caught my eye because of the illustration. It's very rare in my experience to see any publication about home sewing actually feature someone in the act of stitching on the cover. All my issues of Vogue Pattern Book have a cover of someone wearing a garment made from a Vogue pattern, but no indication of how it came into being. It's as if the clothes were made by mice in the night.

From The Tailor of Gloucester - this is not how the magic happens!

My next Simplicity Sewing Book is about a decade later.

From 1958

The only hint in the illustration that this might relate to sewing is the dress pattern the model holds. Upside down, and with part of the number obscured.

Close-up of the pattern

Thanks to the wonder that is CoPA, I was able to identify it as pattern number 1951, from 1957. It's not the dress that the model is wearing, and nowhere is there any indication of which (if any) Simplicity pattern was used for the red dress. I drew a complete blank however, trying to identify the pattern on the cover of the 1947 issue.

Whereas that issue was purely instructional, this one includes a few advertisements.

Back cover advertisement

Jump forward two decades, and things are more whimsical. There's sewing equipment, but it's used as jewellery and hat trimming only.

From 1975

The back cover ad is one of a series which also appeared in Vogue Pattern Book. It's for Trylko, the new synthetic sister thread to Sylko.

Because heaven forbid you should have skills

The implication is that making your own clothes is something you want to keep quiet about. In fact, the copy even goes so far as to say, "So no one will ever know you can make a suit like this" (my emphasis), as though even possessing the ability to do this was questionable, let alone using it. It's true that there was a certain negativity about hand-made clothes by this time (even though dressmaking was still taught as a useful skill in schools), but it seems odd to see it reinforced in a publication aimed at sewists. It's hard to imagine publications for any other hobby (especially male ones?) being so furtive about the very thing they are trying to sell.

Sunday, 26 October 2025

A new look for Simplicity 1866

So there I was one evening, browsing vintage patterns for sale, when I realised that I had seen the same pattern twice.

I came across this one first

Or so I thought.

Simplicity 1866, described as a "two-piece dress" with a princess line top and a flared skirt, was issued in 1946. A year later, Dior's 'Corolle' line, better known as the New Look, revolutionised fashion with its long full shirts and nipped-in waists. Simplicity seems to have realised that 1866 already contained many elements of the New Look, and reissued the pattern with a longer skirt.

New and old - the two versions side by side

Aside from the skirt length, the artwork is so similar that I feel it must have been altered rather than completely redrawn. The only real difference is that the figure on the right has been given heeled sandals rather than flats.

Heeled shoes and slightly shorter legs make the skirt look even longer

The illustrations on the instructions sheet have obviously been redrawn however, and the new version has been marked as "revised".

The revised version has a much more detailed drawing, with shading

Naturally, the actual instructions are unchanged. The only element which has been redone is the cutting layouts.

Original cutting layout at the top, and revised version below

Not much more fabric is needed for the longer length.

Yardage reqirements

I'm sure that most dressmakers would have been perfectly capable of lengthening the skirt pieces themselves, especially as the finished skirt length of the new version varies across sizes but is never more than 2" longer than the original. Nevertheless it was a shrewd move by Simplicity to emphasise the pattern's New Look credentials by revising it.

Sunday, 13 June 2021

More blasts from the past

The skirt I was making is now on pause. The front looks fine, but the fit at the back is truly dreadful. As it's not the weather for a wool blend skirt, and I'm trying to lose some covid pounds anyway, which will affect the fit, it has been banished to the naughty corner in the back of the wardrobe for a couple of months. It's galling, and I must admit that I've put off starting a new project while I nurse my damaged pride for a bit. But at the same time, it's a useful reminder that - whatever stories of relentless success we may see or choose to portray on social media - we can all have sewing failures, even with years of experience to draw on.

In my case those years of experience number over 40, and this latest debacle prompted me to think about some of the things I've made in that time. The very first one was, unsurprisingly, from a Style pattern. I made view 3. The pattern dates from 1975, when I was 11, but I think that I made it a couple of years later than that. I have a memory of hearing Baker Street on the radio for the first time while I was cutting it out, which would place it in 1978, which seems right. That said, I have no idea why I was making a short-sleeved top in Scotland in February!

Not the obvious choice for a Scottish winter

The pattern is long gone from my collection, but when I found it online recently, I couldn't resist buying it. I could remember the fabric I'd used (both Mum and I suffer from the affliction that we can't remember what we went upstairs for, but have an encyclopedic memory of every item of clothing we've ever made), but have no photos of me wearing the top. Then remembered that I might have some of the fabric. . .

Some time in the mid-1970s I saw an article about English (paper piecing) patchwork in a magazine, and promptly decided to make a quilt - starting with something small and working up from there has never been my strong point! At that time, in Britain at least, patchwork was still very much about using up scraps of old fabric rather than buying new specifically for a project. It was perfect for someone like me, who enjoyed sewing but didn't have much cash. Dad made me a template for the fabric and paper hexagons, out of very thick plastic. He also provided a steady supply of thin card, in the form of old punched cards from the I.T. department where he worked. If you look closely at the photo below, you can just see where some of the numbers have been punched out.

The card pieces are still in place round the edges

I decided on a colour scheme of browns and other earth tones - hello, 1970s! A lot of the fabric was from old dresses, and there are some atrocious colour combinations in there as I had to work with what I could get. I bought the cream and terracotta fabrics as and when required; unfortunately, this meant that overall size of the quilt was determined by John Lewis suddenly stopping selling the terracotta! I never actually got round to backing the quilt top, which makes this by some margin my longest ever unfinished project.

The 'completed' quilt top

Initially, I didn't realise that I should sew the hexagons together with the right sides innermost, so there are a couple of motifs with very visible stitching.

Oops! I also used cream thread throughout

As time went on, and I ran out of old dresses, I haunted my local fabric shop for small remnants such as this brown striped cotton.

Almost pattern matched all round

The leftovers from new dressmaking projects were added to the mix, too. This was the fabric I had used for Style 1144.

The centre is a scrap of curtain lining!

Style 2580 is from 1979. It used an absurd amount of fabric, and the leftovers made it into the quilt.

I made view 1. So. Much. Fabric.

And this (the green) is the fabric I used

The next year, I acquired Simplicity 9773. This was a favourite pattern, which I made up several times - possibly because the end result took far less ironing than the Style 2580 blouse! One version was in this green check.

A very 1980 illustration

Apparently I liked green blouses?

It's nice to have the memory of these clothes preserved in the quilt, as I have no pictures of me wearing either of these blouses - a reminder of how few photos we took in the pre-digital age*. I lost a lot of photo albums in a house move years ago, but given some of the hairstyles I sported in the past, I had concluded that this was probably a blessing in disguise. Then last week my mum unearthed some old photos of me (erm, thanks Mum), including this one.

The hair!!!?! June 1984

I have no recollection of this picture being taken, but I remembered that I'd made the top I'm wearing in it, so of course I had to look the pattern up. And, courtesy of the wonder that is CoPA, I found it.

Simplicity 6277, 1983

It's a total change from the fitted blouse of 3 years earlier. I made views 2 and 3, and the neckline was so wide that I was able to just sew the buttons through both fronts and save myself hassle of sewing buttonholes. For old times' sake, a copy of this pattern is now winging its way to me from Canada. I very much doubt if I'll make it again, but at least I wouldn't have any fit issues with it if I did!


* - Recently, I was discussing with a friend things from our childhood which would seem incomprehensible to Young Persons Today. Not being able to see a photograph until you had taken 23, or even 35, more and sent them off to be developed was high on our list!

Sunday, 28 May 2017

Simplicity 1587, aka The Dress of Frump

Simplicity 1587 is probably the least flattering garment I have ever made. This is a bold claim, as there’s been some stiff competition over the years (late 1980s/early 1990s fashion, I’m looking at you), but still it - well my version at least - takes the biscuit.

If only

What makes this especially annoying is that it's a pattern I've wanted to make for a while. I've seen lots of great versions of it, such as this one by Kaitlyn of Simply Vintage. Esther of Dolly Creates loves it so much that she's made it five times! So when I found a poly charmeuse with a suitably retro floral print, it seemed like the perfect reason to step away from the craft cottons and try something different.

I made my standard bodice length alterations, which had worked perfectly on Simplicity 1777, and lengthened the skirt. Because the fabric was 150cm / 54" wide, I cut the skirt back as a single piece rather than have a centre back seam (the dress has a side opening). I forgot to make any alterations for shoulder pads, but I've noticed that a lot of my 1950s patterns have optional shoulder pads and no alterations to accommodate them, so decided that this wouldn't matter.

The front yoke has three pleats in each side, and getting them remotely symmetrical was a challenge. It didn't help that the fabric wasn't on the straight grain, an no amount of washing, stretching and pressing would fix this.

The pleats in progress

The bodice front and back are made up and joined at the shoulders, the skirt front and back are attached to their respective yokes, and then the bodice and skirts are put together. As with Simplicity 1777, I top-stitched the yokes in place, rather than use the modern method of placing right sides together, matching the raw edges and sewing the seam. This may not have helped.

The instructions are to sew the side seams and then set in the sleeves, but I decided to attach the sleeves first.

All made up apart from the side seams and zip

At this point, it wasn't looking promising. I hoped that it was one of those dresses which looks like a limp rag on the hanger, but fabulous when worn. So I sewed up the sides and tried it on - and it still looked like a limp rag. The front yoke lies weirdly and the pleats stick out, possibly due to the off-grain problem. There seem to be gathers in all sorts of odd and unflattering places, and the skirt yoke looks dreadful. The skirt is quite full, so there's a lot of hem, and I was tempted not to even bother. I did hem it in the end, but I can't say that I bothered too much about getting it level.

All in all it is so bad that I almost didn’t photograph the end result. Then I remembered the various discussions I've read in posts and forums over the years about the false image we all give online by only showing our successes and not our failures. So here it is in all its, ahem, 'glory'.

This is the best shot - it's downhill from here!

I think that part of the problem is that the bodice yoke should be shorter; the join to the main bodice is too low, which makes the gathered sections look peculiar.

All sorts of unflattering things going on round the bust!

Even though I lengthened the skirt pieces, there was still only enough fabric for a tiny hem.

There is so much wrong here, I can't even begin to say

Part of me really wants to redraft this and Get It Right, but part of me feels that life's too short. It's definitely one just to wear around the house. Ah well.

Sunday, 15 January 2017

Simplicity 4896, progress and anti-progress

I can't believe it's been so long since I last posted about this - nine months!

I have made some progress since then. Having luckily realized that the fabric had a directional weave before I started cutting out, I ignored the cutting layout and cut everything from a single layer. I was so successful in fitting all the pieces together with minimal waste that I actually ended up with 30cm / 12" fabric left over! Very make-do-and-mend.

I had assumed that the neckline would be very similar to the later Butterick 5716 (now out of print), but in fact it's got three little darts on each side of the undercollar, to give it some shape. It's a really interesting, and unseen, detail - exactly what I love about using vintage patterns.

Shaping the collar

What I don't love so much is the instructions. I think that I may have made welt pockets before, but if so it was over 20 years ago - and I don't remember anything about how to do it. The relevant section of the instruction sheet measures 7½ cm by 9½ cm / 3" by 3¾", and even when I could I see it (I needed a magnifying glass), it made very little sense.

The poor printing didn't help

Eventually I decided just to follow the steps, mystifying though they were. After all, until I reached the point where I had to cut the actual coat front, I could always unpick it.

Basting on the welt

Amazingly the pockets turned out fine, with only minor wrinkles.

The pocket bag on the inside

The finished pocket on the outside

So that was the progress, what about the 'anti-progress'?

I didn't want to use the type of modern lining fabric I use to line skirts, so instead chose a mocha-coloured satin - it's what I also used for the pocket bag above. I wasn't really happy with it though, as it didn't have enough structure.

Then when we went to Shrewsbury for the Story of Wool study day (last May!), it seemed only right to take my sewing friends to visit Watson and Thornton fabric shop. Among other things they stock a good selection of proper, old-fashioned, self-patterned coat lining. So I bought some and abandoned the satin lining, which was made up but not sewn into the coat - and then ground to a halt.

Time to get started again.

Sunday, 30 October 2016

Happy, happy, happy

As well as making fabulous shoes, and creating Pinterest boards which cause you to lose hours drooling over the pretties (ask me how I know), Lauren of American Duchess somehow also finds time to write an excellent blog. I always enjoy reading it, but her most recent post made my little heart sing.

Joy of joys, Simplicity are going to start actually using their vintage patterns to create reissues, rather than redrafting them from scratch! Woot! Hopefully this will address some of the things which I complained about in this post.

The thing is, I absolutely love the end result of Simplicity 1777. It was just a shame that it took so much fiddling to turn it into my idea of a 1940s dress. So I'm unreasonably thrilled that Simplicity vintage patterns are going a bit more, well, vintage. This 1930s beauty is one of the first reissues under the new approach - coming out in the winter catalogue. It's now on my 'To make' list, so in due time I'll be reporting on how well it turns out.

Added to my sewing wishlist

Sunday, 2 October 2016

#VintagePledge - Simplicity 1777 finished

There's good news and bad news. The good news is that Simplicity 1777 is finished, I'm really pleased with it, and it's received lots of compliments (including, "That's a very pretty dress", from a male colleague, which is a first).

The bad news is that when I started to make a dress with ¾-length sleeves, with the intention of it being suitable for autumn wear, I hadn't really considered how thin the fabric is. I was less-than-toasty in it, even in a well-heated office, so it may not get much more wear this year.

Oh well, it will keep. After all, a 1943 dress is hardly going to go 'out of style'!

Getting suitable buttons was surprisingly tricky. I found some red ones which were a perfect match, but they were so perfect that they almost blended into the fabric. Then on the button stall in the local market, which has come up trumps for me before, I found some buttons in the exact shade of blue. Unfortunately they were a bit small, and square, which didn't seem entirely right for the period.

Possible button choices

The solution? Combine the two! Most buttons from the 1930s and 1940s seem to have been a single colour, but some multi-colour ones did exist.

Celluloid buttons from the 1930s

Because the blue buttons have four holes and the red only two, I made a couple of fake stitches on the blue first, before sewing through both buttons. The end result looks like four-hole buttons, sewn on.

The completed two-tone buttons

The sleeves and skirt were finished by my usual and totally non-period method of overlocking the raw edge, turning under a single layer, and hand sewing the hem.

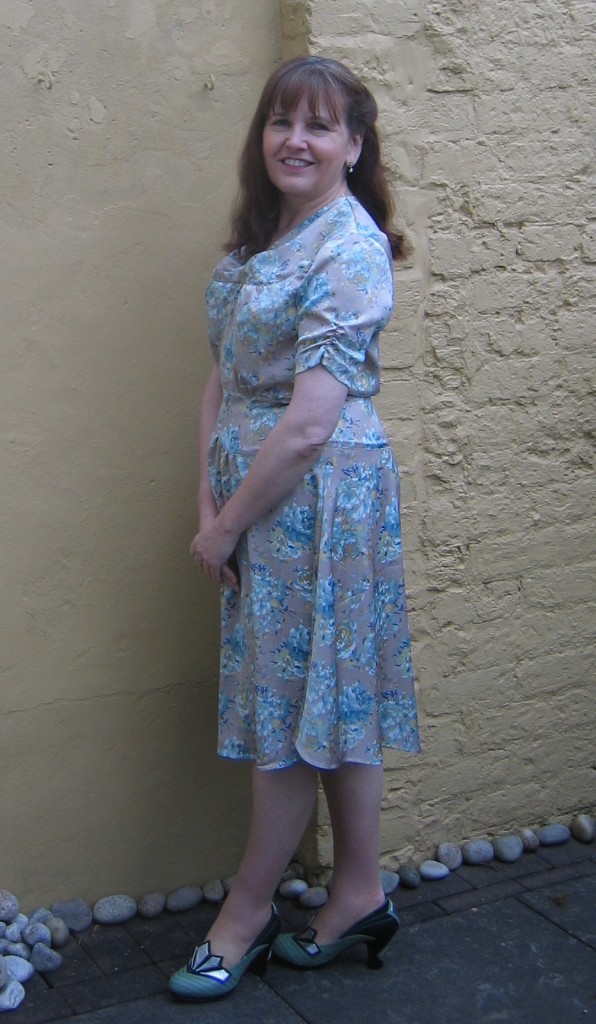
And here's the finished dress. (Try to ignore the henna tattoo! This was to do with an event I attended with the Ya Raqs girls, at which I finally got to wear my Ottoman costume - hopefully I'll have some pictures to post soon.)


So that gets me up to three of my four pledged vintage makes for the year. I'm starting my studies next week, which will limit my sewing time, but I do have one final project in the pipeline . . .

Sunday, 25 September 2016

Simplicity 1777, pattern-hacks

After my grumble the other week about the lack of period details in Simplicity 1777, I thought I’d better write a post about the changes I made to give it a (to me, at least) more authentic 1940s look.

First up, the easiest thing to alter; the length. Early 1940s styles were slightly below the knee, so I added a generous 10cm / 4” to the skirt length, and then shortened it at the end.

A model in a Utility dress, 1943. From Wikimedia Commons

Next, not a ‘period’ alteration, but something to note. The skirt is quite straight at the back, so I had to go up a size between the waist and the hips to accommodate my sway back. For me, simply adding extra width at the side seams usually results in unattractive wrinkling across the skirt back. Instead I cut the whole skirt back to the larger size, and took in the excess at the waist by adding an extra dart on each side. This made the skirt hang beautifully.

Perfectly fitting skirt back

Moving upwards to shoulders. My primary source for 1940s fashion facts (aka ‘Mum’) tells me that not all dresses had shoulder pads. However for me the military-inspired, square-shouldered silhouette is a critical part of the period look. Plus a great many of my 1940s patterns include pattern pieces and/or instructions for making shoulder pads, so I decided to add them to this dress.

Square shoulders from Norman Hartnell's 1942 Utility collection

It might have been possible to just make up the dress and insert shoulder pads, especially with the soft, drapey fabric I used, but I decided to do the job properly. I measured the depth of the (bought) pad, and redrew the shoulder seam so that it was that much higher.

Alteration for shoulder pad, bodice

For the back, this involved folding the dart closed, drawing the line, and then opening the dart out again. For the front, I laid the bodice front over the bodice side front, matching the seam lines, and drew the new shoulder line across the two.

On the sleeve head I added the extra length (the depth of the shoulder pad) below the notches, so that it wasn't affected by the gathering at the top.

The area where I extended the sleeve head

Finally, I re-positioned the notches and dots so that they matched.

As ever, I added pockets in the skirt side seams. Thanks to my friend Kebi for this article on how this particular alteration is a small act of rebellion!

The biggest change I made to the dress however wasn’t a pattern alteration, it was in the construction. The instructions follow standard modern dressmaking techniques, where two pieces are joined by laying them right sides together and sewing a 1.5cm / ⅝” seam. For Simplicity 1777 this makes joining the skirt to the bodice very fiddly, because the dress simply wasn’t designed to be constructed like that.

In the 1930s and 1940s (and possibly later, I’ve just not had the time to investigate this properly), a lot of clothing construction was done with what were called 'lapped seams'. These involved turning under the seam allowance on one piece, laying it over the other, and sewing through all three layers. Vogue 9546, which dates from 1942, uses this technique for the central waist section.

Vogue 9546, constructing the bodice

Vintage Vogue reissue 9126 is from 1947, four years later than Simplicity 1777, but has a similar shape. It also uses the overlaying technique.

V9126 also has a centre panel, gathered bodice and pleated skirt

I used this method to attach the bodice backs and bodice side fronts to the skirt pieces. Several of my vintage patterns mention using a contrasting thread to sew these types of visible seams, to give a decorative effect. Unfortunately the line of my sewing isn’t regular enough for me to want to highlight it!

This is also a good time to mention that there are a lot of pleats at the centre front of the skirt. I marked the top and bottom of each pleat line with tailor tacks, using different colours for the solid and broken lines. Then I pinned the pleats top and bottom, and secured them with two rows of tacking stitches. It was extra work, but worth it.

Pinning the pleats in place

Next I cut out the centre front section in non-fusible interfacing, and then trimmed off the seam allowance from the sides and the bottom point. Then I basted it to the fabric.

Interfacing attached to the centre front, with the bottom folded over

Next I turned the seam allowance over the interfacing, and pressed and basted it.

Raw edges pressed and basted down

Then I laid this over the skirt/bodice side pieces, and basted it into place from the shoulder seams down to the start of the pleats and gathers. (Yes, there was a lot of basting involved!)

After this I did the rest of the dress construction. I put in the zip, using the lapped method the instructions suggest, but hand sewing it because I’ve developed at strange addiction to hand sewing zips. I sewed the shoulder and side seams, and put in the sleeves. (One thing I should mention is that the sleeves do have small, period-appropriate darts at the elbow.) Then, and only then, did I tackle the centre front properly.

Several online reviews I’ve read of this pattern mention that the gathered section can go a little baggy/unflattering/plain downright weird. By leaving it until I had an almost completed dress, I could try it on and fiddle with it until I was happy. I found two things.

One: on me at least, it was far better to have most of the gathering lower down. This makes some of the gathers radiate upwards to the bust, which just looks more flattering.

The completed gathered section

Two: I needed to pull the side fronts in a lot at the waist. This photograph show just how much of the bodice sides I pulled in to the centre.

Compare this to the photo of the centre front section above

Once all of that was done, I top stitched the bodice centre front in place.

Top stitching and padded shoulders - pure 1940s!

Then I made up the facing and attached it. The instructions are to machine stitch the facing 'in the ditch', but I hand sewed it in place with slip-stitch, so it doesn't show on the right side at all.

Pinning the facing in place

Finally all that was needed was the hem and the decorative buttons.