Showing posts with label tools and equipment. Show all posts

Sunday, 6 July 2025

Pineapple completed

Having, finally, decided on a design for my pineapple dress I went to cut it out - and made a discovery about the fabric.

It naturally curled when folded over

The selvedge was very tightly woven, to the extent that it actually puckered. Fortunately, just snipping the selvedge at fairly close intervals fixed the problem and caused it to lay flat.

I wanted to match the pattern on the skirt centre back seam, as I felt that such a bold design would look terrible if it didn't align. I cut one piece, and traced round various fruits and flowers in the seam allowance.

The tracing is just visible here

Then I flipped the pattern over, and used these tracings to place it correctly on the fabric for the other piece. I'm pretty pleased with the way it worked out.
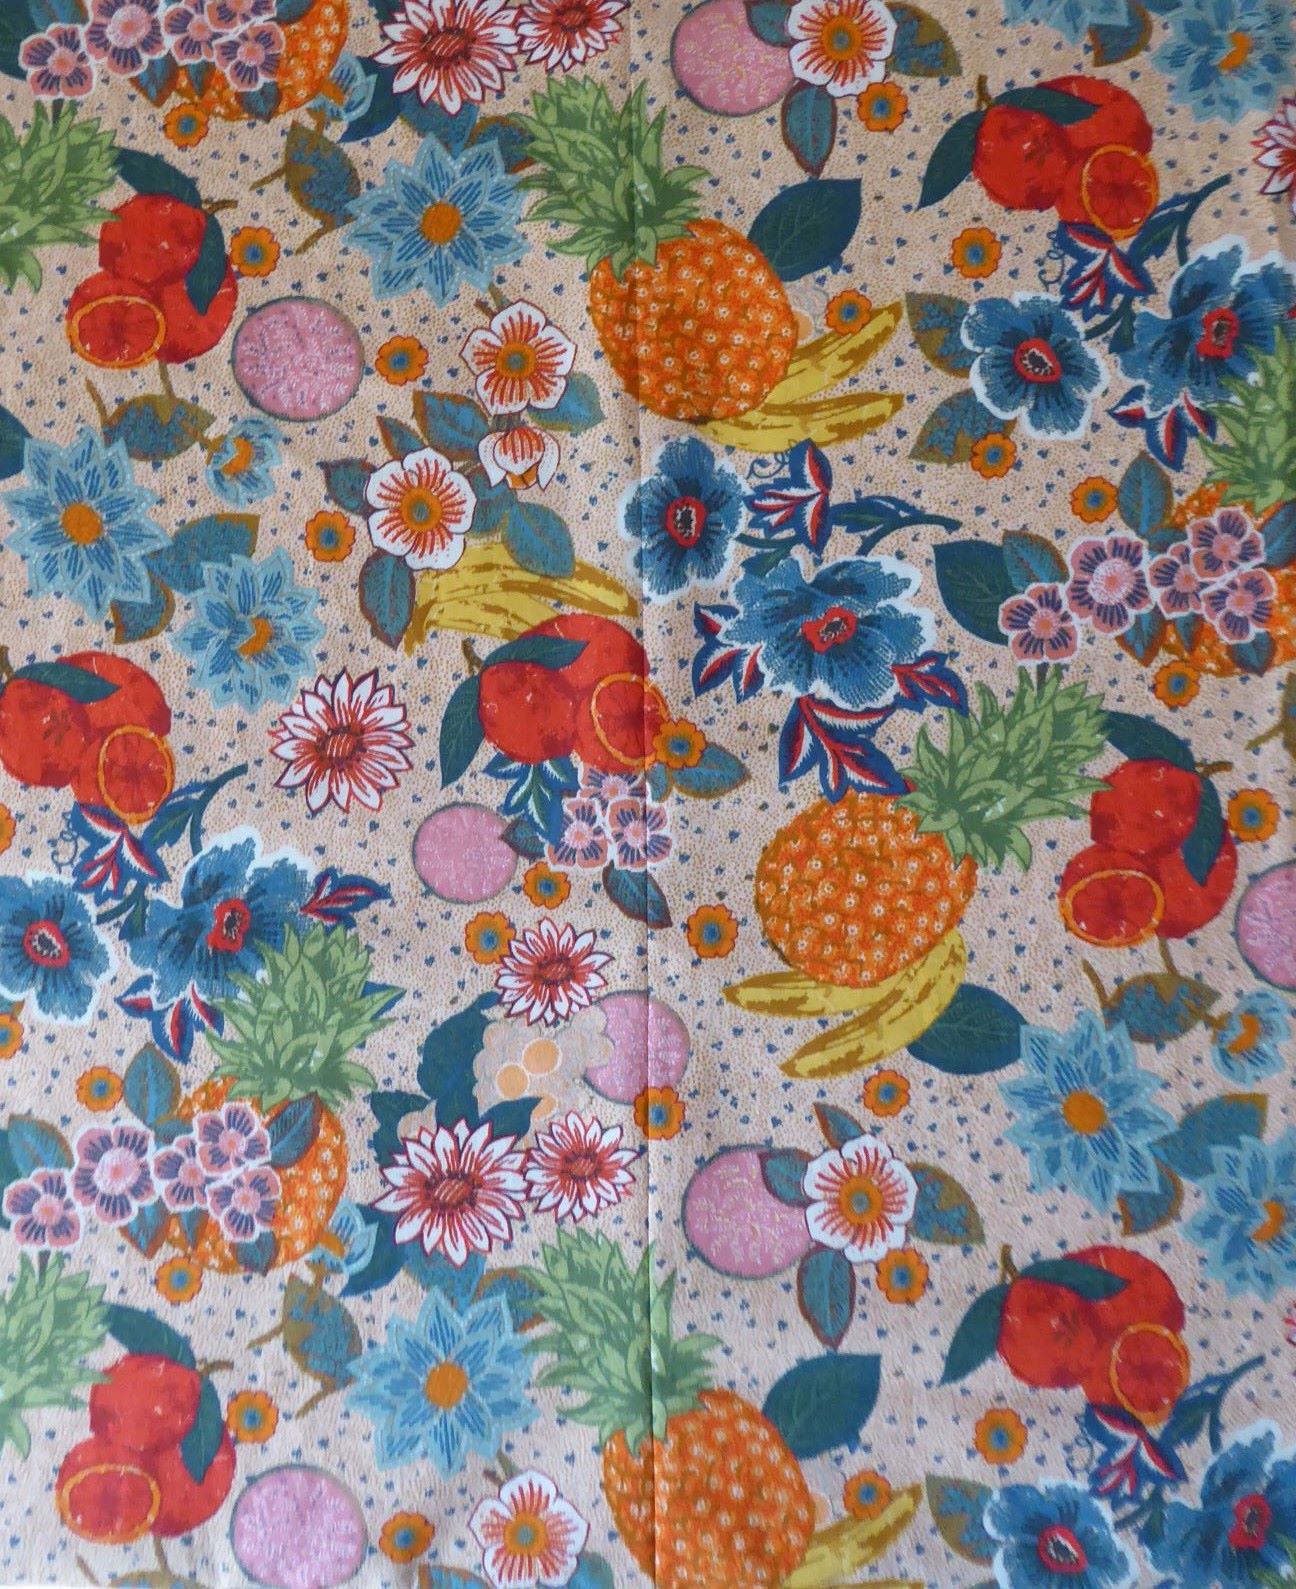
Good match!

The bodice back slopes down the centre seam, so pattern matching isn't possible. Instead, I cut the pieces out so that pattern flows across it. Similarly I made sure that obvious elements such as the pineapples and oranges are at the same height round the skirt. I took particular care placing the bodice front pattern piece - I didn't want a pair of pineapples in 'interesting' positions!

It dawned on me that in all the examples I had seen, the contrast element of the bodice has a top edge which is pretty much straight across, whereas mine curves up at the outer edges. I experimented with a mock-up, and decided that I preferred my version. Such are the advantages of making your own clothes! I completely forgot to take any progress shots, but it was built up on an interfaced inner layer. The two pieces for the outer layer were sewn in place along the top edge, then the excess fabric was pleated and stitched down. Finally the inner and outer layers were overlocked together along the lower outside edge. The insert is just hand sewn in place, and I am considering making at least one more in a different fabric.

The completed bodice

The skirt is quite full, and there's a lot to hem. Fortunately I remembered that on a day trip to a meeting in London last autumn I had found time to pop into MacCulloch and Wallis (because of course I did!) and bought, among other things, these.

I had wanted these for ages

The bottom item is a kakehari or 'third hand'. The clamp is screwed onto something solid, such as a table, the kakehari is attached to this, and then it holds the fabric in place so you can tension it with one hand and sew with the other.

In action, albeit the wrong way round for most people

Because I am left-handed, I sewed with my left hand and held the fabric taut with my right. It made the job much easier, and quicker.

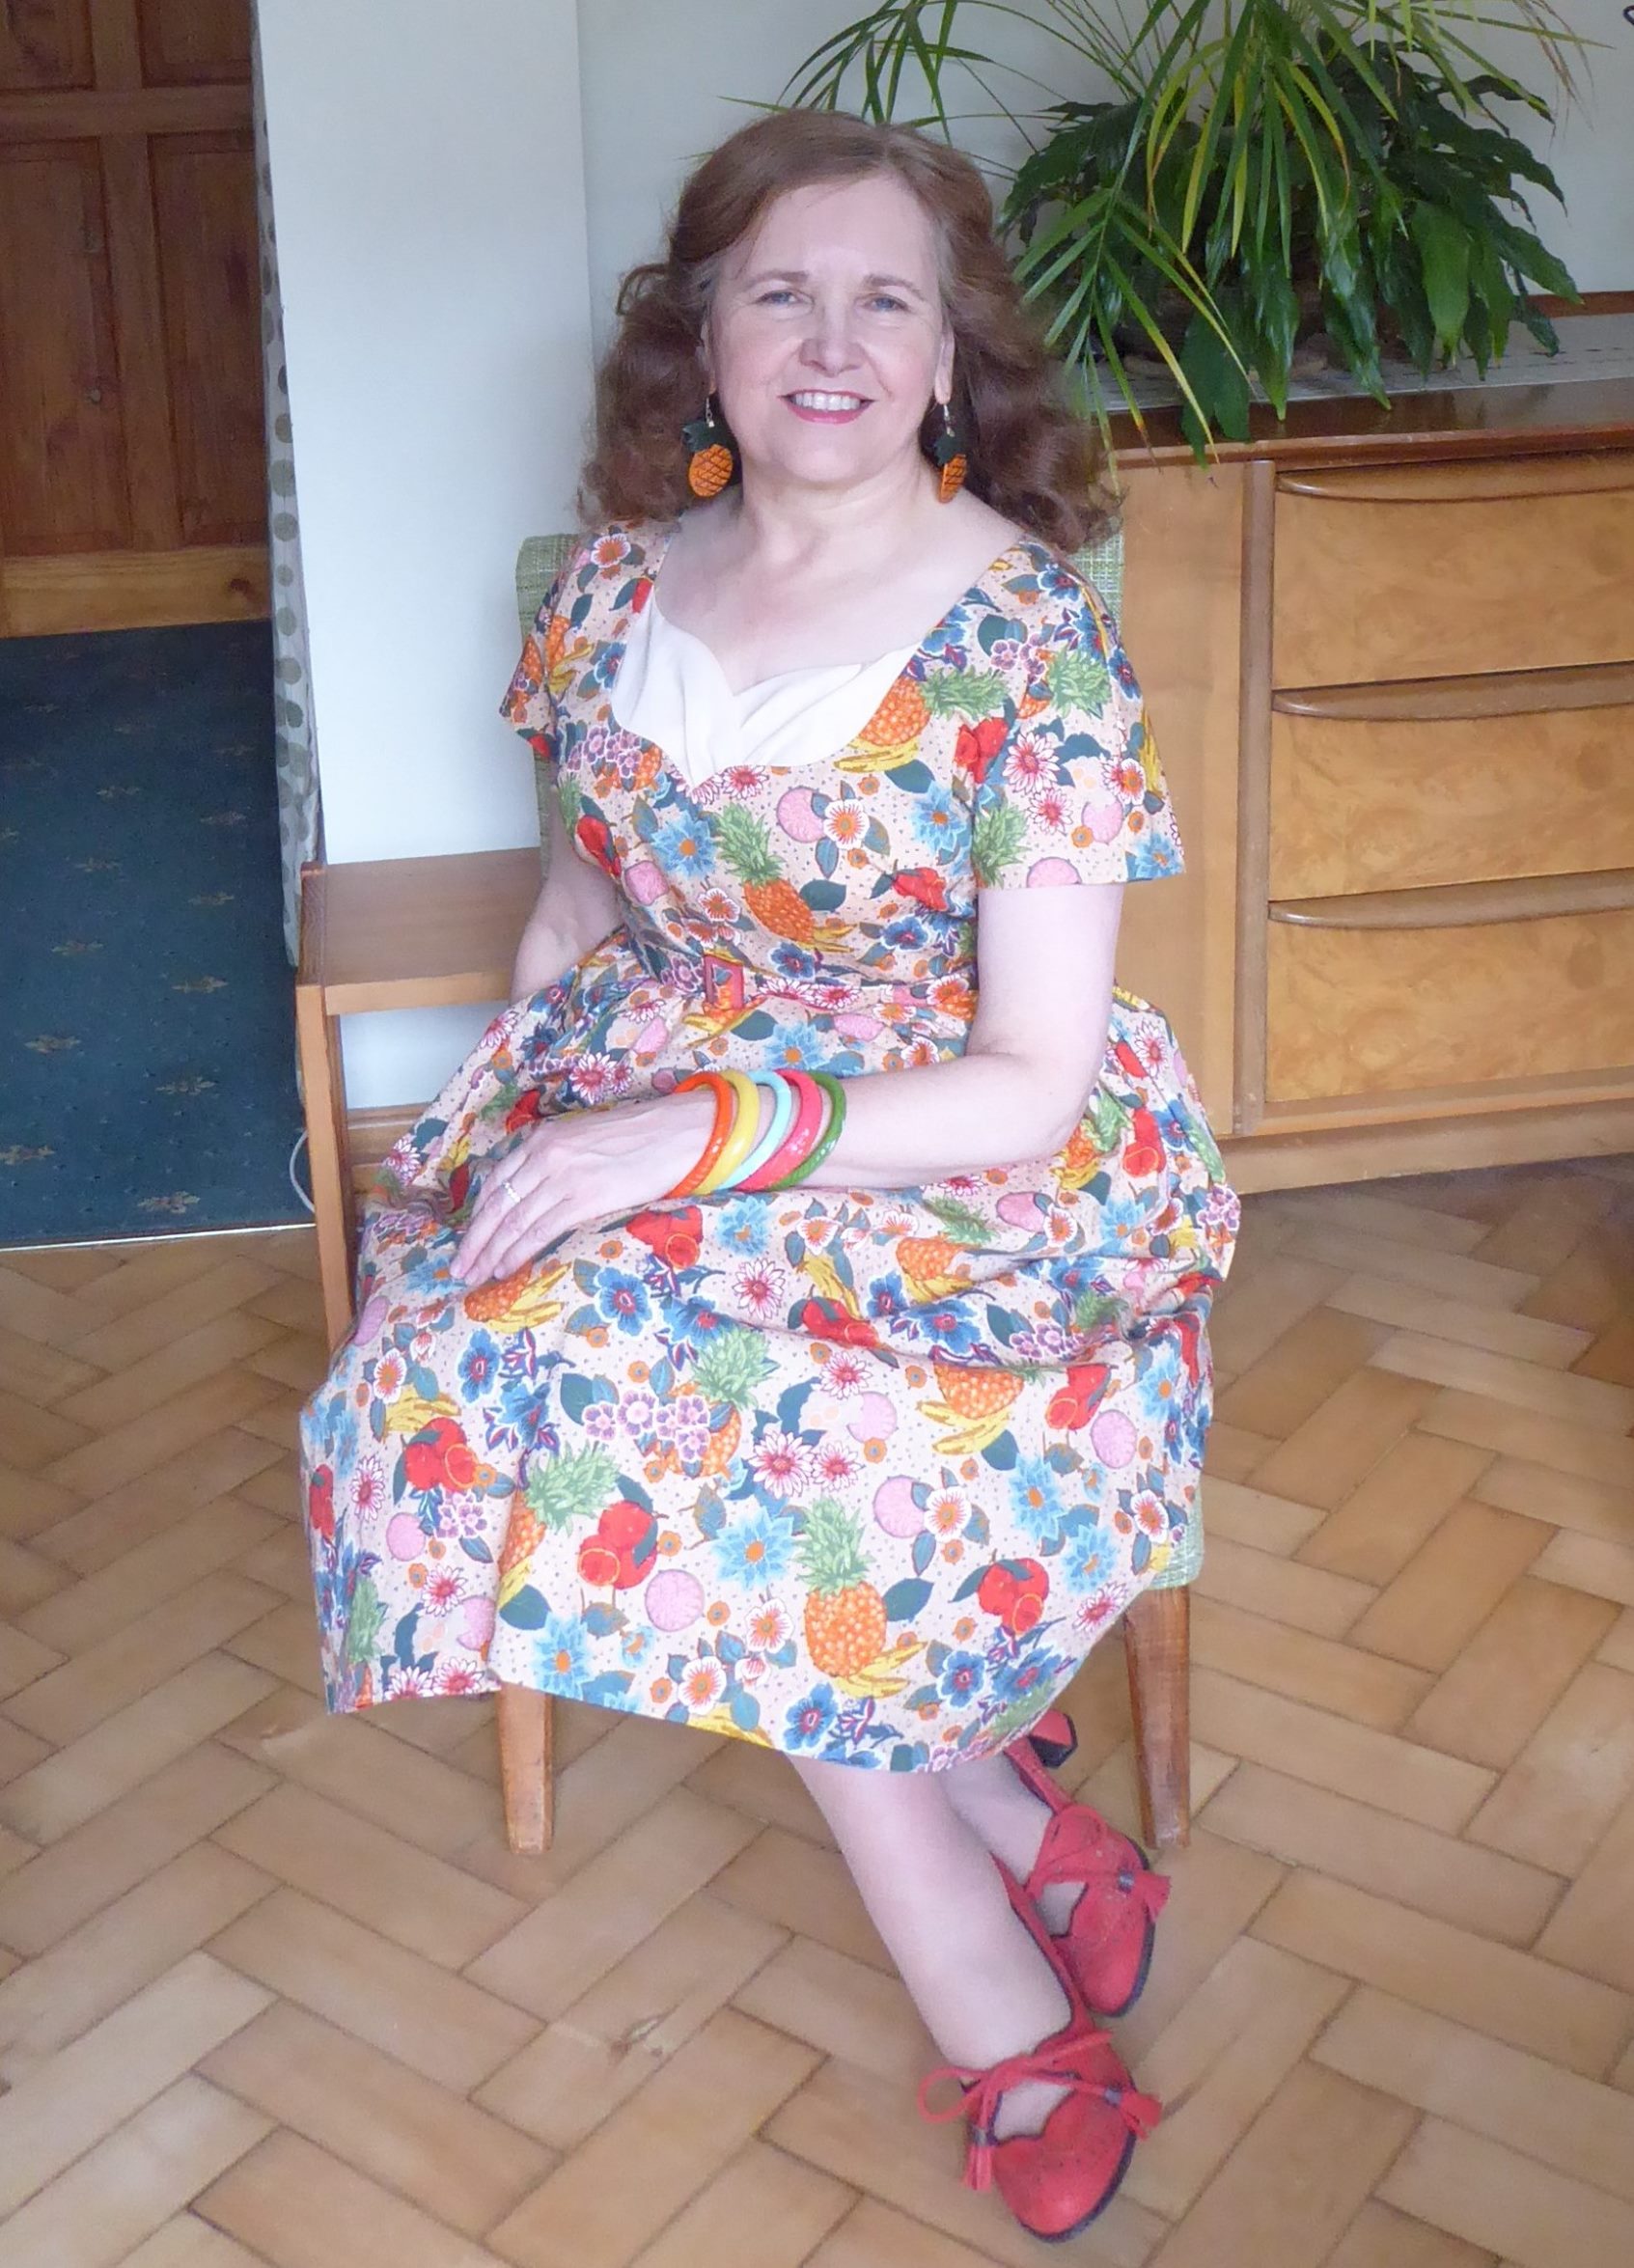
And here is the finished dress, complete with matching belt.

The 'fruits' of my labour (sorry not sorry)

#sewnshownseated

Naturally, a dress with large pineapples on it need to be accessorised with a pair of pineapple earrings! These are from a shop called Digger, in Edinburgh. It first opened when I used to live up there, forty-plus years ago, and I always pop in when I'm back. I was delighted to spot the earrings on one trip, as I knew that they would be perfect with this dress - if I ever made it!

Digger has always looked like this

The stashometer meanwhile remains in the red, but slightly less than before.

Better, but still not good

I need to get sewing with some of those fabrics on the left column if I'm going to get anywhere close to stash-neutral.

Sunday, 15 January 2023

A January purchase

But not by me. This red plastic box was in a suitcase of vintage patterns and assorted sewing stuff which I bought at an auction ages ago (and it made a fair contribution to the overall weight of the suitcase).

Mystery box

I looked inside, thought "Ooh, interesting", and put it on a shelf in my workroom to investigate properly later. And there it has sat, for about 4 years, until it caught my eye during a recent tidy-up, and I decided that it really was time to look at it properly.

The detail on the box lid, below the Singer logo, gives a hint of what's inside.

Can you guess?

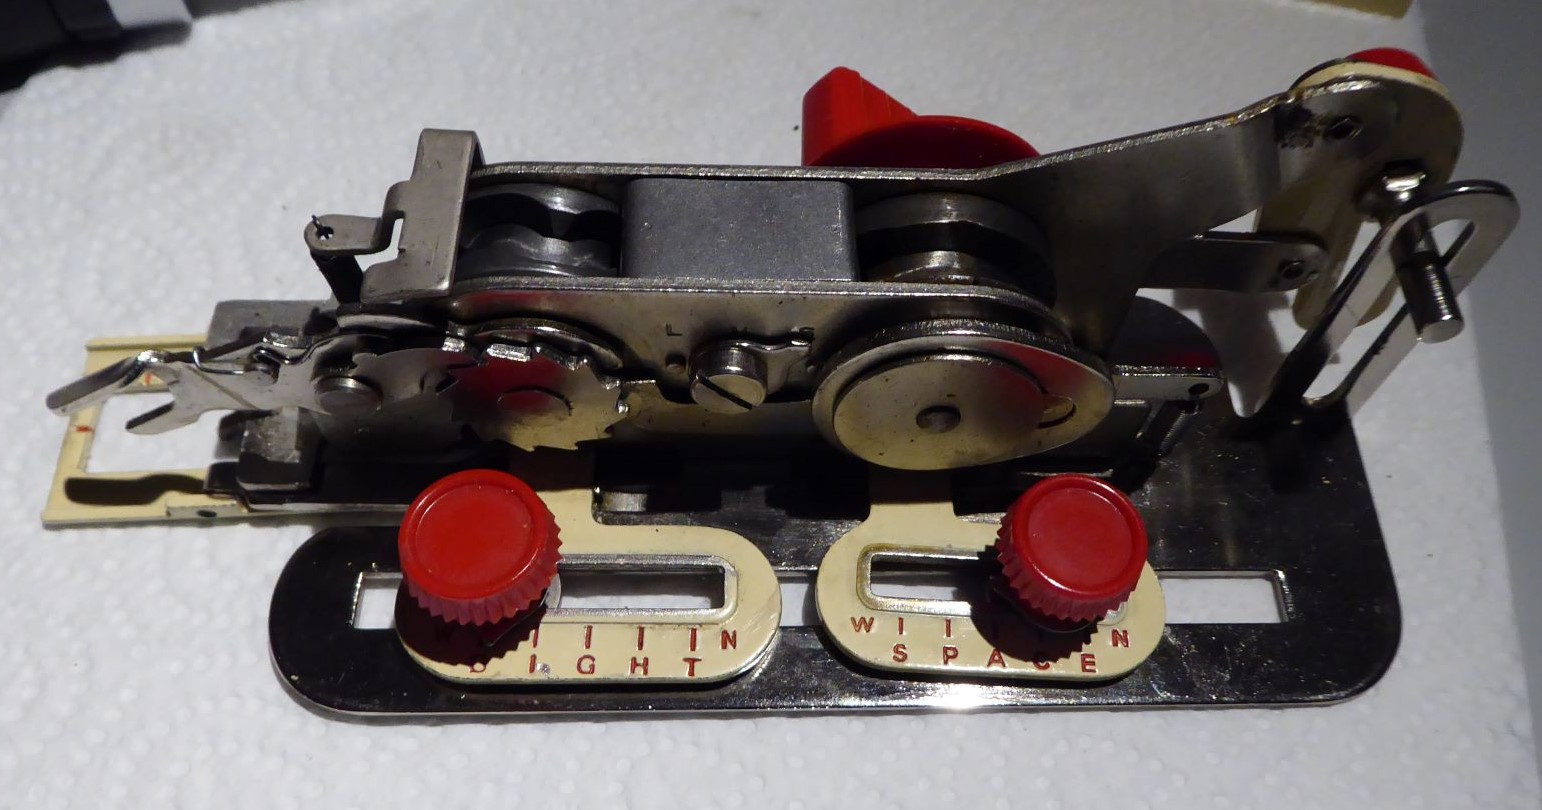
It's an attachment for making buttonholes on a straight-stitch machine, such as my 66s and 99s (but also models such as 15, 128, 185 and 201). The box is cleverly designed to hold all the pieces securely, so there's no danger of anything getting lost.

Everything neatly in place

This (important) piece actually screws into the box

Tucked right at the bottom of the box was the receipt. I assume that of the three items bought from the Singer shop in Chester, this was the one which cost four pounds, 18 shillings and fourpence. Sadly, although the receipt clearly shows the purchase date as 20 Jan, it does not give the year.

I wonder what else they bought?

There is no year mentioned anywhere in the instructions, either. There is however a reference to the "new "Featherweight" portable", so based on this I'm guessing at a date somewhere in the 1950s. This particular buttonhole attachment doesn't seem to have been sold in the States, so there's limited information about it online.

It's a complicated beast, as is apparent from the illustration and parts list (three pages long!) in the instruction manual.

All the parts

I love the fact that if a washer snapped or a spring broke, you could simply get a replacement part from Singer, rather than have to buy a whole new attachment. Mind you, that approach to sales may go some way to explaining why Singer eventually went bust!

With the cover removed

The attachment works by moving the fabric from side to side between stitches, so the machine's feed dogs have to be covered with the plate, which is screwed in place using the same holes as the seam allowance marker.

Feed cover plate in place

The attachment has a fork which is positioned around the needle clamp, and the whole thing is screwed onto the presser foot bar. It's a bit of a challenge to do all this without bending the needle!

Showing how the attachment is attached

Unlike later models, which used drop-in templates to make different styles such as keyhole, this version can only make straight buttonholes. It is possible to alter the density and width of the stitches and the width of the centre gap, however. The buttonhole length can be between ⅜" and 1", and it's possible to extend it up to 1⅞" with manual intervention.

I tried doing some test buttonholes, with red thread on top and cream in the bobbin. The initial attempts were not a success.

From 'very, very bad' to 'not much better'

The underside looked even worse.

This is the underside - there may be some tension issues!

At this point I took the buttonhole attachment off, checked the tension with ordinary straight stitching, and made a few adjustments until I was entirely happy with it. Then I tried again (this time with yellow bobbin thread).

The right side

The underside - at least it's mostly yellow

It's obvious that there's still a lot of work to be done, but I think that it's mostly in improving the skills of the operator! The instruction manual for Olive, my mum's (now my) 1953 Singer 99, has the threading diagram annotated with little felt tip arrows which I added because 50 years ago I couldn't follow the instructions - now I could probably thread a 99 or a 66 in my sleep. So the fact that I can't make perfect buttonholes on my first attempt isn't too much of a worry.

I should add that I did all this on Tilda, my original 66 treadle. I thought that treadling for long enough to do a buttonhole would be exhausting, but it took far less effort than I expected, even going round it twice. The instructions stress the need to work slowly, so a treadle rather than an electric machine is probably ideal.

I've written many times on this blog about hand sewing and slow sewing, and if I only have a few buttonholes to do on a garment then I think that hand-sewn buttonholes would remain my first choice. However, I have a couple of shirtwaist patterns on my 'would like to make' list, and even I balk at the idea of that many buttonholes. So there's a good chance that machine buttonholes may be making an appearance in my wardrobe sometime.

Lots of buttonholes - Hollywood 805, from 1942

Sunday, 10 October 2021

New challenge

I really don't need another vintage sewing machine. But then, I don't 'need' more fabric (or a pattern for making a squirrel) either, and look where that got me.

I shouldn't have. But I did

I spotted this at the local auction last week, and fell in love with the colourful decals. Plus, I was intrigued by the unusual squared off shape of arm, and the layout around the feed dogs. But mostly, the decals.

Ooh, pretty!

Even the faceplate has decals

It took me a while to spot the serial number, as it is hidden round the back. Once I'd found it (R 887019), this site informed me that it was made in the first half of 1903, probably June. No wonder it looks a bit worn in places! I also discovered that it was a model 48K, which gave me access to lots more information, including the manual. It's a shuttle machine (unlike my 1917 Singer 99K, which takes the familiar round bobbins) and, unusually, the shuttle goes from side to side rather than front to back - see the picture above.

According to this site, the 48K was produced as a cheap machine, using technology which was even then out of date. Clydebank appears to be the sole Singer factory which made it, and then only in limited numbers. It was not heavily promoted by Singer, and didn't even appear in sales brochures. It cost four pounds (£498 today), or four pounds, twelve shillings and sixpence with the bentwood cover (£576). By comparison the 28K, which was the cheapest machine which Singer actually advertised, was five pounds and fifteen shillings (£716).

My machine has a bentwood case - clearly the original owner decided to splash out the extra twelve and six!

It needs some attention

The case fastens with a latch which drops over a knob on the base, which is then turned to secure it in place. There is even a key which locks the knob in the horizontal position. It seems a lot more secure than the little internal latch on the 99K, but I'm still not sure I would trust it for carrying long distances.

Locking mechanism and key

I must admit, my original intention was just to clean it up a bit, and have it as an ornament. I'm in the (long) process of reorganising my house, and have an empty shelf on which it would fit nicely. But . . . The shuttle mechanism contains a threaded spool (which I'm leaving in place until I'm confident I know how to replace it!), the handwheel turns smoothly, and the feed dogs work. Oh, and despite being 118 years old, it uses 'modern' machine needles. There seemed no harm in threading the machine up and seeing if it worked. You can see where all this is going, can't you?!

Not going to lie - this bit is scary!

The first thing I noticed is that the base is much lower than that of my bobbin machines - 45mm/1¾" instead of 75mm/3". I’m short-waisted, so I have to sit on a princess-and-the-pea style arrangement of cushions to feel that I'm at a reasonable position relative to the 99K. That 30mm difference makes it a far more comfortable height. And, it does work. The tension needs some attention, but that's hardly surprising. Even the spool winder works with a bit of coaxing - which is just as well really. I can fill round bobbins on my modern electric machine, but winding spools is another matter.

The winder, with an empty spool in place

So now, it's gone from being an ornament which just needed dusting and a wipe down to a something which I want to restore to fully usable order. I've seen some beautifully shiny 48Ks online, but even if I had the skills for that level of restoration, it's not for me. This is a working machine, and I want its appearance to reflect its long, useful, life. For example I love the way that thread has worn a tiny groove in the lacquer at the bottom of the faceplate.

Worn away by years of slight pressure

It does need a very good clean, though. There is a pungent whiff of years of caked-on oil, and the metal parts are all very brown. Initially I assumed that it was rust, but following a suggestion I found online (and there is a wealth of information out there on restoring old machines), I wondered if it might just be dirt and tarnish.

And it was. To illustrate just how much dirt and tarnish is involved, here is a cotton bud after I'd wiped off the seventh application of cleaner/polish.

Ewwww!

Cleaning this one piece took me all morning, and a lot of elbow grease, but you can see the difference.

Guess which side I'd cleaned

It's going to be a long job, and it's something far more mechanical than I'd usually do, and out of my comfort zone. But, I was looking for a winter project other than sewing, and this also works as a tribute to my dad. He was handy at DIY and also an accomplished model-maker, and would have had this fixed in no time. I shall be feeling my way far more than he would have been, but hopefully I have picked up a few of his skills along the way.

Sunday, 12 January 2020

Making a modern hussif - part 2

Here are the rest of the construction details of my hussif. You can read part one here.

The finished article

The inner piece was also made on a base of plain white cotton. I started off by covering the curved end in one of the two light printed cottons I'd chosen, then added sections in alternating fabrics to form the pockets. Each piece formed the top on one pocket, and the underside of the next one. The raw edge at the top of each pocket was folded over to the right side of the fabric, and covered with cream satin ribbon.

Progress shot of the pockets

I made three rectangular pockets, and then added a little curved one at the end, made from the outer fabric for contrast.

The pockets end completed

Most of the other end was covered in the spotted fabric, with a gap in the middle and a gap at the end. These would become the needlebook and the pincushion respectively. I sewed on pockets for the scissors, seam ripper and tape measure, and added straps to hold the scissors and tape measure in place. These are fastened with small press studs (snaps).

Originally the seam ripper was just going to be in a pocket, but I realised that it could slide out easily, so I added a flap to the top. This fastens with a button and elastic loop, because I was worried that the pressure of closing a press stud might crack the seam ripper. The button was an orphan in my button box, and the elastic came from the swing tag of something I'd bought - I was just about to throw it out when I realised that it was the perfect thickness!

With all the securing straps and flaps open

The far end was made into a pincushion - with a difference. My thimble was a lucky find in a workbox which I bought at auction along with a stack of vintage patterns (it was the patterns that I wanted). Initially I thought that it was a cheap metal, but when I polished it, it came up shiny and with hallmarks! These showed that it was made in 1905 by Charles Horner, and hallmarked in Chester. It's a perfect fit. As I don't want to dent or lose it, I made a pocket for it inside the pincushion.

I made the pocket out of a tube of stiffened fabric, gathered at one end and capped with a scrap of fabric. On the pincushion fabric I sewed a circle of tiny double running stich, the same size as the pocket tube. I cut the circle into eighths, being very careful not to snip through the stitching, pushed the pocket through, and overcast round the edge of the pocket and the hole.

The thimble pocket attached to the fabric for the pincushion, shown from the wrong side


Sewing the pocket in place, shown from the right side

The pincushion was then made up and stuffed, and attached to the hussif. To keep the thimble extra secure, I made a flap for the pocket, using the dark outer fabric to tie it in with the little pocket at the opposite end of the hussif.

The thimble secure in its pocket

Finally in the middle of the hussif I made a needlebook from leaves of felt, in colours to match the fabric. The bottom, blue, layer contains pins.

The tools end completed

I slip-stitched the inner and outer layers together from the pincushion end, and added the ribbon ties at the curved end. Initially I wasn't sure whether to use dark or light ribbon.

Ribbon choices

I did try sewing the two together, but the end result was too thick and stiff. In the end I chose the light ribbon.

I'm really pleased with the end result. Rolled up, it's just a nice size to carry in my hand, and it's perfect if I want to go away and take some sewing with me (and I always take sewing with me if I go away!).

End-on view of the rolled-up hussif

Tuesday, 31 December 2019

One final reduction

I managed to sneak a final make into 2019 - I finished my hussif this evening. Talk about cutting it fine. (In my excitement I forgot to photograph it with a ruler, so had to add the size details to the photograph.)

Completed!

More details coming in a future post, but taking into account the outer and inner fabrics, interlinings, pockets etc. I estimate this as using half a metre of fabric overall. So the final stashometer figures look like this.

Totals for the year - under four metres

It's not great, and it would have been much, much worse without the destash, but I'm hoping for better things next year. Details to come in my 'Goals for 2020' post on Sunday.

Happy New Year everyone!

Sunday, 24 November 2019

Making a modern hussif - part 1

This project has been on my 'to do' list for several months, but the impetus to get on with it came from finishing the University Centre Shrewsbury banner. When I delivered the banner to the campus I thought that I had best take a small emergency sewing kit along as well, just in case any last-minute fixes were required. They weren't, but as I hunted round for something suitable in which to carry pins, needles, thread and scissors I thought, "I really need to make that hussif".

Make a what? A hussif, or housewife, is a small, portable, roll-up sewing kit, as explained in this article by The Dreamstress. They were often carried by men who were away from home for long periods, such as sailors or soldiers, to enable them to carry out repairs to their clothing.

Women used hussifs as well. I first came across them at the Wedding Gown in a Weekend event in June, where all the mantua-makers who were involved in making the dress had their own. In this photo of Peryn Westerhof Nyman at work on the back of the dress her hussif is in front of her, there is another one between the two reels of linen thread to her right; and a third one rolled up on the table by the window.

Hussifs galore!
All of these were of course historically accurate to the eighteenth century. There are lots of Victorian and more modern designs out there as well, and numerous tutorials on how to make your own, such as this one.

Hussif by Julia's Place

The great thing about a hussif though is that there is no right or wrong; you can make whatever design, to whatever size, suits your requirements. I've seen examples with loops for silk skeins for embroiderers, and others with rotary cutter pockets for quilters.

My thimble dates from 1905, and my original idea was to make a hussif decorated with Art Nouveau embroidery to complement it. Thinking about it was as far as I had got until the Shrewsbury trip, when something rare happened - realism set in! It dawned on me that if I wanted a hussif to actually use, at some time within the next decade, then I would have to scale back my plans.

As I was going to Shrewsbury anyway, it seemed only sensible to pop into Watson and Thornton while I was there, and buy some fabric (because obviously I had nothing suitable at home!).

My fabric choices from the Tilda Candy Bloom collection

The dark fabric is for the outer layer, and the lighter ones for the inside. On the train journey home I made a list of what I would want the hussif to contain. I came up with: pincushion and pins, needles, scissors, thimble, tape measure, seam ripper (because, realism) and a pocket for threads. Plus a few more pockets for the things I'd forgotten to add to the list.

When I got home I laid out these tools on an A2 sheet of paper. Once I had some idea of the arrangement I wanted, I drew out the various pockets and other elements, and added seam allowances. The end result was longer than the paper, so I had to draw it in two parts. Because the drawing is in pencil it doesn't photograph well, but here goes.

Click to enlarge for a (slightly) clearer image

The lining is to be a little smaller all round than the outer layer, so that some of the dark fabric shows on the inside. I cut out both the outer and inner pieces from a stashed piece of plain white cotton, somewhere between a craft weight and duck or twill. These pieces were cut to the finished sizes, with no seam allowance. Then I cut the outer shape, with a 1" /2.5cm allowance all round, from the dark fabric. This was folded around the white cotton outer piece, and the corners mitred. To get the curved end smooth I cut a template from scrap card, gathered the blue fabric over it, pressed it, and then removed the card. The raw edges of the blue fabric were then stitched down onto the white, taking care that the stitches didn't come through to the right side.

The completed outer layer
So progress is being made, but what about the Stashometer? It's not looking good. I guessed (correctly) that the hussif would require the full width of the fabric, so bought fat quarters of the light fabrics, and half a metre of the dark.

Oh. Dear.

I may have to sew non-stop from now until the end of the year to fix this!