Sunday, 4 September 2022

Playing 'fabric detective'

My latest project is making another Style 1271, this time using the true vintage cotton fabric which I bought at the Festival of Vintage earlier in the year. I wrote at the time that the length should be enough for a late 50s/early 60s sheath dress and it is, just.

The print is a curious mix of yellow and pink 'jewels' in turquoise frames, plus turquoise 'blobs' and small coloured circles, on a dark mottled background.

The fabric, with a 6" ruler for scale

A closer look shows that there are draped ropes and tassels on the background as well. Also, the fabric has a slight but definite sheen to it.

Close-up

The cloth is in very good condition, but I was curious about just how old it is. It is only 36"/90cm wide, but then, so were quite a few fabrics when I started dressmaking in the 1970s. There is no information on the selvedges, the print goes right to the edges. The only method I could think of to date the design was to look at fabric advertisements in my copies of Vogue Pattern Book. I didn’t find the exact print, but the rich colours, 'brush stroke' effect and semi-abstract design all suggested the early 1960s.

Pattern Book feature on 'Dark shades'

Advertisement for Epatra fabrics

Advertisement for Ferguson's fabrics

The sheen to the fabric also helps to date it. In the summer 1962 issue, Helen Scarsdale provided a chart of the different cotton finishes available, what they were for, and how to launder them.

Useful information on caring for the finished dress

According to advertisements, both 'Everglaze' and 'Calpreta Permanent Sheen' were available on fabrics from a range of manufacturers, so I assume that they were either processes or a substance which was applied to the printed cloth. Either way, it seems probable that my fabric has one of these finishes.

Loganberry cottons used 'Everglaze'

While Marshall Fabrics favoured 'Calpreta'

This motif print is similar to my cotton

Style 1271 is, as far as I can tell, from the mid 1960s. So a fictional dressmaker would have had this length of cotton in her stash for a couple of years before getting round to making it up - which sounds about right for me!

More practical sewing

Vintage handbags. They're lovely, but they do tend to be small. It's hardly surprising. At that time few people, and certainly few women, would have had car keys. Purses only contained money, not a raft of plastic cards as well. And no-one carried a phone around with them!

If I'm using a vintage handbag, I usually end up with some sort of 'overflow bag' as well, such as this one from Moo and Boom. It's made from recycled plastics, and I love it, but there's no denying that small items tend to sink into the depths, never to be seen again. Also, I used it in the recent heatwave, and discovered that the woven handles were quite scratchy on my bare arms.

'Before' shot

The solution? Line it, and add pockets. (Actually, 'add pockets' is the solution to many dilemmas in my world!)

I found some plain cotton in my stash, slightly thicker than craft cotton and a good match for the grey in the bag, cut out a piece for the lining, and then ironed in creases where the 'corners' of the bag would be. This provided a background for deciding on pocket numbers and dimensions. After trying various ideas, I went for long pockets at each end for glasses and sunglasses, a single large pocket on one side, and four smaller ones for odds and ends on the other. These were all made up and attached while the fabric was flat.

Pockets, part one . . .

. . . and part two

The straps for the handles were narrow strips of cloth with the raw edges pressed in to the centre, like bias binding, but cut on the straight grain. There was also a strip of fabric sewn round the top of the lining, like a facing, to provide some stability and enclose the strap ends.

When it came to sewing the lining into the bag, of course I couldn't use pins to hold the two layers together. Instead, I used clothes pegs, and they worked very well.

Sewing in the pegged-on lining

And here is the finished, upgraded, bag. It turned out exactly as I had hoped, and I'm very pleased with the end result. Not the most exciting or glamorous project, but the sort of useful and satisfying fix which sewists have at their disposal.

Completed bag, with lined handles

Pocketses!

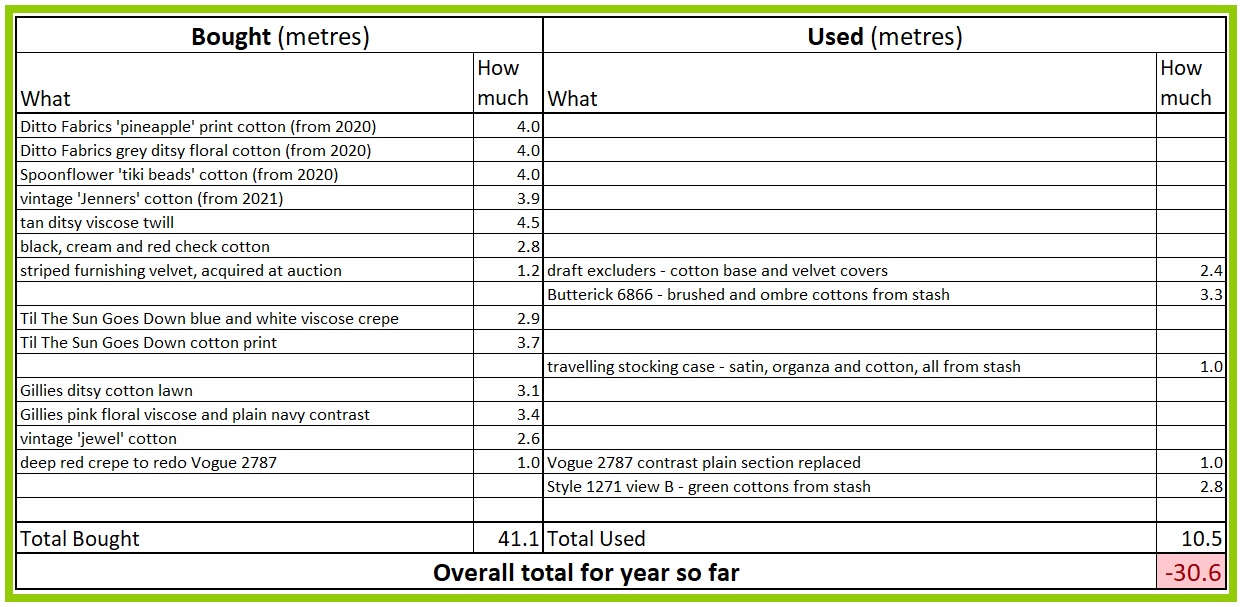
And another half meter added to the Stashometer - at this stage in the year every win, no matter how tiny, helps!

Ending the year in credit is looking very unlikely!

Sunday, 21 August 2022

Curiosity

It's known for being a bad idea for cats, but what about dressmakers?

New Look 6594. I altered the pattern over and above my usual adjustments while I was making it, and then last week I altered the finished dress some more. I'm much happier with the sleeve position now, but moving the sleeve up the shoulder means that its hem is now far from level. And the bodice is still a bit too long. Plus, the very wonky fabric printing meant that I had to make all sorts of compromises when cutting the dress out.

In short, I wondered what the dress would look like if it were made properly.

Having another go

Redrafting the bodice to have a shorter, slightly dropped, shoulder and a shorter bodice overall was quite an exercise, especially as the pattern has no shoulder seam - the back comes over the shoulder to form a faux yoke. And the front is in two pieces. But happily, everything came together, and all the seams matched. I kept the sleeves the same length at the underarm seam, but lengthened them at the centre.

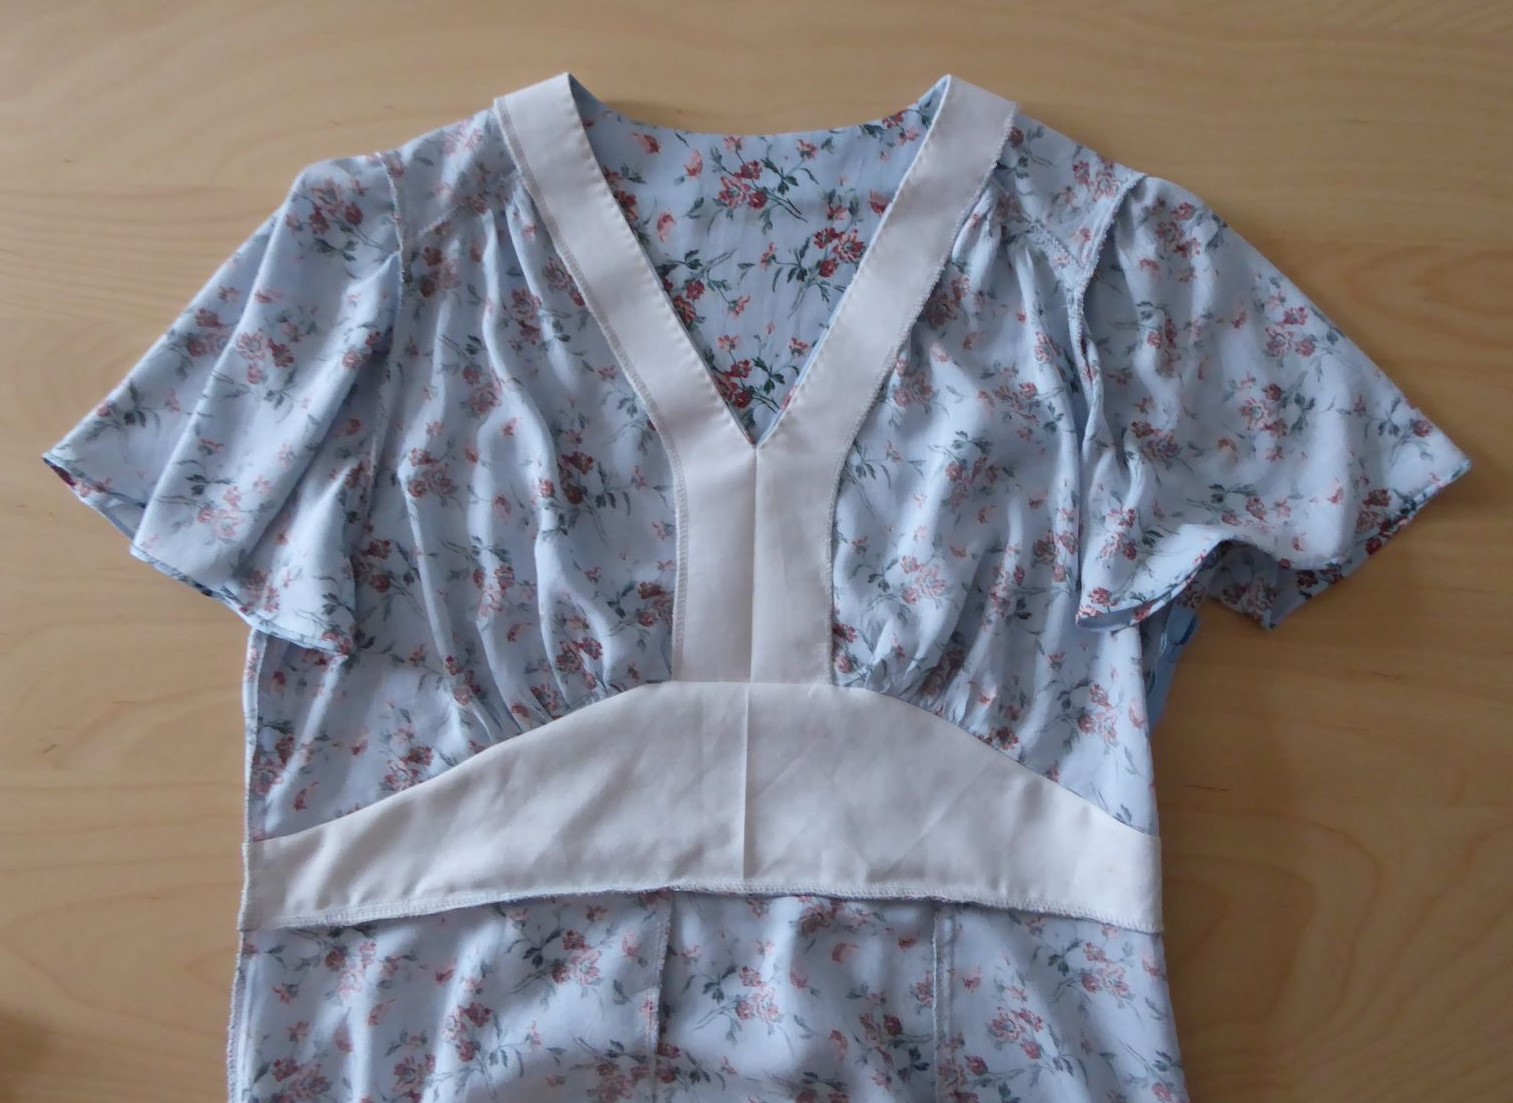
For fabric, I used a floral viscose which had been banished to the naughty bin because it was so thin that the pattern showed through anywhere where there were two layers of fabric. To get round this, I decided to use plain fabric for the facings and midriff lining. I had no plain viscose however, and all of my cottons seemed too stiff. Fortunately, I found an old toile from my dance-costume-making days, which had been made from an old and by now very soft bedsheet - re-recycling! It also had the advantage of adding a tiny bit of extra body to the midriff section.

Interior

There's not a lot to say about the construction, except that I managed to sew the skirt pleat the wrong way round, despite having the first version of the dress right next to me for reference! Sigh. I hand sewed small rolled hems on the sleeves to keep them drapey. As with the first version, I went for a length between views A and C.

Version two

Also as with the first version, I didn't sew down the front skirt pleat. The result is a skirt which doesn't bunch up when I'm sitting, but isn't hugely full, either.

#sewnshownseated

In terms of look, I see it as 'vintage adjacent'. It's a bit of a mix; the midriff section is very 1940s, while the sleeves (of this view at least) are more 1930s. The neckline is ideal for showcasing this 1930s necklace which belonged to my maternal grandmother, while the dark and light greens in the print go nicely with these shoes which I rarely get a chance to wear.

The necklace fits nicely

Showing off the shoes

I must admit though that I'm still not entirely happy with this dress. The right sleeve seems to hang slightly oddly, and the whole thing is a teensy bit baggy. Possibly a waist tie at the back might help? I see a strong possibility of more tinkering ahead! On the plus side, it has used up some more stash fabric, which is always good.

Still a long way to go - part two

Sunday, 14 August 2022

A new look from New Look?

Just a short post this week, because
a) it's hot
b) I'm not long home after a train journey which was far longer, slower, overheated and tiring than I expected, and
c) did I mention that it's really, really hot?

This week has been about lots of little sewing admin jobs. I've drafted the proper version of my alterations to Style 1271, and I've tweaked a dress which was annoying me - New Look 6594.

When I made this dress a year ago, I noticed that the shoulders were too long on me, so redrafted the armscye to shorten them by ½". But after wearing it several times recently, I came to the conclusion that the shoulders were still too long.

This is very odd. A quick glance at the Contemporary Gallery page of this blog shows just how many New Look patterns I've made up over the years. It was my go-to brand until I started vintage dressmaking in earnest, and my work wardrobe consisted almost entirely of dresses from New Look patterns. In short, I would have noticed if the shoulders were consistently too long.

I went back to comparing the line drawing of New Look 6594 to that of a tried and trusted favourite (I've made it four times!) New Look 6093. The distance from sleeve seam to centre front looked pretty similar. But whereas 6093 fits perfectly, the sleeve of 6594 is sliding off my shoulder and down my arm, even with the ½" reduction.

New Look 6594 (top) and 6093 (bottom)

I unpicked the top section of the sleeve seams, and repositioned the sleeves a further ¾" up the shoulder. The dress hangs better (although I could possibly adjust a little for shoulder slope), and I'm much happier with the way it looks.

The sleeve hangs much better now

But overall, that’s a whopping 1¼" difference from the pattern! All my other existing New Look dresses still fit fine, so it's not that my shape has changed. All of those dresses however are from patterns dated 2015 at the latest, whereas 6594 dates from 2019. Which makes me suspect that New Look have changed their sloper – the basic design from which all their patterns are derived.

It's hardly the end of the world. I rarely even look at new releases from the Big5 pattern companies these days, and if a new New Look pattern does catch my eye well, I know what alterations I need to make. But it's just a little irritating that a brand can change its product so much without warning.

Sunday, 7 August 2022

Style 1271 - part 2, view B completed

Big hair, who dis?

What can I say? It's a bit of a different look for me!

I've finished Style 1271 - my first version, but definitely not my last. There are a few things I still want to tweak, but this was meant to be a wearable toile, and I'm pretty happy with it.

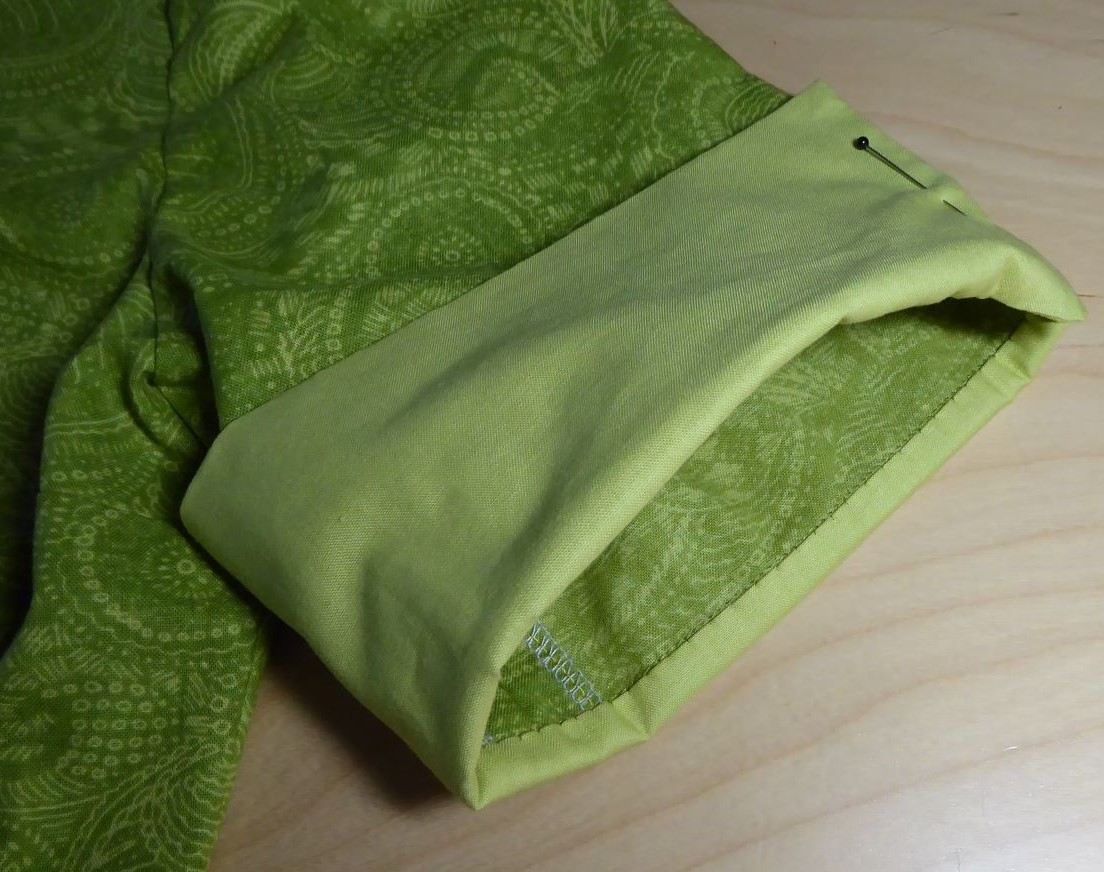
As I hinted in part one, the cuffs were a bit of a struggle. For one, the pattern piece didn't match the instructions - never a good start. The pattern only has an overlap section, which is not sewn to the sleeve, at one end. However, the instructions show overlap sections at both ends.

Cuff pattern, with overlap on the left . . .

. . . but the instructions show overlaps at both ends

My guess is that the pattern was changed at some point in the development process, but either the instruction sheet or the pattern piece wasn't updated.

The next issue was that whereas a modern pattern would probably have a notch to match the cuff to the sleeve and a dot to indicate where the cuff should match the sleeve seam, this pattern has the notch only. So it's entirely possible to attach the cuff the wrong way round. Which, of course, I did!

Once I had fixed that, I machined the cuff to the sleeve right sides together and slip-stitched the underside, as normal. Except that I hadn't taken into account that the cuffs are folded back, so now the stitching shows! Only a tiny amount, but enough to annoy me.

Grrrr!

All in all, the cuffs had me entirely bamboozled. Fortunately everything else was fairly plain sailing. The skirt has a back pleat with separate under panel, so just to add a bit of interest I made that from the same fabric as the cuffs. I also managed to pattern-match the centre back seam.

Contrast at the back of the pleat

The buckle for the belt has fairly narrow slots, and I was worried that once I had attached one end of the belt to the centre section, there wouldn't be enough space for the other end to pull through. So, I only used a single layer of buckram for the section which wraps around the buckle. This made it far more pliable, and left enough room for the buckle to be usable - phew.

Narrow buckle, but it worked

I couldn't find any buttons I liked for the cuffs (what else is new?), so instead I went through my button box for two plain, flat buttons, mismatched but the same size. I covered them in scraps of the patterned fabric wrong (domed) side out, and sewed them on round the edges of the fabric.

Cuff 'button'

When it came to taking pictures of the finished dress, I wasn't sure what to do with my hair. Then I noticed that the lady in blue on the pattern envelope seemed to have some sort of bouffant up-do, and off I went! It came together far better than I had hoped, and was great fun. Admittedly the back didn't bear scrutiny, but for photos that didn't matter.

Posing like the pattern model

With handbag

And one more, because I was having so much fun!

I even remembered to wear one of my many brooches! Plus, a fabulous pair of earrings from Loved And Loved Again, which are a perfect match.

Jewellery

Due to the weather mostly being too hot-or-cold-or-wet to sit outside, I've never got round to putting the outdoor chairs in the yard. So for the seated shot I had to perch on the meter cupboard - oh, the glamour!

#sewnshownseated


This is the first entirely new item that I've completed for months. For once, the Stashometer can be updated in the right direction.

Still a long way to go

Now I just need to create a record all the pattern alterations I made, and I'm good to go with Style Print patterns.

Sunday, 31 July 2022

Another rescue project

Yesterday (30 July) was World Embroidery Day, so naturally I took the opportunity to sit down with some stitching. Specifically, to have another go at the embroidery which I accidentally trashed a while ago.

The problem

Enough time has passed for me to feel a bit calmer about it. Plus, I noticed that the Ukrainian company from whom I bought the frame* for the project have, after a break, reopened their Etsy shop. It struck me that if they can continue to operate during a war, I really ought to get over myself and my colour-run failure.

Various attempts at washing out the leached colour had changed it from pink to a sort of tan, so I decided to try tea-dyeing the piece. I've never done this before but, as with the re-do of my two-tone Vintage Vogue dress, I figured that it couldn't make things any worse. If it dyed to an even colour, then hopefully the previous marks would disappear altogether, and even if I ended up with a mottled effect, then they would blend in.

Shadows of the lettering were left, even after several washes

I followed these instructions, and steeped the teabags for 10 minutes. Then I poured the 'tea' into the lid of a Pyrex casserole dish. This meant that I could lay the area to be dyed flat without any crumpling. I pressed the cloth firmly into the liquid, to remove any air bubbles and to make sure that the whole area remained submerged. Unfortunately, I was so busy concentrating that I forgot to take any in-progress pictures!

When I took the piece out, it was a deeper colour than I wanted - even allowing for wet fabric looking darker. However I was able to rinse some of the tea out, and I then put the cloth in the vinegar/salt/water solution to set the colour.

The end result was pretty much the colour I'd envisaged, and the marks were completely invisible - result! I chose a greenish-brown thread for the lettering, as this went best with the new colour scheme. It's not that obvious in the photo, but there was a real colour difference between the dyed area (within the frame) and the white fabric round the edges which hadn't been in the tea.

Set up for stitching

I did all this prep on Friday, including re-marking the lettering. So yesterday, all I had to do settle down to sew for a few hours (oh, the hardship!).

Re-embroidered

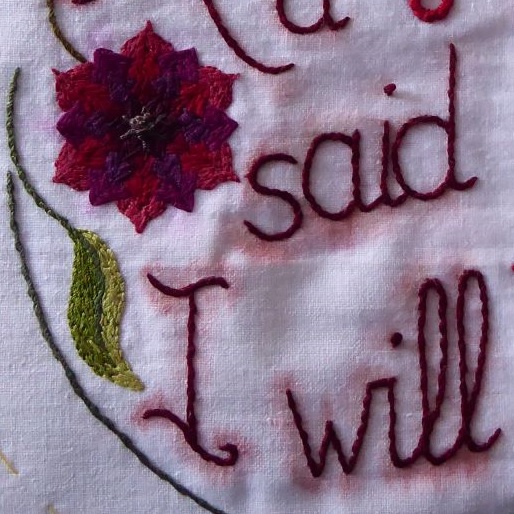
The dyeing process seems to have raised the texture of the cotton fabric, and given it quite a rustic look. The frame did come with a circle of clear plastic sheet, but I decided that the effect was too flattening (visually, not literally), so left it off.

Close-up texture image

And here is the end result. Obviously it's not quite what I originally intended, and I haven't yet decided where to hang it for maximum effect, but since its whole point was to remind myself to actually do things, I’m glad that I got it done.

The end result


* - I have bought circular wooden frames in the past, but they seem very hard to get hold of now. The shop, RukoJob, offers them in a variety of woods and sizes, and the one I bought is beautifully made.

Sunday, 24 July 2022

Style 1271 - part one, laying foundations

There wasn't an opportunity to do a fitting session on my black dress with Mum this week, so instead I've started (yet) another unscheduled project!

New project

Back views

I want to use views A and C of this pattern with two lengths of vintage fabric which I've got. Obviously, with both of these I have limited yardage and no room for error. So my new project is to iron out any possible issues by making a wearable toile of the pattern, using some cotton print fabric which has been in my stash for ages.

The original plan was to make a very basic version of view C, with plain short sleeves and a tie belt, a quick and easy project - ha! (When will I ever learn that such a thing doesn't exist in my world?) Then I remembered that I still had some of the plain green cotton I'd used for the lining of my sewing bag and my 1950s Butterick top. It turned out to be a perfect match, so the plan was amended plan to view B, with contrast cuffs.

Such a good match

Amazingly, I found a buckle of suitable size and colour in my buckle box - well, it seemed rude not to use it. So now a proper belt has been added to the project.

And the perfect buckle, too

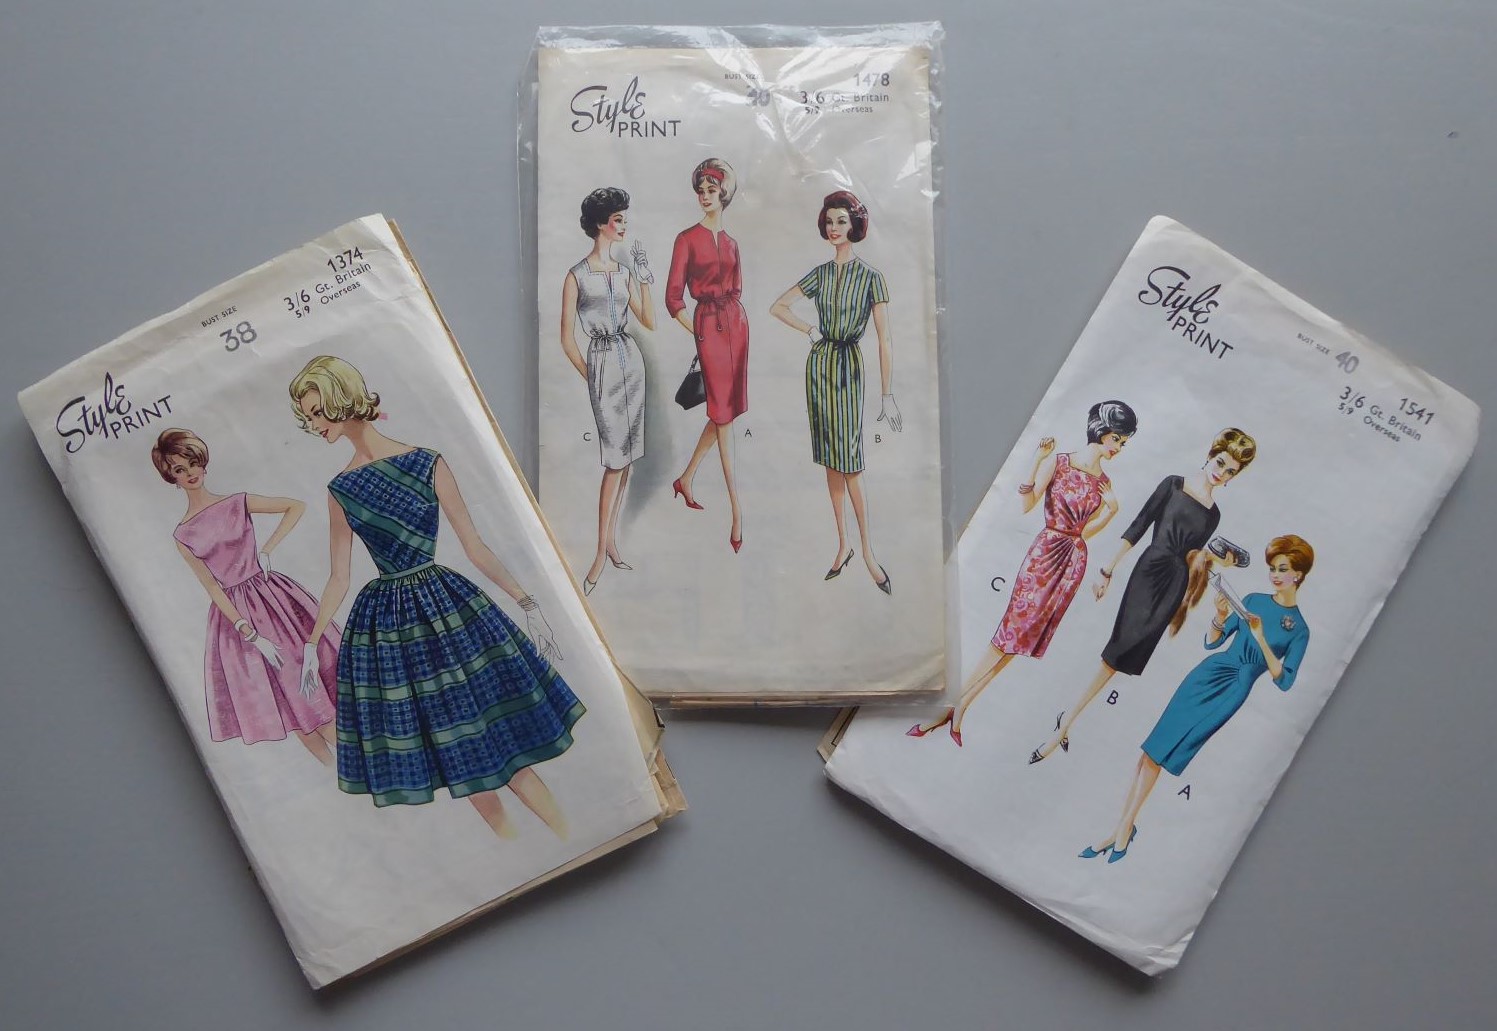
For someone who doesn't much like 1960s fashions, I seem to have quite a few late 50s/early 60s Style patterns in my collection.

Patterns I have definite plans for . . .

. . . and ones I just liked . . .

. . . and more

As I have so many 'Style Print' patterns, and as this dress is such a simple design with no complicated shapes, I decided to use it as a 'fitting shell'. Most of the big pattern brands issued fitting shell patterns; a very basic design based on the pattern sloper from which all their other patterns were derived. The idea was that a dressmaker could use this shell to identify what fitting alterations they required, and then apply these to all patterns from that brand rather than having to fit each new pattern from scratch.

Vogue fitting shell pattern

Progress has been slow, as I have to stop and check the fit after every step, but I think that the exercise will prove worthwhile. I have already established that both the shoulder width and the shoulder angle for these patterns need to be changed. In fact, the shoulder could be made slightly narrower still, but as this is just a wearable toile, I'm leaving this version as it is.

Progress so far

The cuff proved surprisingly complicated, but that's a story for another time.