Sunday, 9 January 2022

2022 plans

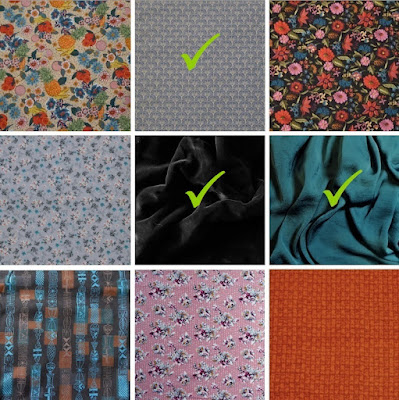
"Hope Springs Eternal" and all that. Despite, and/or because of, last year's dismal showing on the UseNine front, I have decided to simply roll the unused five fabrics (one is part-done, and will appear on the blog shortly) forward to this year.

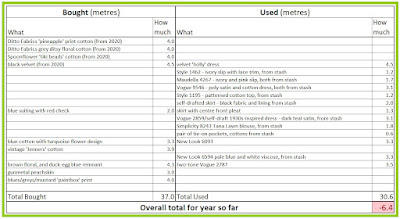
My (woeful) total for last year

One big difference for this year is that because I have specific patterns in mind for eight of my nine choices, I'm changing over to MakeNine.

Some old, some new

So, going from top left to bottom right.

When I featured this exuberant printed cotton last January, I wasn't sure what to make with it. Over the summer I settled on Butterick 5556, a reissue of a 1955 pattern. Unfortunately, Life got in the way before I could start.

Pattern choice made

This fabric, and the pattern to go with it, have appeared on the blog before. Waaaay back, in October 2014! I've thought about making the coat more or less annually, but have always been put off by the fact that I would have to shorten the bodice on nine pattern pieces (five for the lining and front facing, four for the outer coat). Now I have the additional thrill of needing to do a bust adjustment on the five front pieces, but nonetheless have decided that the time has finally come. I'm making view B, but without the braid on the sleeves. (Also, I don't imagine I'll be wearing it with a chunky polo-neck jumper, as I'm not planning to audition for a remake of The Cruel Sea any time soon!)

Coats! A new challenge for a new year

The next two, printed florals in viscose and cotton, are carry-overs from last year.

Familiar faces

The first of the year's two entirely new fabrics is my 'wild card' of bunch. I made the mistake of 'just popping in' to my local fabric shop's sale - and this remnant mysteriously fell into my basket! It's a woven cotton, quite thick but not brushed. I don't know what I'm going to make from it yet; it depends what I can eke out of 2.8m and pattern match the checks, but it's a good match for this vintage belt clasp which I've had for ages.

Showing the back and the front of the belt clasp

Bought on the same trip, but with a pattern in mind, this viscose twill is a perfect ditsy floral for a 1940s style.

Yet another Style pattern

Another two carry-overs. Hopefully it will be third time lucky for this pink floral crepe, which has been on my 'to make' list since 2020!

More familiar faces

Finally, this true vintage printed cotton featured on the blog last August, along with the pattern, thread, and zip which the original owner had planned to use to make it up. Unfortunately, the fabric is printed quite noticeably off-grain. Therefore I think that this pattern, with its bias-cut bodice, might be a better bet. Judging from the numbers, 1479 for the original and 1374 for the possible replacement, the two patterns are from the same era.

Plan B for this gorgeous 60s cotton

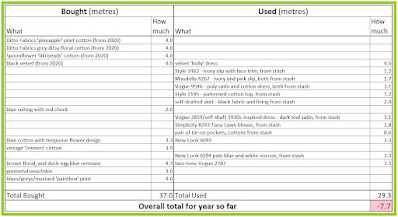
As ever, I wondered what to do with the Stashometer. Just rolling all unused fabric into The Stash feels like cheating, so instead I have carried over the unused 2020 purchases, and the 2021 purchase I plan to use in MakeNine2022. Plus, I've added my two new acquisitions.

Starting the year over 23m in the red!

Given my dismal showing on last year's UseNine, this should be more than enough to keep me busy. But, this year's challenges for the Historical Sew Monthly have been announced, and I really want to get back into historical sewing this year. I have Plans, let's see if they come to fruition.

Because I haven't got enough to do already

Sunday, 2 January 2022

2021 review, including one last project

I had hoped to squeeze a final UseNine creation into the week between Christmas and New Year but, in keeping with 2021 in general, it was not to be. I did complete a half-done garment, though, which is better than nothing.

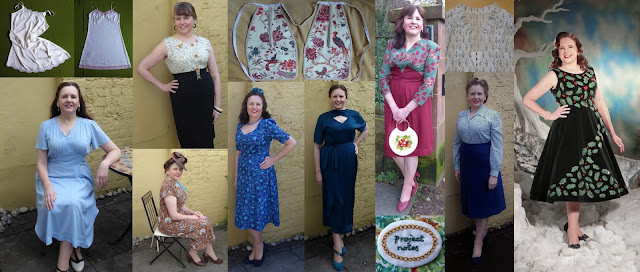
So as I don't have a completed dress to show, it's time for a review of the year. I didn't feel as though I've done much sewing this year, but putting it all together in a collage proved me wrong.

2021

The year started with a venture into lingerie-making; which I enjoyed far more than I was expecting and want to pick up again this year. I also dabbled with separates - two blouses and two skirts - including a sleeveless blouse made especially for getting my first Covid jab. Of course, it received another outing last month (topped with a thick cardigan!) when I went for my booster.

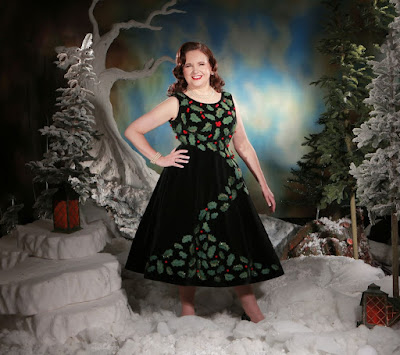
As ever, I put the 'dress' into 'dressmaking' by making six of them, culminating in my 'Holly' dress.

The Holly dress was definitely the highlight of the year, but apart from that, it's two of my most simple projects which have brought me the most pleasure. Firstly, keeping all my project notes in one place has proved to be a really good idea - who knew?! - and having a special book to record them in makes sure that I resist my old habit of scribbles on random bits of paper.

Still so pleased with how this embroidery turned out

Secondly, and proving that I should stick with dressmaking and not branch out into fortune-telling, the summer blouse which I fixed to make wearable but I "doubted would ever become a favourite" became - just that. Every time I wore it, I was so glad that I'd made the effort to rescue it.

Mystic Tulip fails again!

Those with eagle-eyes and long memories may have noticed something in the collage above which hasn't been blogged about. My inverted-pleat skirt was banished to the naughty corner in June for crimes against fitting properly, and has languished there ever since. But it struck me that finally fixing it would make a tiny improvement on the Stashometer before the year ended.

The 'fix', such as it was, was to unpick the back darts and so convert them into loose pleats. It's not ideal, and I definitely need to tweak the pattern before I use it again, but at least the skirt is wearable.

This just left the hem to do, but because the skirt is constructed in the vintage method of a separate back panel for the pleat, it was a bit more complicated than normal.

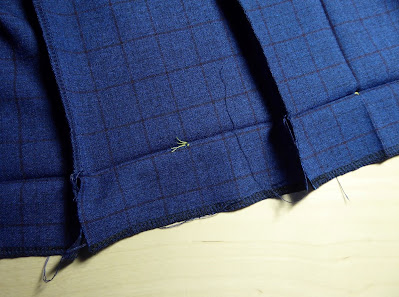
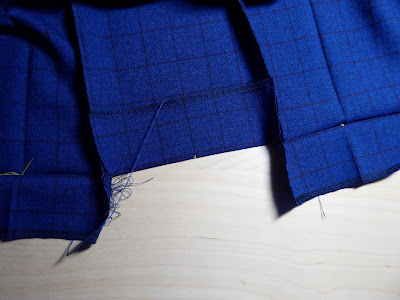
First, I decided on the skirt length and pressed the hem up. Then, I unpicked the seams attaching the panel to the skirt, as far as the pressed line.

Hem marked and seams unpicked

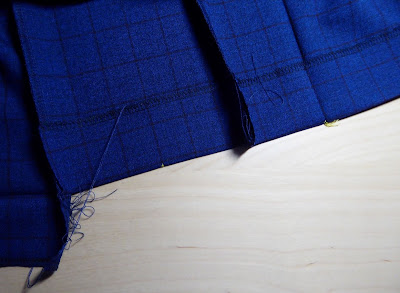
This meant that I could fold the hems for the panel and the skirt up separately, without the seam allowance getting in the way.

The back panel hem folded up

With one skirt piece also folded up

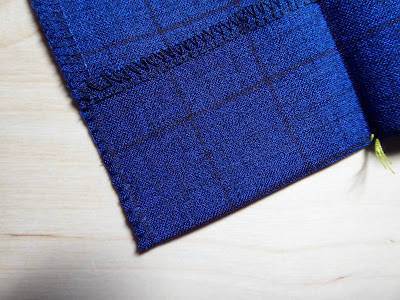
Finally, once the hem was sewn, I tidied up the unpicked seams with blanket stitch.

With the unpicked seam allowance stitched down

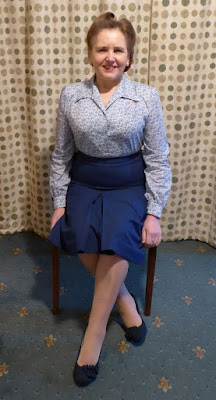
It was a real rush job in drizzly weather to get it photographed before I set off to Mum's for Hogmanay, so please excuse the poor pictures. At least my hair cooperated, for once!

Worn with Simplicity 8243

#SewnShownSeated

Completing the skirt took the Stashometer to a 6.4m deficit, so if it hadn't been for that trip to the Museum of Liverpool in October, and my detour into John Lewis's small and limited fabric department, I would have ended the year in credit. Thank goodness they don't still have the large and excellent fabric department which I remember from the 1980s - the damage could would have been far worse!

In three years of the Stashometer, this is the worst yet!

Sunday, 26 December 2021

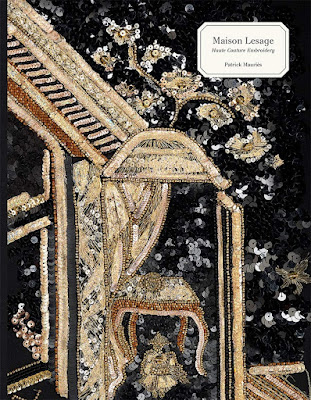
Maison Lesage

Merry Christmas to those readers who celebrate! I hope that you're enjoying the holiday weekend and that, in a phrase from my Scottish childhood, 'Santa was good to you'. This week I'm posting about one of my presents from my mum: this book.

Maison Lesage: Haute Couture Embroidery, by Patrick Mauriès

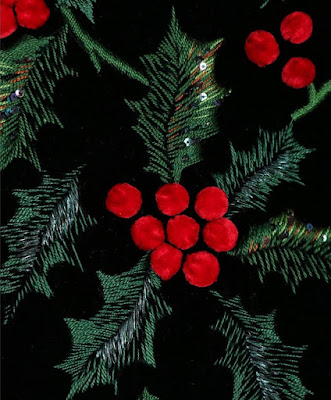
Although I've always described the inspiration for the holly dress as being by Pierre Balmain, its distinguishing feature - the stunning design of berries and frosted leaves - was actually created by the Paris embroidery house Lesage.

Too good not to include yet again

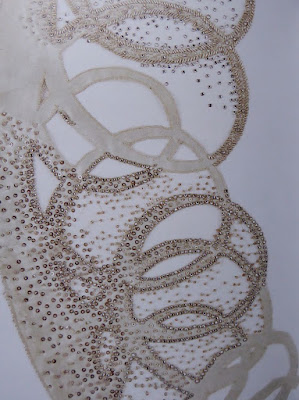
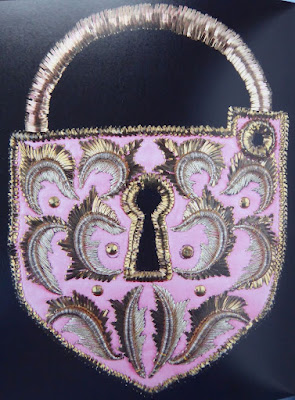
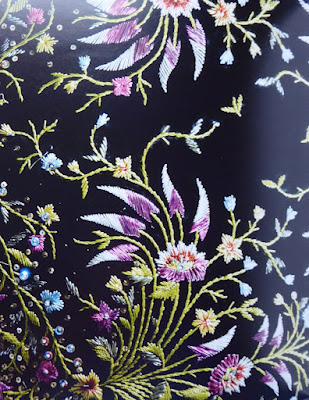
The book tells the story of the firm; from its creation in 1924, through its association with many of the leading couture houses of the twentieth century, to its current position as one of Chanel's Métiers d'Art ateliers. It is extensively illustrated, with pictures of completed garments and many full-page, wonderfully detailed close-up photographs of different embroideries.

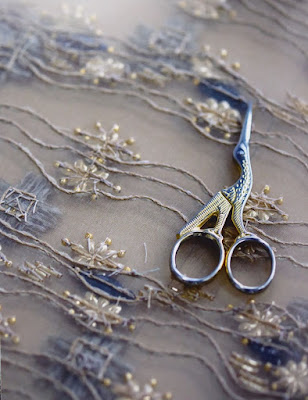
Underside of an embroidery sample in progress

Vionnet, 1929

Vionnet, 1938

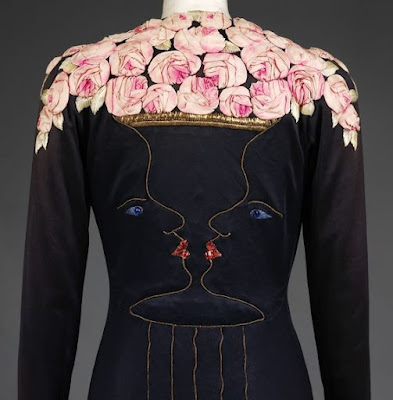
Schiaparelli, 1939

Balmain, 1956-57

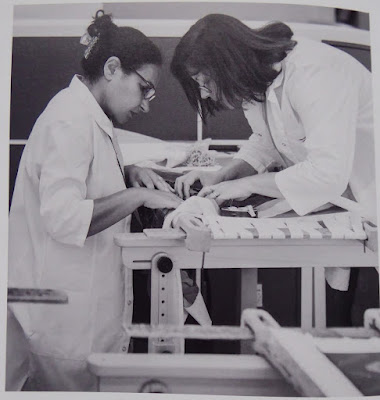
My dream job! Embroiderers in the atelier, 2018

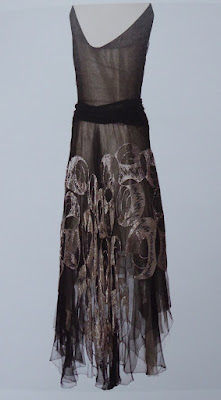
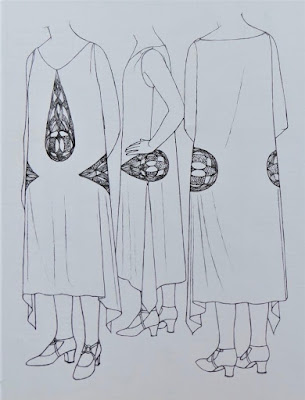
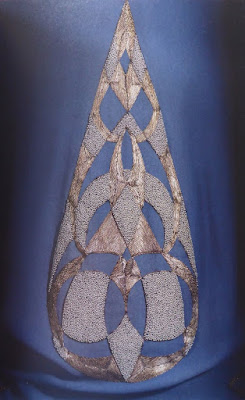
I hadn’t realised just how much of Lesage's work I have come across over the years, without realising it. First up, this 1925 dress by Vionnet, which appears in Patterns of Fashion, volume 2.

Janet Arnold's illustration

The centre front embroidery

I have seen this Schiaparelli coat in the V&A on my many, many visits there.

Schiaparelli evening coat, 1937 (image © Victorian and Albert Museum, London)

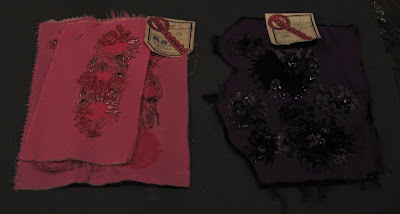
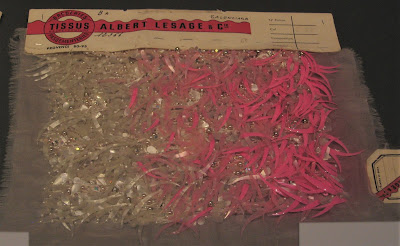
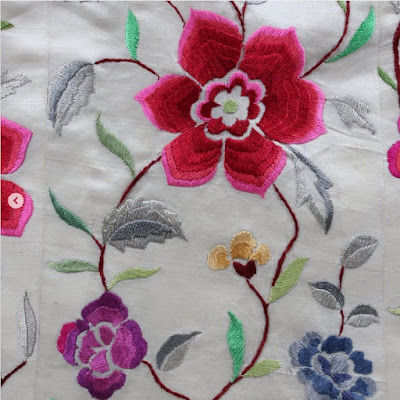
Also in the V&A, the Balenciaga exhibition in 2017 included not only clothing but also several samples of embroidery and beading from the Lesage workshop.

Lesage samples for Balenciaga

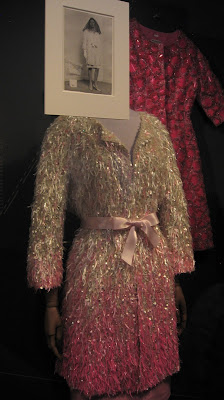
Beading sample on dip-dyed organza, 1967

The same beading on an evening coat, 1967

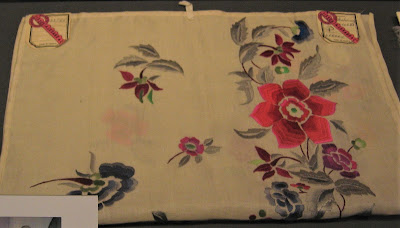
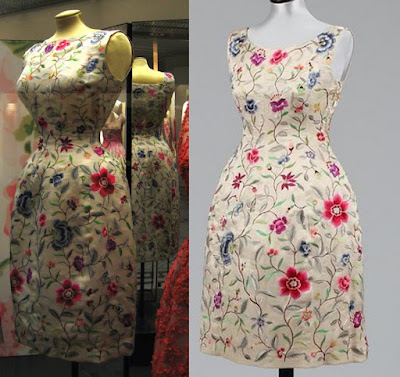
Sample for an embroidered silk cocktail dress, 1960

When another example of the embroidered cocktail dress appeared on the Kerry Taylor Auctions Instagram account earlier in the year, not only did I recognise it at once, but I even twigged that the embroidery was slightly different! How nerdy is that?

Close-up of the Kerry Taylor dress

V&A on the left, Kerry Taylor on the right

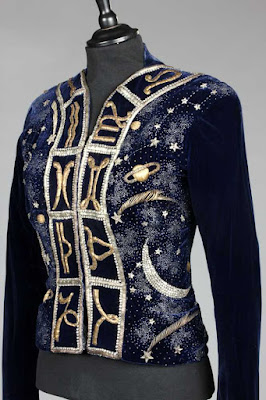
I've seen numerous Schiaparelli pieces with Lesage embroidery at Kerry Taylor viewings over the years (I'm really hoping that I can attend in person again next year) but sadly, I didn't get to see this one. Possibly my favourite piece of Lesage work - after the holly dress, of course!

Zodiac jacket, 1938-39

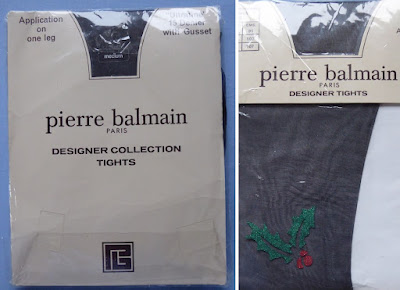
And to finish on the holly dress, another present. This was from my friend F, who is an absolute fiend at searching out the perfect vintage gift. These tights would be the ideal match for the dress, and the fact that they are by Pierre Balmain is almost too good to be true!

Holly detail tights to go with my dress!

Sunday, 19 December 2021

and . . . All done!

You know what? For once I'm not going to lead into this. I'm just putting it right there, at the top of the post.

Looking ever-so-slightly different

No, there hasn't been a sudden extreme snowfall in my back yard. And also no, I haven't vastly improved my hair and makeup skills in the last few weeks, either. All will be explained shortly.

I actually finished the dress in the very early hours of Monday morning (night owl tendencies right there), almost 36 hours before it was needed. Possibly some sort of record.

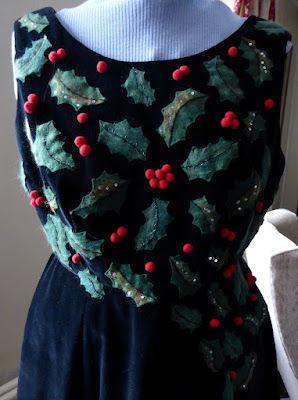
Love the glinting sequins in this shot

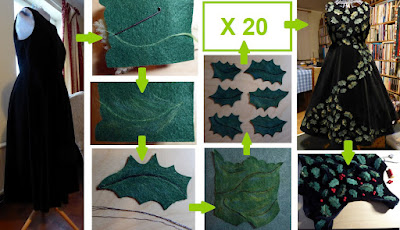
As ever, I hadn't kept a tally, but I reckon that I spent about 200 hours working on this dress in total. That's a lot of hours for one dress. But it all comes down to why I sew. As I've mentioned several times before on this blog, I don't sew because I need more clothes (although being able to create garments which fit is a huge benefit), I do it because I enjoy sewing. I enjoy creating, I enjoy the tactile qualities of working with cloth and thread and, especially over the last two very trying years, being absorbed in a sewing project does wonders for my mental health. But in order to experience these benefits without ending up with a bulging wardrobe, it's necessary for at least some of my projects to be long and labour-intensive ones.

This is where most of those 200 hours went

In some ways, having the blog makes this more difficult. Because I'm posting every week, it's hard to overcome the feeling that there needs to be a steady stream of shiny new toys to maintain interest, rather than progress reports on the same, long, project. But on the other hand, sewing does take time, and perhaps I should be reflecting that. I'd be interested to hear what readers think - let me know in the comments.

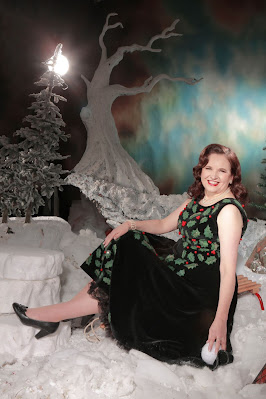
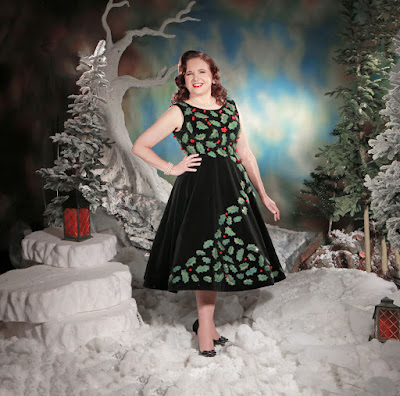
But anyway. A dress which took that long deserves a better record than my usual back-yard-or-indoors-if-wet snaps, and for this I have Ms1940McCall to thank. She regularly works with professional photographers to create stunning pictures of herself wearing her beautiful forties creations and I discovered that one of these photographers, Neil Kendall, is based in Chester.

Now much as I don't like having my photograph taken, when you're a vintage dressmaker and you discover that you live literally a ten-minute walk away from an award-winning vintage photographer well, it seems silly not to take advantage of the situation. In fact, it was Neil's announcement that he was taking booking for shoots on his 'Winter Wonderland' set, complete with hair and makeup by Bethany Jane Davies, that spurred me into finally starting on my version of the holly dress.

I woke up on the morning of the shoot thinking, "What. Have. I. Done?", but I needn't have worried. The whole thing was very relaxed. Although Neil and Bethany frequently work with professional models, they were brilliant at putting a complete novice at ease. Bethany, who has won awards for her Old Hollywood hair and makeup, gave me a look entirely in keeping with the mid-fifties provenance of the dress. While the makeup was definitely not an everyday look, I'll certainly be attempting to recreate the hair. Even a couple of days later, people were telling me they loved the style!

Neil meanwhile is a master of old school lighting to recreate that real vintage feel, and also a master at calming nerves and suggesting poses.

Going for that Picture Post look

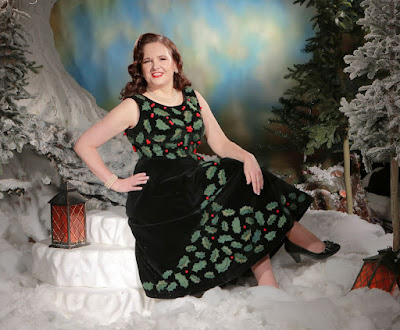
Of course, there were some seated shots as well.

#sewnshownseated

Showing the non-leafy side

It was all entirely new to me, totally out of my comfort zone, and huge fun in what has largely been a fun-free year.

Meanwhile, the practicalities. This has brought my number of #UseNine2021 makes to the miserable total of three! Family commitments have limited my sewing time this year, but that's still poor.

Ouch

I've also only managed to use one of the four fabrics I carried over from last year. The dress actually took 3.5m of the 4.5m remnant, but what's left is too marked and full of weaving faults to be much use, so I'm writing it off, stash-wise.

Sigh

But - I'm proud of what I achieved with this dress, and I'm thrilled with the pictures, too, so I'll finish with a final one.

Worth all the work

Sunday, 12 December 2021

Progress!

I'm onto the home stretch with the holly dress, and expect to finish it tomorrow. Given that it's needed for Tuesday lunchtime, by most people's standards this would represent cutting it terrifyingly fine. However, as I recently mentioned, by my standards this represents a triumph!

It's beginning to look a lot like - a holly dress

I decided to do the hem before sewing the leaves on, so that if the hem turned out to be really visible, I could hide it with leaves! Up to now, the dress has always been on either me or Nancy with petticoats underneath. But at one point it was on its own, and looked really droopy.

Cue the saddest of sad trombones

Clearly the skirt needs lots of support, so I ordered a second biiiig petticoat from Hell Bunny. The effect is alarmingly reminiscent of the dresses in the original Come Dancing, and the trail of destruction I leave when walking round my workroom in the full get-up is impressive, but it does the job. Almost.

#skirtgoals

For even more support, I decided to put crin round the hem of the dress. It's not something I've used before, and I don't know if I got it right, but this was my method. First, I marked the fold of the hem in chalk, and basted the crin in place. Because of the curve of the hem, it had to go onto the skirt, not the hem allowance, so I made as small stitches as possible on the right side.

The crin basted in place

Then, I folded the hem allowance over and pinned it to the crin, easing the excess fabric into place. (I had overlocked the raw edge of the hem when I made the dress, to stop it from shedding velvet fluff everywhere.)

Enclosed in the pinned hem

I sewed the hem allowance onto the crin along the top and bottom edges, and then sewed the hem in place, pulling out the basting as I went along. All in all, I sewed round a 3.4 metre hem four times!

The three rows of stitching are just visible

Fortunately, it all worked. The crin adds structure to the bottom of the skirt, and the hem doesn't show at all.

Then it was on to the leaves. I remembered to take Nancy's cover off, so nothing could get pinned to it, and pinned the leaves on by eye. Those on the bodice are quite widely spaced, to allow more room for berries, but on the skirt they are closer together.

The final arrangement

The 'drift' of leaves comes down from the left side of the bodice.

Showing how the leaves extend from the bodice

I used Microsoft 'Paint' to check the effect of red berries - hardly high-tech, but it worked.

The pops of red make such a difference

And then, it was lots and lots and lots more hand sewing, as I attached the leaves. I sewed down the centre vein in black, catching down the black felting wool at the ends to stop it from coming loose, and then sewed down the leaf points in green.

Finally, they were all done.

All the leaves in place

Now I am attaching the berries, which are tiny pom-poms cut from a bobble trim and sewn on individually with red thread. Once those are done, it's just a case of catching down the neck and armhole facings (and cleaning off dislodged wisps of felting wool, of which there are plenty) and I have a dress! Woot!

Berry time - the end is in sight