Sunday, 10 January 2016

The University Chapel Project - January 2016 update

The latest meeting of the Chapel Stitchers took place on Friday. Most of us were able to attend and Peter Jenner, the University Chaplain, joined us to see how the project is coming along and offer advice on some practical points.

When last seen, my contribution to the hands for the altar frontal consisted of one child's hand, embroidered but not cut out.

The first hand, embroidered on silk twill

Since then I've completed three more hands, and forgot to take progress pictures of any of them! I've used different techniques, but carried on the flower theme throughout.

Adult and child hands (from the University crêche) completed

All the hands, completed or in-progress, were split into left and right and laid out on the altar frontal following the colour placement of Christine's original design.

Initial placement, with Christine's design at the top

Christine had also brought the cross with her, so that was placed in position as well.

With the cross added

We then moved some of the hands around, to give a more symmetrical look and to make the wording embroidered on some of the hands more readable.We also wanted to make sure that all of the decoration remained visible.

Initial layout of the left side

And with some changes made

At present there is a lot of white space between the hands. One possibility was to fill the gaps with scraps of toning fabrics, but this meant that there would be an obvious edge at the top where the hands and fabric ended. Instead Christine is going to paint the main fabric, with the colour fading out towards the top.

The hands which needed further work were returned to their owners, and then the frontal was carefully rolled up with the remaining hands in position, for Christine to take back to her studio. A few more hands are needed in certain colours; Kath, Anne, Pat and I are going to make these and get them to Kath by the end of the month.

With the completed frontal design in sight, we then discussed the rest of the project. Ros and Claire are going to come up with a design for the wedding kneelers for the next meeting. Christine is going to make smaller crosses for the stoles and lectern falls, and at the next meeting we can discuss these and the communion sets in more detail.

The next meeting is on Friday 5 February, at noon, in the usual room in Senate House.

Sunday, 3 January 2016

In a lifetime

Well, less than half a lifetime actually.

I've posted before about my maternal grandmother, Granny T. Because my great-grandfather was for a time a professional photographer, we have quite a lot of family photos, and looking through an album of some of them, it struck me just how much fashions changed in the first 33 years of Granny T's life.

She was born in 1900, and this photograph with her mother is the earliest one I have of her.


Her sister F was born a couple of years later. Unfortunately my great-grandfather wasn't consistent about putting dates in the album, so I have no idea when this was taken.


This one of my great-grandmother and her daughters isn't dated either, but is clearly of the Edwardian era.


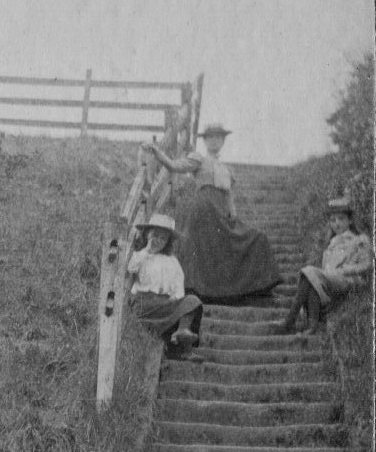
There are lots of photographs of family outings, quite a few to places I recognize. This one was taken in Llandudno, on the north Wales coast. Granny T is second from the left. Her expression suggests that my attitude to having my photograph taken may be a family trait!


Most of the images in this post I have cropped, to concentrate on the clothes. I've left this one, also taken in Llandudno, because of the bathing machines and the horse on the right. Plus, there's something about the composition that I really like.


Some years after my great-grandmother's death, my great-grandfather remarried. This photograph with his second wife was taken in 1920.


And this family group was taken a year later. Clearly my step-great-grandmother was fond of shiny fabrics! Granny T is second from the right.


This photograph, also from 1921, shows the sisters outside their stepmother's shop. Although these are clearly their 'work' clothes, they look far less old-fashioned than what I assume are their 'best' dresses above.


By 1925 things had definitely changed. The look is far more archetypal 1920s, and hemlines are shorter, even on my step-great-grandmother's dress.


Pausing only to admire my great-grandfather's ability to Photoshop out legs well before the invention of Photoshop (seriously, look at the above two images), we move on another two years. My step-great-grandmother (on the right) and a friend are sporting even shorter hems, while apparently posing in front of Blackpool Tower in fog.


It's 1932, and my mum makes an appearance, having clearly inherited her mother's delight in being photographed. Granny T is seated in the middle of the group. There's not a huge change in the fashions, but I do want Granny T's fabulous hat.


From the same year, Granny T, her sister and my mum, relaxing in my great-grandfather's garden.


A year later, Great-Aunt F in a very 1930s dress.


So there it is. A transformation from fashions so clearly of another era to clothes which I could easily wear now, all in 33 years. Fashion is always changing, but I can't think of any 33-year period in my own life where the changes have been so extreme.

Thursday, 31 December 2015

Looking forwards, looking back

Some of 2015's projects

It’s that time of year again; time to review what I’ve achieved in the last 12 months, and consider what the coming 12 may bring. It's also a good time to say a huge "Thank you" to all the people who put so much time and effort into making the things which make me happy actually happen.

First up, the Historical Sew Monthly, where I actually managed to complete all the challenges! Yay! Obviously the fact that there were only 12 this year helped, but never mind. From the quick-and-easy of my shoe clips and my suffragette cockade, to the major projects of my entari and my ‘Delphos’ dress, for the first time in three years I completed the full set, and am basking in the rosy glow of achievement. As ever, thank you to Leimomi and the HSM moderators for all the hard work that goes on behind the scenes.

'Delphos' dress for the Historical Sew Monthly

Sadly the glow of achievement isn’t quite so rosy on the Vintage Sewing Pattern Pledge front. There I only managed two out of my three vintage pattern pledges; Vogue 9546 and Simplicity 2683 (both, for some reason, purple). It’s not all bad news however; as with the Historical Sew Monthly a huge part of the fun has been seeing what the other participants have made. Thanks to Marie of A Stitching Odyssey and Kerry of Kestrel Makes for a great year of giveaways, interviews, and a fabulous Pinterest board! Plus, while I fell short on making up my vintage patterns, I did make up several vintage re-issues; my Horrockses homage, my swing coat and my 1940s hat.

Swing coat for the Vintage Sewing Pattern Pledge

Talking of hats . . . . 2015 was the year I discovered millinery, and I love it! From sinamay and buckram, through veiling and fabric flowers, to making and blocking felt, I’ve learned so much - and enjoyed every minute. I feel truly lucky to have the Hat Works museum just up the road; thank you to tutors Lorna, Sue and Marie, and to Bronwen and the rest of the museum staff.

On top of this I did make a couple of 'ordinary' dresses, all from New Look patterns. There was also a last-minute Christmas dress made from another of my Goldhawk Road purchases. It’s a stretch satin knit with black and gold lace fused onto it, and it was available in lots of different background colours, but I really liked the green.

'Christmas' fabric

Such a fancy fabric only needed a very simple pattern, so I used New Look 6643 view A again, and while the lace layer made it tricky to cut out in places, it made up beautifully. I used plain cotton for the neck facing, as I thought the lace would be too scratchy.

So what will 2016 bring? At present, it looks like more of the same. I’m already booked on a couple of new courses at Hat Works. The 2016 Historical Sew Monthly is happening; the challenges have already been issued, and now I have a standard of completing them all to live up to. I even know what I’m going to do for the first challenge, Procrastination (although for obvious reasons I’m tempted to put off starting it for a while!).

Marie and Kerry have promised a new Vintage Sewing Pattern Pledge, and I’ll be entering in a spirit of Must Do Better.

Meanwhile, when I came to put together the montage at the top of this post it was apparent that I really need to improve my photography skills, so that’s another little job for the year.

However, despite all my plans, I expect that something totally unexpected will come along to distract me - hopefully it will be fun!

Whatever your plans, both sewing and beyond, I hope you have a great year. Here’s to 2016!

Cheers!

Sunday, 27 December 2015

Re-Do / Brown

The last remaining Historical Sew Monthly challenge for me to complete was September’s; Brown. For this I decided to make a bag to go with my Wiener Werkstätte dress and hat.

I turned to the Wiener Werkstätte archive for inspiration, but couldn’t find many images of complete ensembles with bags.

Mela Köhler illustration (with bag), 1911, image © MAK

Photographs which included bags weren’t especially inspiring, either.

Woman with fringed bag, image © MAK

I did find some images of bags in the archive. The styles all seemed to involve either long straps or drawstrings.

Photographs from the Wiener Werkstätte archive, all images © MAK

Widening my search, I found lots of Wiener Werkstätte beaded bags. Some were even brown! However most were from dates later than my dress and hat, and anyway a completely beaded bag was more work than I had time for.

Beaded bag with drawstring and beaded tassel, circa 1915

Beaded bag, 1910, image © Leah Gordon

I was still wondering what to do when I went on my London trip. But then, in one of the shops on Goldhawk Road, I found this brown silk with a metallic brocaded pattern, clearly inspired by Gustav Klimt. It was just the thing for a drawstring bag.

Tree of Life by Gustav Klimt, 1905

Brocaded silk, showing scale

I turned the fabric sideways, so that I could use the contrast selvedge as a feature. It was folded in half to form the top of the bag. I sewed on a length of cotton cord in loops, and covered this with blanket stitch in a metallic yarn to create the looped top common to many of the beaded bags I’d seen.

The loop top completed

The loosely-woven selvedge wasn’t strong enough to support the pull of the gathering, so I added a strip of cotton to reinforce it.

Showing the cotton stay inside

The drawstrings are two simple twisted cords of the same metallic yarn.

With the drawstrings added

The bag is lined with cotton from my stash. I gathered it at the bottom, and added a ‘tassel’ of a glass bead, and loops of rocaille beads in two colours, inspired by the 1910 bag above.

The bead tassel

The completed bag

The small print:
The Challenge: Brown
Fabric: Metallic brocaded silk, cotton for lining
Pattern: My own
Year: circa 1910
Notions: Metallic yarn, glass beads
How historically accurate is it? It’s a mix of lots of different bag styles rather than a copy of any one, so I'd say 50%
Hours to complete: About seven
First worn: Not yet
Total cost: Silk £5, yarn £3.50, everything else from stash, so £8.50

Tuesday, 22 December 2015

The University Chapel Project - December 2015 update

A combination of Christmas commitments and bad weather meant that last Friday’s meeting of the Chapel Stitchers was smaller than usual – so more mince pies to go round! Those people who had not forgotten to bring their completed hands (sorry) laid what they had completed so far on the background cloth to give an idea of how it might look.

Panoramic shot of the hands laid out

(Thanks to Kath for the photos. As well as the hands, I forgot to bring my camera along – sigh.)

It was great to see so many different interpretations of the basic embroidered hand idea together; hopefully the end result will look amazing.

A selection of the hands, some completed and some in progress

We also experimented a bit with coloured organza overlays, but agreed that no decision is needed on this until the frontal is much closer to completion.

Testing the effect of organza overlays

With the altar frontal starting to take shape we spent some time discussing the other elements of the project. Ros and Claire are keen to make a start on the kneelers, and Kath has asked for people to bring idea and sketches to the next meeting. We also need to decide on the design for the stoles, lectern cloth, and communion sets. The suggested stole design of the amber cross and hands on one side and simple lines of the colours at the base on the other side was popular, but other ideas are welcome.

Suggested stole design

The next meeting is on 8th January, 12 noon in the usual room in Senate House (CSH112). Please bring along make as many hand shapes as you’re able to make, but don’t forget to take some time off from sewing to enjoy your Christmas!

Sunday, 20 December 2015

Recreating Selma

When I was researching Mariano Fortuny one image kept coming up; a woman in a vivid gold dress with, rather bizarrely, a matching cardigan.

Mrs Selma Schubart by Alfred Stieglitz, 1907. Image © Metropolitan Museum of Art

At first I was just horrified by the idea of teaming something as iconic as a Delphos dress with something as mundane as a cardi, but when I looked at the source, something else finally dawned on me; this was a colour image, taken in 1907. I hadn’t realised that colour photography began so early. And so I fell down the rabbit hole of researching autochromes.

Alfred Stieglitz was clearly a very early adopter of the autochrome process, as it was patented by the Lumière brothers in 1903 and first marketed four years later. The process used special glass plates covered with tiny grains of potato starch dyed green, orange-red, and blue-violet, with the gaps filled with lamp-black.

Microphoto of an autochrome plate, from Wikimedia Commons

The images captured on the plates could not be reproduced; each autochrome was a one-off image, and could only be viewed with a strong light source such as a magic lantern. The colour filtering also required long exposures, which made it impossible to use for moving images. As a result, the autochrome process never became widely adopted. Nonetheless, to an early twentieth century audience, seeing images in colour must have been amazing. To an early twenty-first century costume nerd, seeing clothing as it was worn 100 years ago, rather than on mannequins in a museum, is also pretty amazing.

Portrait of a woman, 1915, Auckland, by Robert Walrond. Purchased 1999 with New Zealand Lottery Grants Board funds. Te Papa (A.018212)

The novelty of colour images, and the rich colours achieved, seem to have lent themselves to exotic subjects.

Ouled Nail, image © Museé Albert Khan

Woman in assuit costume c. 1915, image © George Eastman House Photography

Dancer in Ghawazee costume, 1920, by Jules Gervais-Courtellemont

"Cleopatra" in Domain cricket ground, 1914, Auckland, by Robert Walrond. Purchased 1999 with New Zealand Lottery Grants Board funds. Te Papa (A.018196)

Image: “Cleopatra,” 1914, Auckland, by Robert Walrond/Te Papa

You can see more images from the Te Papa collection, and read about it, here and here.

The starch grains give autochrome images a hazy, slightly pointillist effect. As well as compiling a great collection of autochromes on Pinterest, Jen Thompson of Festive Attyre has created some wonderful faux autochromes on her blog, which you can see here.

All this comes neatly back to the first image. When I was finishing my entry for the Silver Screen challenge, it struck me. I had a Delphos dress. I had shoes with buckles (almost). I most definitely had a cardigan. All I needed was a plain belt and some fabric flowers. . .

So, after we'd taken the 'proper' photos, Mum and I headed to a nearby park. The bench was rather too modern, but that turned out to be the least of my problems. Oddly, the hardest thing was keeping a straight face. My usual expression in front of a camera varies between, “Please don’t point That Thing at me”, and, “Haven’t you finished pointing That Thing at me yet?”, so in theory recreating Mrs Schubart’s look of resigned gloom should have been a piece of cake. In practice I just had a terrible fit of giggles every time Mum tried to take a picture. We got there in the end, though, and a combination of filters and fiddling with colour balance did the rest!