Sunday, 17 August 2025

Optimistic, or deluded?

Sadly, content on this blog is going to be a little lean for a while. Family illness means that I'm doing a lot of hospital visiting, which in turn means a lot of sitting on buses and trains getting to and from said hospital (and a lot of sitting waiting for said buses and trains to turn up). And annoyingly, the bus journeys are too short and the train journeys too wobbly to get any sewing or knitting done.

Despite both this and my proven inability to complete any creative challenge on time, I've decided that the sensible thing to do in the circumstances is to take part in Shirtwaist September 2025, i.e. make a shirtwaist dress within the next six weeks! Mainly because amid all this I need to be making something to maintain my sanity, and I figured that the timescale of a challenge might prompt me to actually get on with it in what time I do have. I know, I know - it's a long shot. But worth a try!

I've made a few shirtwaists over the years. Before I even started this blog, I made Vogue 8028, view D, in a John Kaldor crepe. It fitted perfectly, and became my go-to dress for difficult days at work - just putting it on made me feel more confident.

One of my most successful makes ever

Sadly, it no longer fits, but I still have it as I can't bear to part with it. I still have the pattern, too. This was in the days when I cut patterns out rather than traced them off, and I cut this to the smallest size, but someday I may get round to resizing it and making another.

Classic shirtwaist pattern

Making a shirtwaist pattern that I like twice seems to be a bit of a theme. I made my self-drafted CC41 dress twice, details are here and here.

My CC41 dresses

I also have two versions of Butterick 2535, see here and here.

The pattern, and my two versions

I've only made Vogue 7422 once; possibly the effort of matching those stripes put me off making another!

If I made this again, it would be in plain fabric!

For this challenge I'm going to make another 1950s shirtwaist, Butterick 7729.


From 1956

I want to go with the bracelet sleeves of view B, but with the collar of view C for the shirtwaist look.

Combining these details

The fabric will be this rather jaunty cotton/viscose mix from my stash.

With a 6" rule for scale

Wish me luck!

Sunday, 10 August 2025

Spot the difference

Look beyond the shape, colour and styling

Actually, it's a trick question. Barring one difference in construction technique, and one change which may have been a typo, they are exactly the same pattern.

I came across 1284 in a charity shop, and bought it as a perfect example of a fitted 1950s cardigan (according to Ravelry, it was published in January 1952). A while later I spotted 1415 online, and bought it as a perfect example of a looser, more boxy, 1960s cardigan (again, thanks to Ravelry for the publication date of May 1960). It was only when the latter arrived that I realised that they used the same slipped stitch pattern.

The first clue

The fact that both patterns could be knitted in the same wool should have been a bit of a hint, but when I looked at the measurements and wool requirements, I realised that they were exactly the same.

Different layout, but the same details

Intrigued, I then compared the pattern instructions line by line. They are identical for the back, fronts, and front bands. Only the sleeves differ. 1415 is knitted in the way I'm familiar with - the cuff ribbing is cast on and knitted on the smaller needles, then larger needles are used to knit the sleeve. (The number of stitches is also reduced at the end of the ribbing.)

Sleeve instructions for 1415

For 1284, the body of the sleeve is knitted on the larger needles first. Then the smaller needles are used to pick up and knit stitches at the bottom of the sleeve (knitting into some twice to create the extra stitches) and the ribbing is knitted.

Sleeve and cuff instructions for 1284

The eagle-eyed may have noticed one other difference. On 1415, the sleeve width is increased from 29 to 45 stitches by adding two stitches on every sixth row, for all three sizes. But on 1284 the increase is on every sixth row for the 34" bust version, but every fourth row for the two larger sizes.

The only real difference between the patterns

By my calculations, this means that whereas the 34" version of 1284 would reach 45 stitches wide on row 47, the 36" and 38" versions would get there after 33 rows, and therefore the sleeves would be a fair bit shorter! My guess is that this was a typo in the original, which was corrected in the new version.

I already knew that dress pattern companies reissued patterns if a style came back into fashion, but I wasn't aware that the same happenend with knitting patterns - albeit restyled to give a more contemporary look. However, none of this explains how the same cardigan looks such a different shape in the two illustrations. I wonder if there was some sort of peg or clip on the back of the brown version, pulling it into the desired fitted line? Photoshop, 1950s-style perhaps!

Sunday, 3 August 2025

Second time lucky, again

Following on from my success with Style 2703, I have another winning pattern remake to report, but this time it's knitting.

My first Close To You shawl wasn't exactly a failure. It's a great pattern, it was just that the colours of the yarn I used weren't really 'me' once it was knitted up. But this yarn from Ewe & Ply in Shrewsbury looked a much better match.

Corrie-Mo in shade Sea Shanty

There isn't really a lot to add to what I said in my previous post about this project. But here is a better photo of beaded section, post-blocking.

The beads just add a little extra

And speaking of blocking.

Utilising all available sunlight

I love the way the colours of this yarn work with the pattern. There are a couple of pools of gold, but mostly it appears in streaks, giving an almost watercolour effect.

Ripples of gold across the green

Unfortunately, I haven't had time this week to take proper photos of the shawl being worn, so here’s a quick phone snap instead.

It's beautifully soft

This doesn't really do justice to the finished article, so I will try to take something better soon.

Update, 23 Aug 2026: And here, a mere 12 months later, it is!

Better late than never!

Sunday, 27 July 2025

Ste Anne, again

Only a very short post this week, as I've been busy with family commitments. Yesterday was Saint Anne's Day, the patron saint of seamstresses, and I managed to find time to make good on my previous threat to recreate this postcard.

Vive Ste Anne - version one

Even if I had had more time, it seemed silly to make a new dress just for this. So instead, I wore the version of Style 1571 which I made from vintage fabric. From my attempts to date the print, it seemed around the right era for the image. There was no way I could recreate the hair, so I stuck with one of the styles on the pattern envelope. Also, none of my sewing machines are as 'modern' as the one on the postcard (my money is on it being a Singer 319 - yes, I am that nerdy!), but I did at least use my mum's 1950s Singer 99 rather than my much earlier treadle. Finally, I managed to find some flowers which went with the yellow and pink in the dress, and even the pincushion matched the colour scheme!

Vive Ste Anne - version two!

All in all, it was a lot of fun to do, and a welcome diversion in what have been a stressful couple of weeks.

Sunday, 20 July 2025

Recreating Vintage 1940s Knitwear

When I came to write this post I was amazed to find that I have only been knitting since February 2023 - less than 30 months. I still regard myself as a beginner in many ways, but it just feels like something I 'do' now. In that time I've acquired a small, but growing, library of knitting books, and the latest addition is Recreating Vintage 1940s Knitwear by Linda Ivell.

My newest acqusition

The book contains 17 original 1940s patterns, all of which were designed to use small amounts of wool in different colours at a time when yarn was not only rationed, but in short supply. But there is so much more to it than just the patterns.

Patterns to cope with wool shortages

The introduction provides lots of background on knitting in the war years. I've heard about this time from my parents, who lived through it, but there was much in here that I didn't know.

From the introduction

I found the section on stitches fascinating; the many different approaches that designers came up with using multiple colours in ways that were not just stripes.

So many variations

Most 1940s knitting patterns are printed in black and white - even before the restrictions of wartime, colour printing wasn't widespread. Colour information is often provided in the pattern, but the shade names may not mean much to readers now. This book provides lots of information on period-appropriate colours.

Colour suggestions

There are instructions on how to make shoulder pads in different shapes for that authentic 1940s silhouette.

Showing the effect of the shoulder pad

There's also plenty of advice on yarns of the period and how to source suitable modern substitutes. And there's a whole chapter on how to resize vintage patterns, which were almost always for a 34" (86cm) bust only. All of the patterns in the book were resized to either 34-36" or 40-42" using this method, so it has been well-tested.

The patterns are split into three categories; open stitches and lace, slip stitch, and colour work. All have been adapted to knit in 4ply or DK, and are rated in terms of difficulty.

The pale blue ties the different colours together

Feather and fan was a popular design

Colour work

There are also lots of 'how-to' photographs and handy tips throughout, making this a real handbook for vintage knitting. My 94-year-old mum greatly enjoyed looking through the book, and said that it brought back lots of memories of knitting in her teens, which I thought was a great endorsement.

Recreating Vintage 1940s Knitwear is published by Crowood Press, and available from booksellers. This is not an affiliated post - I bought my own copy, and these are just my thoughts on a lovely and useful book.

Sunday, 13 July 2025

(first?) Serpentine hat

It's been extremely hot and sunny here in the UK recently, which has finally given me the impetus to make a project which has been on my list for a while, the Serpentine hat by Elbe Textiles.

I already have several straw sunhats, which I wear regularly, but I wanted something which I could just fold up and put in my bag. Unfortunately, I have a strong aversion to bucket hats (one of my many clothing prejudices, but that's another story!), so my options were rather limited. But then I spotted Susan Young wearing what looked like the Perfect Hat on Instagram, which turned out to be the Serpentine.

All of Elbe Textiles' patterns are PDFs, which are not my favourite thing, but fortunately a hat doesn't run to many sheets of A4. The hat is fully lined, so it's possible to use two different fabrics and make it reversible. Susan had advised me that because of the large brim, stiff or firmly interfaced fabric is key, so I used plain canvas in blue and beige.

The two fabrics in the brim

It's a great pattern. There are only three pieces, they fit together perfectly, and the instructions are clear without being long-winded. The only change I made was that rather than sew the band pieces together and then sew around the upper edge as guide for fitting the top, I stay-stitched the pieces before sewing them together. I did the same for the brim pieces, too. But really that was just because that’s how I'm used to constructing garments.

Stay stitching the band

One thing I would say is to closely follow the advice about notching seams. There are a lot of curved pieces in this pattern, and taking the time to snip them properly will really help everything to fit together properly and keep the edges smooth.

The brim seam notched and pressed open

The clever construction means that the whole thing is machine sewn; there is no hand finishing required. Because I was using such different coloured fabrics there was a lot of changing spools and bobbins, but it was worth it. There were times when there were several layers of fabric to sew through, but my treadle machine coped effortlessly.

And here is the finished hat (or two). Excellent fit, good wide brim, and easy to make. It really is the Perfect Hat.

Beige hat with blue lining

And vice versa

In fact, it will probably be one of several perfect hats. I have plenty of canvas left over, so I'm thinking of making a couple more with patterned linings/under brims. So hopefully the leftovers on the stashometer will eventually vanish.

0.6m left over, but ideally not for long

Sunday, 6 July 2025

Pineapple completed

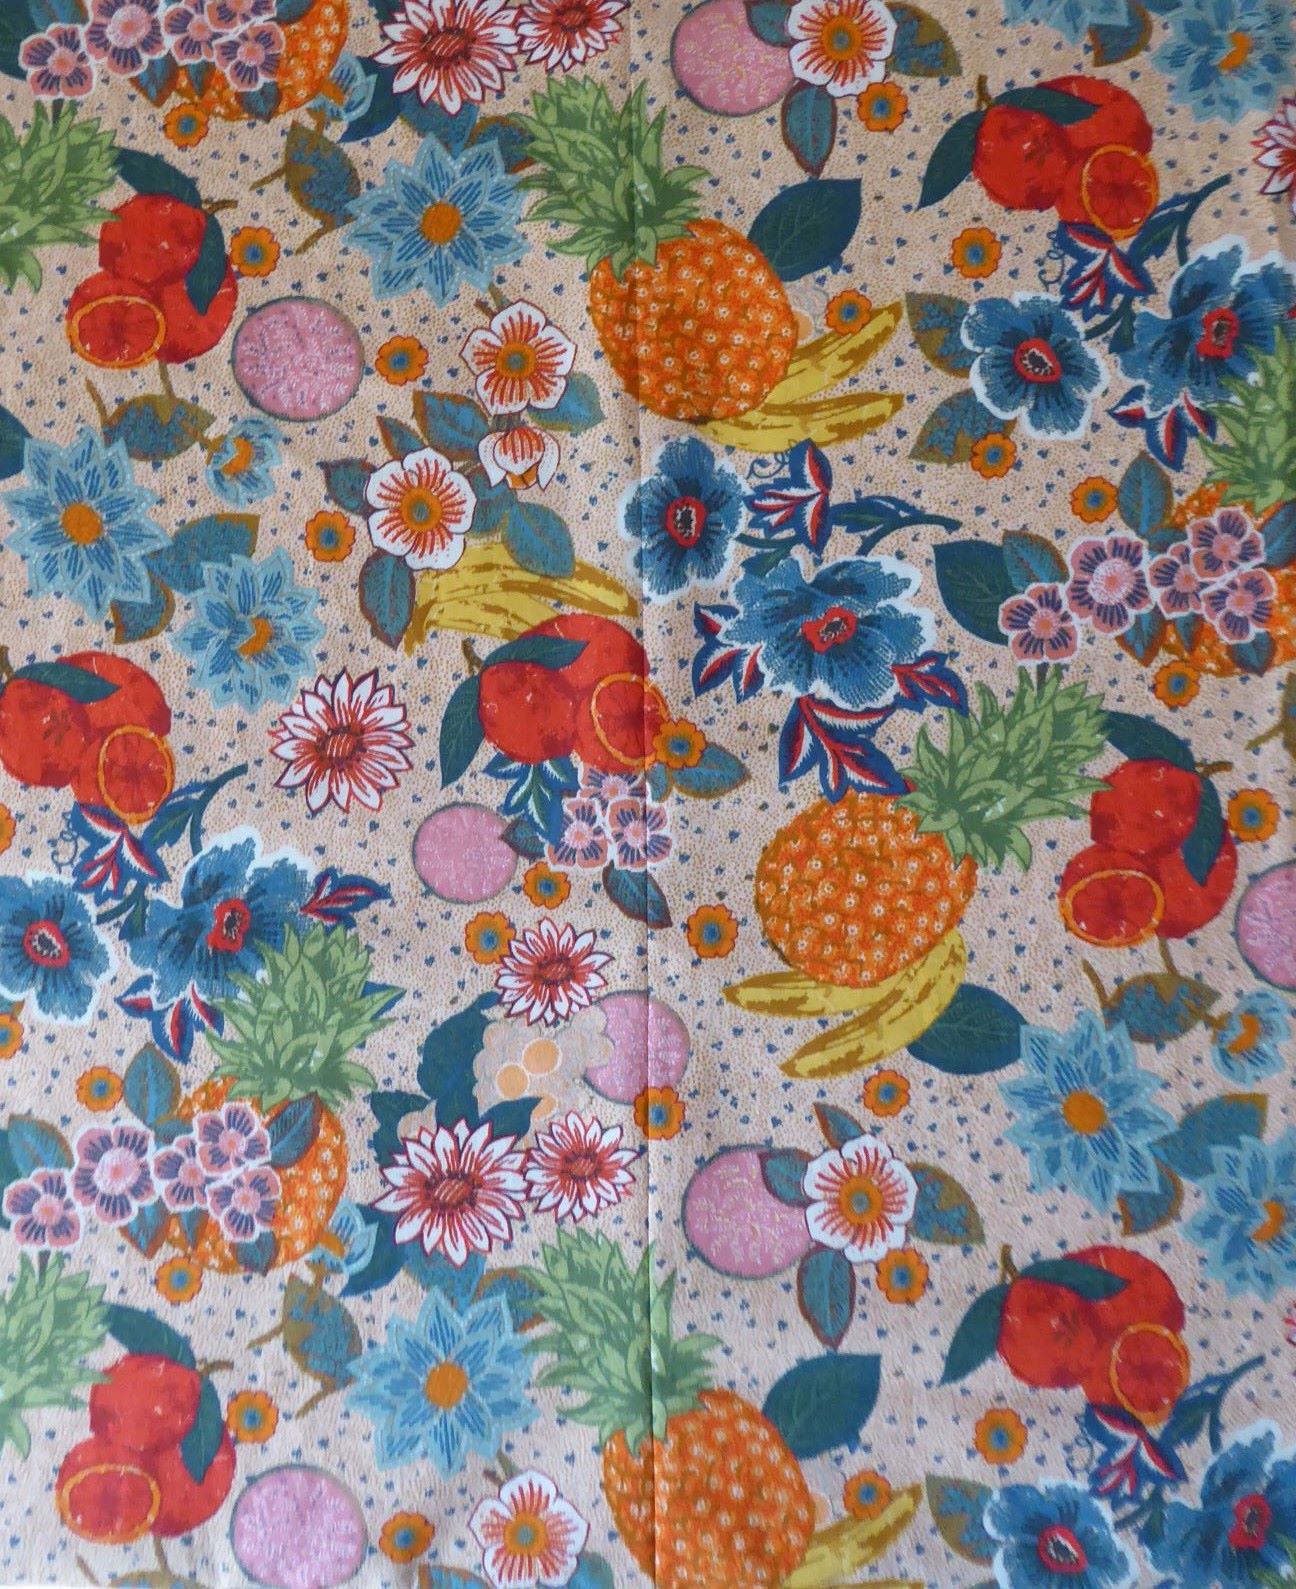
Having, finally, decided on a design for my pineapple dress I went to cut it out - and made a discovery about the fabric.

It naturally curled when folded over

The selvedge was very tightly woven, to the extent that it actually puckered. Fortunately, just snipping the selvedge at fairly close intervals fixed the problem and caused it to lay flat.

I wanted to match the pattern on the skirt centre back seam, as I felt that such a bold design would look terrible if it didn't align. I cut one piece, and traced round various fruits and flowers in the seam allowance.

The tracing is just visible here

Then I flipped the pattern over, and used these tracings to place it correctly on the fabric for the other piece. I'm pretty pleased with the way it worked out.

Good match!

The bodice back slopes down the centre seam, so pattern matching isn't possible. Instead, I cut the pieces out so that pattern flows across it. Similarly I made sure that obvious elements such as the pineapples and oranges are at the same height round the skirt. I took particular care placing the bodice front pattern piece - I didn't want a pair of pineapples in 'interesting' positions!

It dawned on me that in all the examples I had seen, the contrast element of the bodice has a top edge which is pretty much straight across, whereas mine curves up at the outer edges. I experimented with a mock-up, and decided that I preferred my version. Such are the advantages of making your own clothes! I completely forgot to take any progress shots, but it was built up on an interfaced inner layer. The two pieces for the outer layer were sewn in place along the top edge, then the excess fabric was pleated and stitched down. Finally the inner and outer layers were overlocked together along the lower outside edge. The insert is just hand sewn in place, and I am considering making at least one more in a different fabric.

The completed bodice

The skirt is quite full, and there's a lot to hem. Fortunately I remembered that on a day trip to a meeting in London last autumn I had found time to pop into MacCulloch and Wallis (because of course I did!) and bought, among other things, these.

I had wanted these for ages

The bottom item is a kakehari or 'third hand'. The clamp is screwed onto something solid, such as a table, the kakehari is attached to this, and then it holds the fabric in place so you can tension it with one hand and sew with the other.

In action, albeit the wrong way round for most people

Because I am left-handed, I sewed with my left hand and held the fabric taut with my right. It made the job much easier, and quicker.

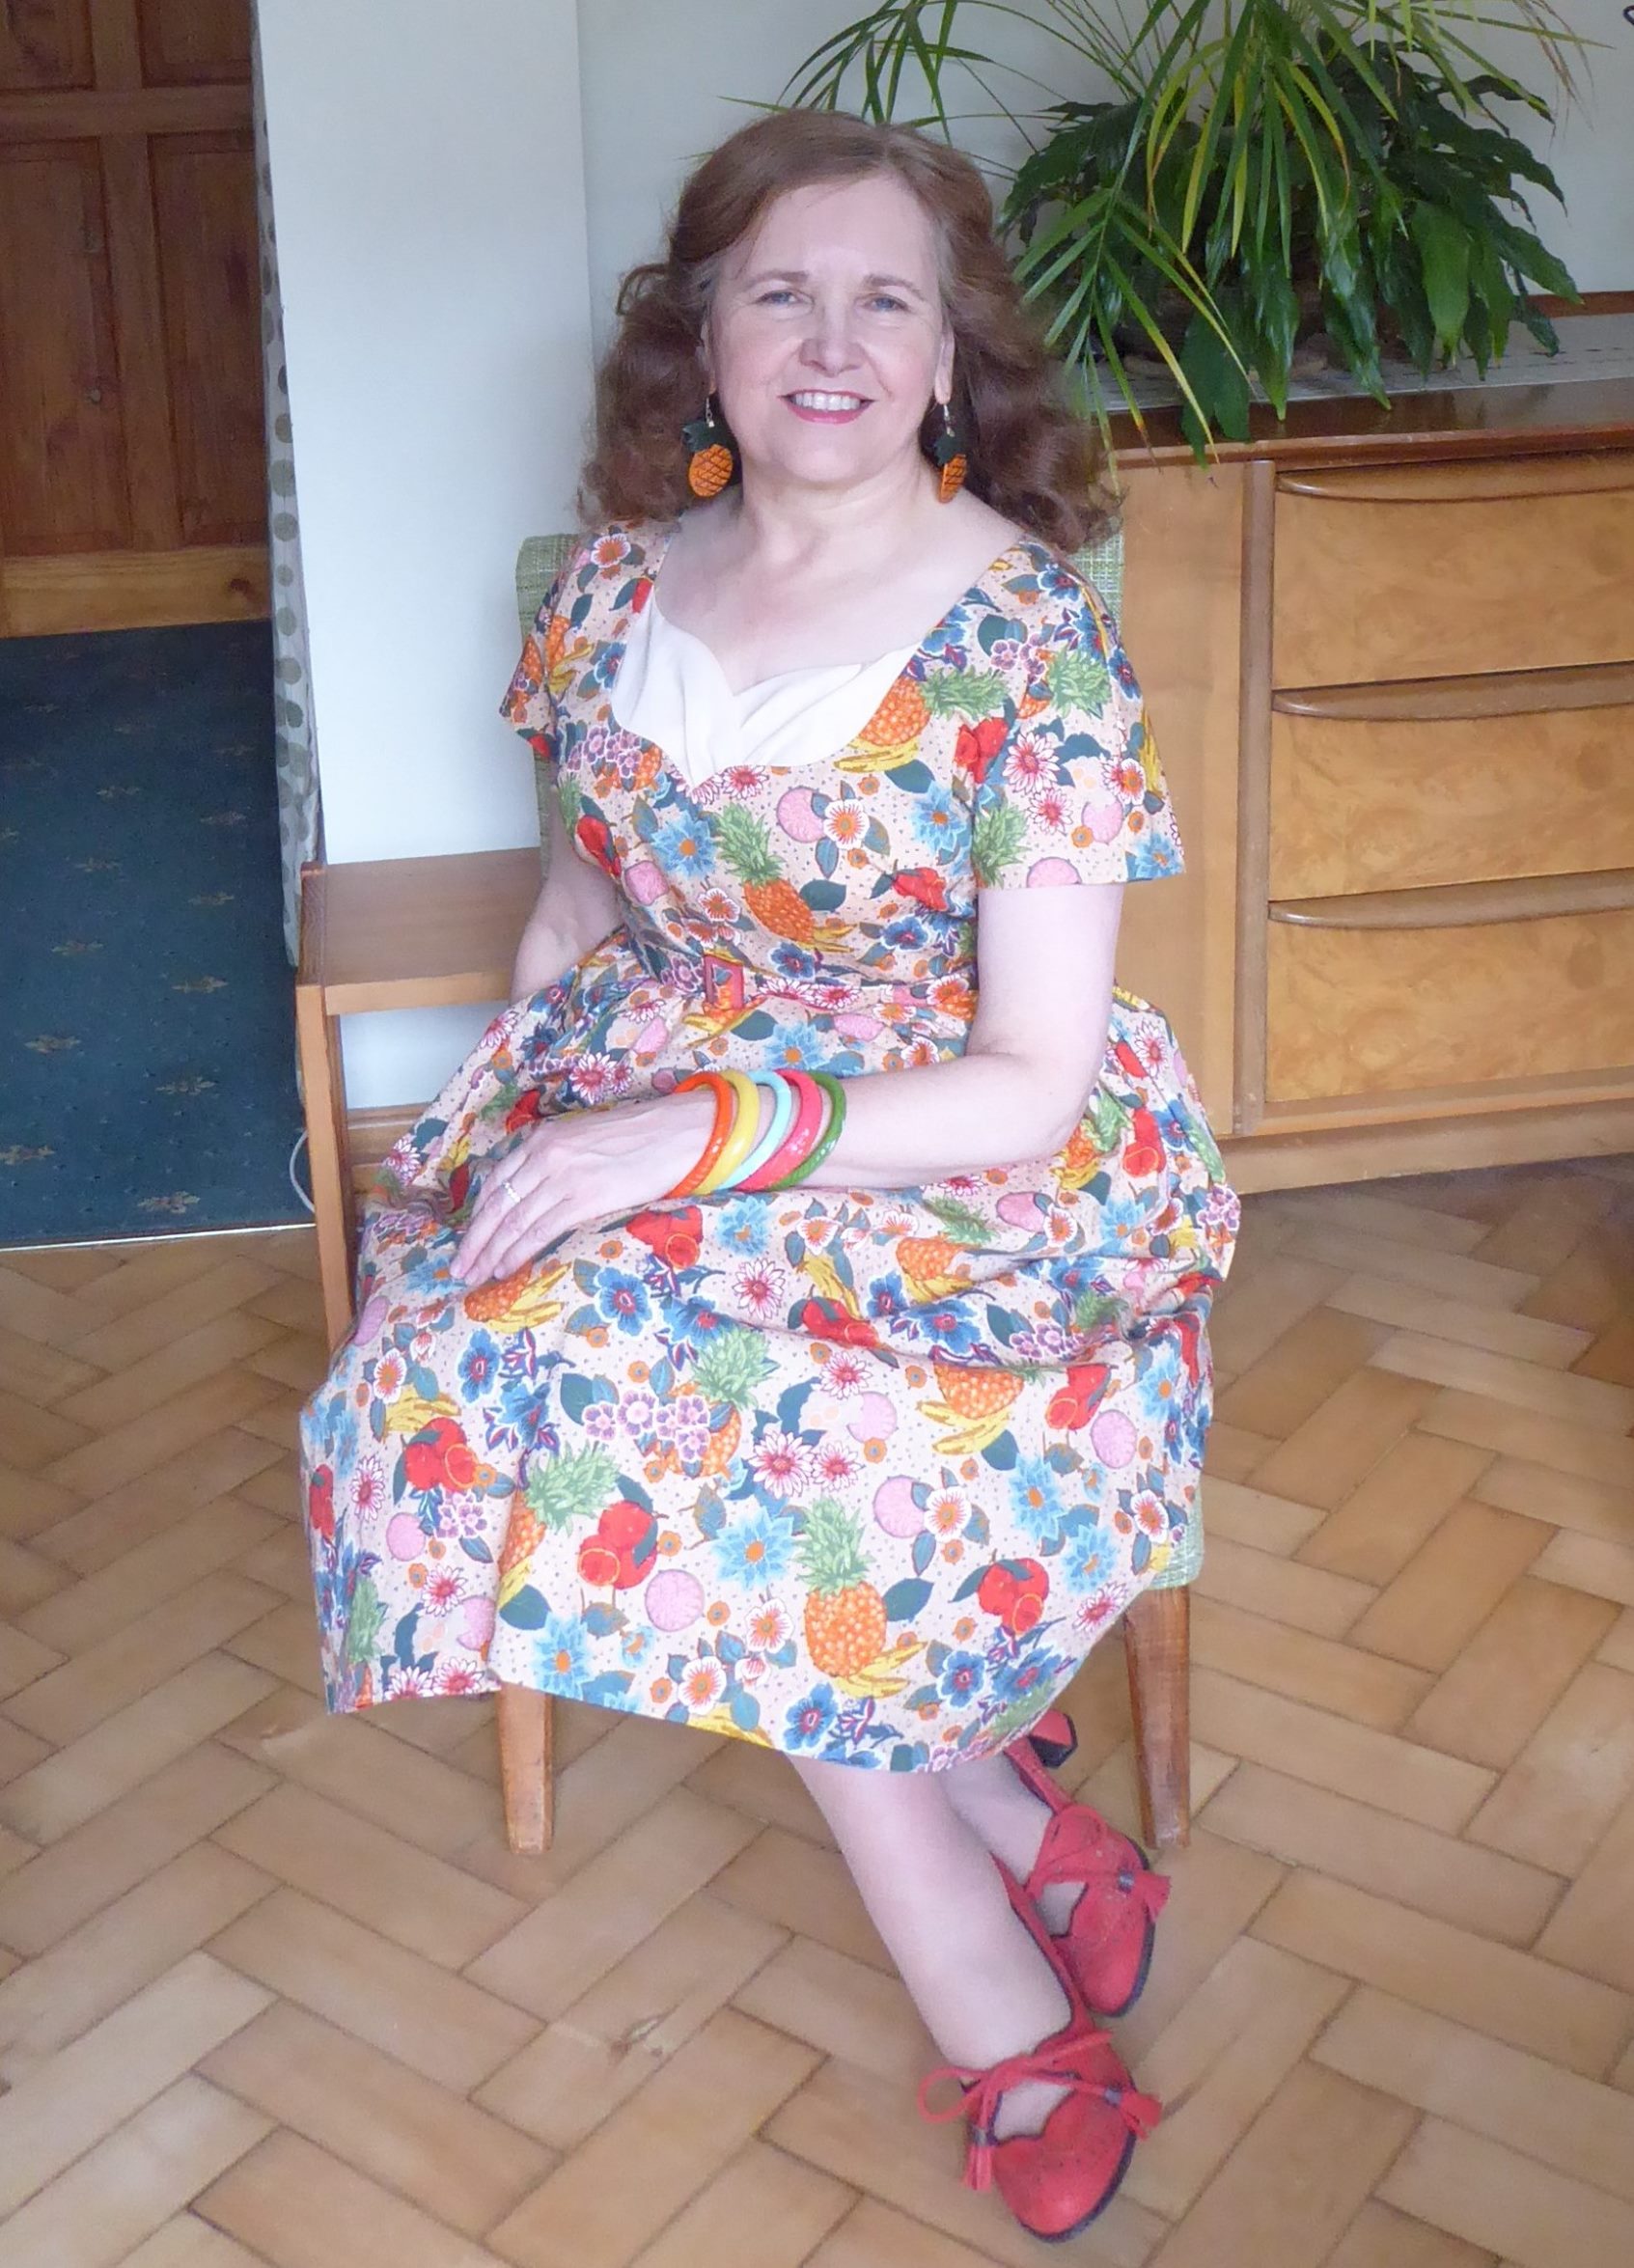
And here is the finished dress, complete with matching belt.

The 'fruits' of my labour (sorry not sorry)

#sewnshownseated

Naturally, a dress with large pineapples on it need to be accessorised with a pair of pineapple earrings! These are from a shop called Digger, in Edinburgh. It first opened when I used to live up there, forty-plus years ago, and I always pop in when I'm back. I was delighted to spot the earrings on one trip, as I knew that they would be perfect with this dress - if I ever made it!

Digger has always looked like this

The stashometer meanwhile remains in the red, but slightly less than before.

Better, but still not good

I need to get sewing with some of those fabrics on the left column if I'm going to get anywhere close to stash-neutral.