Writing an update post about
a knitting project feels very different from writing about sewing, but here goes. These are very much the thoughts of a knitting newbie, so this may be a rather basic post for experienced knitters.
 |
| In a week, I've gone from this . . . |
 |
| . . . to this (admittedly, I've not done much else) |
The first thing to say is that for a newbie, especially one who is used to sewing patterns, a knitting pattern looks terrifying. All those letters and numbers! No diagrams! With sewing patterns I like to read through the whole thing before I even cut out, so I know what I'm doing. However no amount of reading this pattern though was going to make it any clearer; if anything, it was more likely to put me off even starting. So instead I decided that as I know how to cast on and do ribbing, I would do those, work until I got stuck, then learn the next technique I needed, and carry on. And I've continued in that vein ever since. I did follow Tasha’s advice of highlighting the relevant number for the size I'm knitting, which seemed vital for avoiding mistakes.
After the ribbing came the row increases to shape the body of the cardigan. The first thing I needed to do was consider by how much to shorten the lower body. Using the pattern schematic,
Tasha's helpful YouTube video, and a
shop-bought cardigan which is a similar shape, I calculated that my standard 2"/5cm reduction would do the trick. Then I worked out how to remove 14 rows (approx. 2" of knitting) from the pattern while still ending up with the same number of stitches at the end, and wrote my own, very detailed, chart.
 |
| Possibly information overkill - part of my chart |
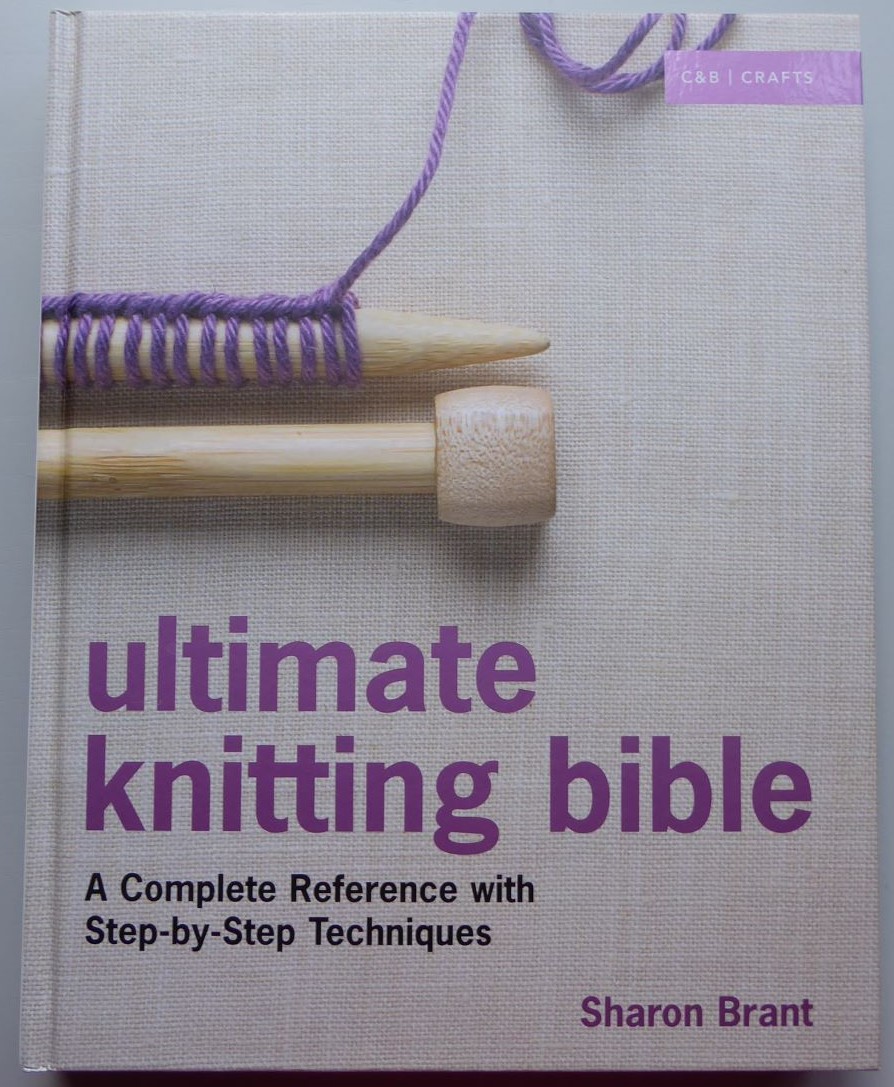
Actually for me, this was one of the easiest bits (what can I say, I'm a maths nerd!). Then I had to learn how to do left and right stitch increases. For that, I turned to this book.
 |
| I've found this so helpful |
I’ve got a couple of 'how to knit' books but for me, this is the best one. I find the instructions, and especially the illustrations, easy to follow. And I like that there's also a clear photo of actual knitting.
 |
| Different methods of decreasing |
 |
| Close-up of a diagram and photograph |
The instructions on joining a new ball of yarn recommend keeping any leftovers handy in case they are needed for mending - which is a touch that I appreciated. There is also a page on how to do this.
 |
| How to keep your knitwear in use |
Because I was doing the stitch increase over relatively few rows, the effect is quite marked.
 |
| The increases laid flat |
 |
| How the cardigan will look |
Initially I miscalculated and did the bind offs for the underarms in wrong places - which gave me more unpicking practice! The back and front right sections were then put onto holding pins while I worked the left front.
The fronts were quite easy and relatively quick to do. The rows were reasonably short, and there were various changes to keep it interesting - reducing stitches for the armhole, a narrow ribbed edge for the neckline opening (which, remembering the
Butterick 5997 episode, I made slightly shallower), and shaping the neckline.
 |
| Part of the right front |
The back, however, I have found very boring to do (So. Much. Stocking stitch). Fortunately, it's nearly done, and then come all sorts of interesing new things; knitting the shoulder seams, adding button and neck bands, knitting the narrow neck ties, and finally the sleeves.
 |
| Not much more to go - thank goodness |
I must admit that I'm finding it very odd not having anything to try on as I go along, unlike sewing. Even when I've completed the shoulder seams, the high degree of curl in the fronts will make it hard to really tell what the completed cardigan will look like. Currently it looks alarmingly small, but I have checked the gauge and it is all fine, so I am relying on blocking to make it the right size and shape. The crucial thing is that I'm still enjoying doing something entirely new.


No comments:
Post a Comment