 |
| Arty flatlay shot! |
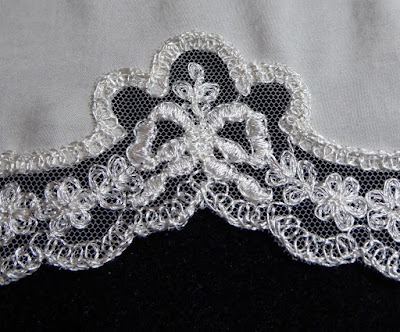
As expected, most of the work needed to complete it was in sewing on the scalloped lace - next time I shall use a lace with a straight edge! It looks lovely, but it was a lot of work. I started at the back, in the hope that by the time I got to the front I would have perfected my lace-attaching technique, and certainly my skills improved over time.
This was the method I used:
First, I sewed the lace round the hem of the slip with a small running stitch along the upper edge.
 |
| The stitches are just visible |
Next, I pinned through the lace and fabric on the right side at key points on the motif.
 |
| Marking the points of the motif |
Working on the wrong side, I used the pin positions as a guide to roughly cut away the fabric.
 |
| First trimming |
I took the pins out, and used my Carrickmacross lace scissors to cut the fabric away from the three 'bumps' in the motif.
 |
| The bump on the scissor blade stops you from cutting the lace |
Then I used my curved blade scissors to remove any remaining bits of fabric which showed through the lace.
 |
| The cutting away fine-tuned |
I had to keep flipping the slip over to the right side to check it.
 |
| Making sure no fabric shows through the net ground |
Once I was happy with the fabric shape, I overcast the raw edge onto the lace - and started all over again with the next motif!
 |
| The raw edge neatened |
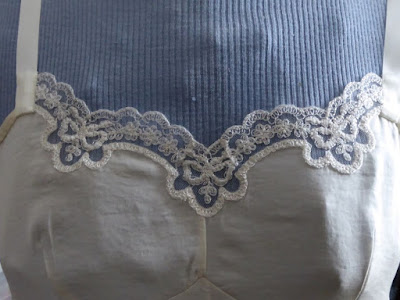
I had a little bit of lace left over, which was too small to use for much else, so I decided to trim the neckline as well. This involved sewing tiny pleats into the lace to give it a slight 'V' shape.
 |
| Pleating either side of the centre bow |
The various slip patterns which I own use different methods for neatening the top edge. Some tell you to sew a very narrow hem, and some use bias binding. This instructions for this pattern are to cut a long bias strip, fold it wrong sides together, sew it onto the wrong side of the slip with a narrow hem, then fold it over and slip-stitch to the right side. I assumed that this was an old technique which had been superseded, but it is used on the armholes of my peacock dress, and also appears in Vogue 8888, the most modern lingerie pattern that I own.
 |
| The only lingerie pattern I own that's still in print |
It was difficult not to stretch the bias strip as I was attaching it, which of course would make it narrower. I must confess that I rarely tack anything when I'm sewing, preferring the approach of a forest of pins and a lot of hope, but I made an exception for this.
 |
| Pinning and tacking the binding to the top edge |
The straps are made from ribbon, and I folded the ends over to encase the raw edges of the lace.
 |
| The neckline and straps |
Posting photographs of myself in my underwear is not my thing (I have absolutely no objection to other people doing it if they want to, it's just not for me), so Nancy was called upon to do the job. It turns out that most of the walls in my house are a similar colour to the slip, so I had to position her in front of some curtains in order for it to show up.
 |
| Nancy modelling the finished article |
I had expected that making lingerie would be fiddly: the fabric would slide everywhere, and there would be a lot of hand sewing. All of this was true, but what I hadn't expected was how much I would enjoy it. A second slip, from a different pattern, has already been cut out, and I have acquired a couple more patterns. I have even managed to combine my new-found interest with my long-established love of 1979 Style patterns!
 |
| Any excuse to acquire more patterns! |
Of course, a slip doesn't exactly make a huge impact on the Stashometer, but it's a start.
 |
| Only 1.2m, but better than nothing |

Wow! A lot of work, but worth it.
ReplyDeleteVery nice!! I love a beautiful slip. I look forward to seeing your make of the vintage Butterick.
ReplyDeleteThank you! I'm currently working on a 1950s Maudella slip pattern.
Delete