Sunday 30 April 2023

Wondrella completed!

I am now the super-proud owner of a cardigan which fits. Even better, a cardigan which fits and which I made myself. Anyone lucky enough to be the same size and shape as ready-to-wear clothing will be mystified by my level of excitement but, believe me, it's real. My 2"/5cm reduction of the length was spot-on.

Happiness is a cardigan which is the right length!

When I last posted about this, I had knitted the fronts and nearly completed the back. Once the back was done, the next stage was to knit up the shoulder seams. Knitting off two needles onto one and casting off at the same time was an entirely new idea for me, but produces a very neat join. Next came the button and buttonhole bands. Tasha provides various options for the neck band/collar, but I decided to keep it simple for this version and just do the basic neck band. The neck ties are knitted as i-cords - two stitches knitted in the round. Something else new, and great fun to do.

Then it was on to the sleeves. Tasha's method of working involves knitting everything as part of the garment, not as separate pieces. This means that the sleeves are knitted top down from the armhole. That was a lot of stitches (118 for my size) to space out evenly, so I followed the tip provided and split it up into smaller sections.

The armhole divided into sections

Even these seemed a bit tricky, so I ended up marking the approximate pick-up point for each stitch within a section with pins.

Even more detail

The sleeve decreases by two stitches on every third row, and eventually got too small for the circular needle I was using. I changed onto double-pointed needles, as that was all which my local shop had. Unfortunately I didn't think to check my progress for a while and when I did, I discovered that despite my best efforts to pull the stitches tight, there was very obvious laddering at the joins.

Sigh

Luckily, an online search for a solution alerted me to the fact that smaller circular needles exist! I ordered some online, and patiently unpicked 18 rows of sleeve while I waited for them to arrive (sad trombone).

After that, it was plain sailing. I really like the fact that this method of construction means that there's no sewing together of various pieces to do at the end. The only sewing was adding petersham ribbon to the button bands to strengthen them, and overcasting the buttonholes in the ribbon. I spent an absurd amount of time trying to decide if the buttonholes in the ribbon should be horizontal or vertical before thinking to read Tasha's excellent, comprehensive, instructions, which confirmed that they should be vertical.

Buttonholes

When I planned this project, I was so doubtful about my ability to complete it that I didn't want to spend a lot of money on expensive yarn. So it is made from an acrylic and as a result, I'm not sure how effective blocking it actually was, but I did it anyway.

Blocked, and showing the very short body length

Finally, I added buttons from my stash.

Auditioning buttons - I went with the middle ones

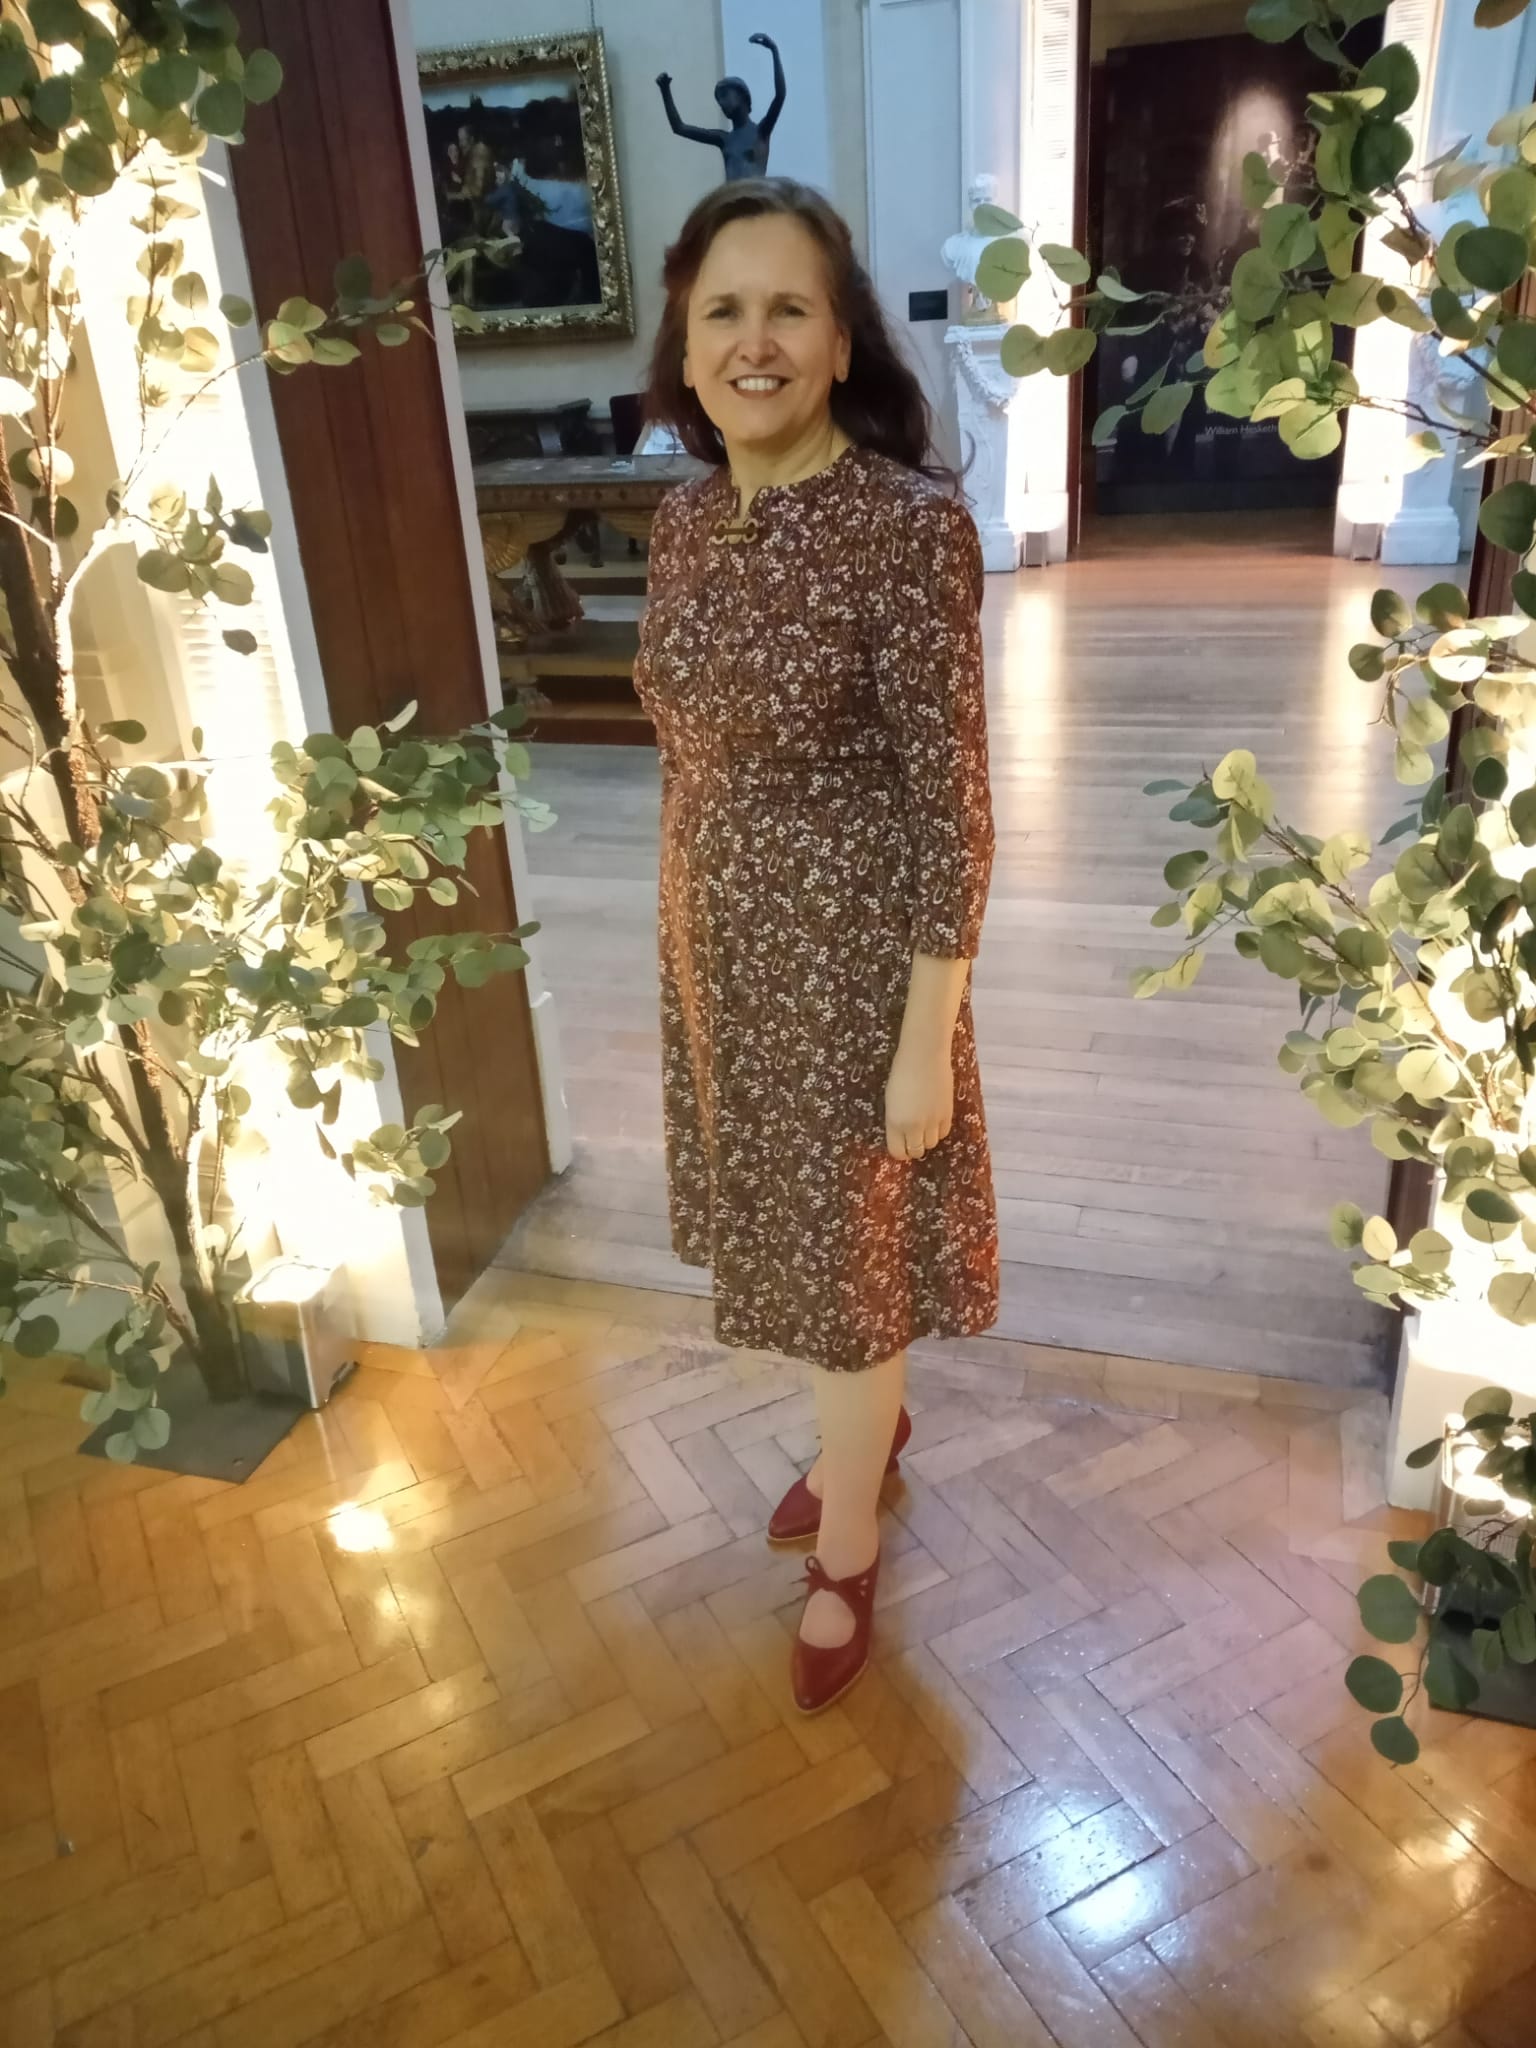
The end result can be worn over a dress, extending the wearing season of sleeveless dresses such as Butterick 6582, while the batwing sleeves will also make it easy to wear over styles with grown-on sleeves, such as Vogue 5215.

Worn over Butterick 6582

Alternatively, Wondrella works well with a skirt - although I am glad that I shortened the keyhole neckline opening a little!

Worn with my back-to-black skirt

Either way, I can see this cardigan getting a lot of wear, and I really can't recommend the pattern enough (the link to Tasha's website is here, if you want to have a go yourself). I'm not a knitter - the only other garment I've ever knitted was a jumper in the early 1980s with minimal shaping in a very fuzzy yarn which hid multiple crimes against tension and sewing up - but even with just knowing the knitting basics I was able to make something which I was proud to wear out to the Festival of Vintage today. I suspect another version will be on my needles soon.

Sunday 23 April 2023

Vogue Couturier patterns, 1940

Back to my 1940 Vogue Patterns catalogue, and this time I'm looking at the Couturier patterns section.

Front page of the 'Couturier' section

Only a handful of styles came in larger sizes

According to Joy Spanabel Emery's excellent book, the Couturier line was introduced in August 1932. Which, if any, actual couturiers were involved was never explained. Instead the patterns were just described as "designed in Paris". Judging from the examples in the Commercial Pattern Archive, they appear to have started at around number 100, gone up to the 500s by 1938, and then started again in the 200s. I can only assume that Vogue wanted to keep the pattern numbers low to maintain an air of exclusivity for what was, at the time, their highest-priced line.

The Couturier section in the catalogue contains 78 patterns, each given a full page. These are just a selection, starting with the latest designs.

364

363

362

361

360

359

Earlier designs included a small schematic showing the shapes of the pattern pieces.

358, the schematic is bottom left

Schematic close-up

No fabric suggestions are included, but some designs have a note that "If the cotton or linen fabric used is Sanforized-shrunk, no allowance for shrinkage need be made".

345, suitable for cotton or linen

This pattern had clearly had an error in the details, and a correction slip had been pasted onto the page. The glue has dried over time, and it has come loose. The only difference that I can see is in the yardage requirements for the jacket lining.

338, with correction slip

Not all of the patterns are called "Vogue Couturier Design", some earlier ones are called "Vogue Couturier Model" and have a script, rather than a typed, description. Unlike the 'Design' patterns, these did not come with a silk label. This didn't prevent the UK price of some of the patterns being raised from five shillings to six shillings, however! The old price has just been blocked out, and the new one written beside it.

311

315

308, visible zip and no price rise

One thing which surprised me was the variety of styles available. As well as fitted, full skirted coats there are loose, straight coats.

246

Evening dresses meanwhile are mostly slim 1930s styles, but with a few unexpected variations thrown in.

355, very 1930s

575, circa 1938

297, circa 1939

The more extravagant designs (and possibly, evening dresses in general) would soon be withdrawn in Britain due to clothes rationing, but 297 in particular seems to hint at 1947 and the New Look. Although given the date, it may have been inspired by Gone With the Wind.

Sunday 16 April 2023

Simplicity 1777/4463 complete

Some actual sewing to show at last, as I've finished my latest iteration of Simplicity reissue 1777. Some of the changes I made to the design are obvious, others not at all, but overall I'm very pleased with it.

I made this dress on Joan, my 1934 enclosed cabinet treadle. I do not have an open-toe foot for any of my Singer machines, so when it came to attaching the centre front to the bodice sides, I couldn't use my normal method for doing the lapped seam. Instead I had to improvise a little with a zipper foot. It worked fine, probably helped by being able to sew slowly on the treadle.

Sewing the lapped seam

As it turned out, I didn't need the extra allowance I had added in the side seams. What I did need, however, were some slight changes to the pocket. On the previous versions, the pocket bag has been sewn into the side seam, and held in place in the front waist seam.

How I've done the pocket on previous versions

This version has no waist seam, so I reshaped the pocket to reflect this. Also, I have a high and pronounced hip curve, and because this version of the dress has no pleats at the front, I had to add this curve to the side seams to allow the skirt to fit properly. My versions of Vogue 2787 all have the same tight curve, and it works well, but any pocket in the side seam has to be placed below it where the seam is straighter. Finally, the cotton fabric is slightly fuzzy on both sides, and I was concerned that the skirt and pocket bag would stick together and cause the skirt to hang weirdly, so most of the bag front is made from a scrap of lining fabric.

How I did the pocket on this version

Talking of lining fabric. The quality of shoulder pads really seems to have deteriorated in the last few years, with even the ones from the better brands getting twisted and mangled by the gentlest of washing*. So, in an attempt to prolong their life, I covered these ones with some more of my lining scraps. (Yes, I do have a box in my workroom labelled "spare lining bits", doesn't everyone?!) Placing the lining on the bias and making the underside slightly smaller also helps to maintain the curve of the pad.

Covered shoulder pad

The one thing which this dress doesn't have is buttons. I wore the unfinished version for a #hatlarks picture a couple of weeks ago, fastened with a 1930s brooch, and really liked the look. I might add buttons at some point, but for now it's a good chance to use some of my vintage brooches.

Worn with Vogue 7694, view C

So here is the finished dress. Last week I went to the preview of the Flower Fairies exhibition at the Lady Lever Art Gallery, and made the most of being a) somewhere other than my back yard and b) with a friend who could take photographs for me.

The back is unchanged from versions two and three, which have the waist ties.

Back view

I managed to stand with my hands clasped in front of me in almost every picture, but it's just possible to see that the flared front falls into a very slight inverted pleat, albeit not nearly as pronounced as the envelope illustration suggests.

Front view, with (tiny) pleat

The skirt is as full at the hem as the original version of 1777, so the lack of pleats is not obvious when you are moving. Nor did it feel especially different when I sat down. In fact, I think I actually prefer not having all that fabric in my lap.

#sewnshownseated at the feet of Art!

When I was planning this project I came across this paisley print cotton fabric and thought that it would be perfect for the job, so I bought the exact amount I needed. Which means that the Stashometer bottom line is unchanged.

3.1m in, 3.1m out

Finally, the Lady Lever was beautifully decked out in greenery for the occasion, so I must include a couple of pictures from inside the gallery.

Leafy archway at the gallery entrance . . .

. . . which we used for a photo


* - I did wonder if I was imagining this. However, my first Simplicity 1777 is a favourite dress which has seen some pretty heavy wear since it was made in 2016. Despite this, when I came to photograph the pocket for this post, I noticed that the pads are far more robust and in better shape than those on much more recent makes. Cost-cutting is clearly everywhere.

Sunday 9 April 2023

Vogue Paris Originals, part two

Family commitments haven't left me with much sewing (or knitting) time this week, so here's a short, picture-heavy post about the second batch of Vogue Paris Original patterns. (You can read about the first batch here.) New Paris patterns were still front-page news, but not the main story - the featured pattern on the cover was Vogue Special Design 4008.

Vogue Pattern Book, Autumn 1949

Pattern S-4008 (image from Vintage Sewing Patterns wiki)

The Paris Original patterns did not appear until page 30.

The accompanying text

Click to enlarge

The same eight designers featured, but this time they each had two designs. The main colour illustration was still accompanied by black and white sketches, but there were no longer any notes.

Lanvin, 1073 and 1064

Piguet, 1066 and 1059

Schiaparelli, 1068 qnd 1061

Molyneux, 1071 and 1058

Paquin, 1060 and 1067

Balmain, 1063 and 1072

Fath, 1065 and 1069

Heim, 1070 and 1062

At some point, I will look at how the stable of Paris Original designers changed over the years. But hopefully next week I will have some actual sewing to post about.