Thursday 30 March 2017

Well, this is awkward

Oops! Having posted about my plans for this year’s Vintage Pledge only a few days ago, and selected my most suitable fabrics from The Stash, I moved something in my workroom and unearthed - yet another dress length! Even worse, it’s one of the most vintage-y looking fabrics that I own.

Yet more fabric. Yet more green.

This had got so lost that it didn’t even feature in the original Collage of Shame. I think that I bought it about three years ago, possibly even more. I do remember that at around the same time I found some green braid which was an almost exact match, and had the idea for a cream collar with a braid edging. I also remember how ridiculously hard it was to find fabric in the right shade of cream; who knew that there were so many?

Anyway, folded up in the striped fabric were the braid, the cream fabric (thank goodness I didn’t lose that!) and the pattern I’d decided upon. I’m not keen on the mega-pockets, but I have an idea for alternatives. So, into the Vintage Pledge mix it goes.

With collar fabric, braid and pattern

Now I’m slightly worried about what else is lurking in that room!

Sunday 26 March 2017

#VintagePledge 2017

Yay, it's back!


Once again, Marie of A Stitching Odyssey is hosting the VintagePledge. Full details are here, but put simply, the VintagePledge is all about sewing with vintage or reproduction patterns.

Last year I completed my pledge of making up at least four of my vintage or reproduction patterns, which was Very Good. However I failed dismally in my plan to reduce my stash, which was Very Bad. Of the four items I made, three were with new fabric.

Because of my studies, I'm scaling back on the number of things to make this year. However I'm setting myself an extra challenge instead. I've identified some of the most vintage-appropriate fabrics* in my embarrassingly-large collection (trust me, this is only part of it), photographed them properly this time (albeit without ironing them first!), and created a new collage.


So the challenge is this:

During 2017, I, Black Tulip, pledge to make up at least three of my vintage or reproduction patterns from the fabrics shown above.

So that's the plan. I can make as many other items as I like from new fabric, but by the end of the year three of those dozen dress lengths need to be hanging in my wardrobe instead of folded in my workroom!

* - I've just realized that the fabric far right in the middle row has been in my stash so long that it qualifies as vintage itself!

Sunday 19 March 2017

Reissue v original - Simplicity 4463

In which I bang on, yet again, about vintage pattern reissues in general and Simplicity 1777 in particular. And also realise that I've been extremely stupid.

As part of my research for my Masters I was recently looking at what actual, as opposed to reissued, vintage patterns are for sale online (and yes, thank you, I am aware that this must be a strong contender for the Most Feeble Excuses of the Year Awards - Internet Browsing section!).

Anyway, I came across this.

Looks familiar, Simplicity 4463

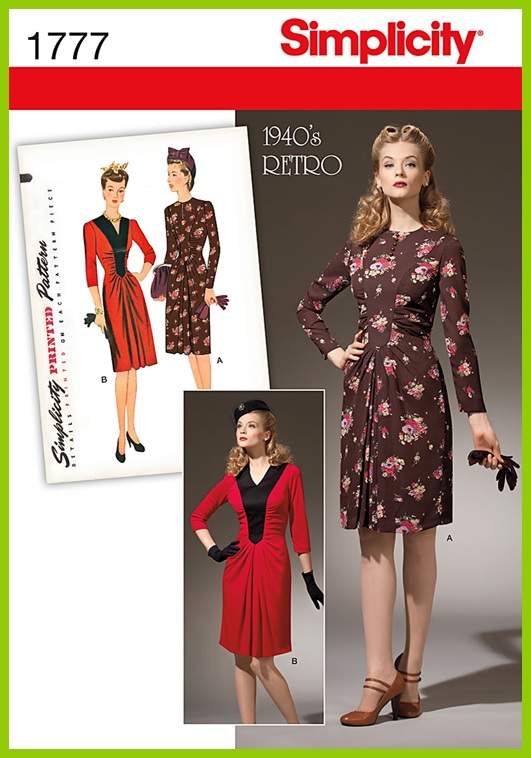
It was missing its envelope, but I immediately recognized the artwork as being the same as this.

Reissued as Simplicity 1777

Over the years I've come across various discussions in the vintage dressmaking online community about how reissued patterns differ from the originals. As this article explains, most reissues are drafted from the pattern illustration, not the original pattern pieces. This is why I was so excited to learn that Simplicity were starting to use their original patterns for reissues.

Simplicity 1777 predates this changeover however, so I was interested to see how the original compared to the reissue.

First up, the pattern pieces.

From the instruction sheet of 4463 . . .

. . . and from 1777

Some of the pieces were pretty much the same. I had redrafted 1777 with my standard alterations, which include shortening the bodice by 4.5cm / 1¾", but my bodice pieces didn't seem that much shorter than the 4463 pieces.

The front yoke

The bodice back was wider because 4463 is cut on the fold and has a side fasten (zip or placket with press studs), whereas 1777 has a centre back zip. More on this later. . .

Bodice backs

The skirt back of 4463 does not have darts, instead it is cut in two pieces. Possibly because for larger sizes the full skirt would be too big for 36"wide fabric. I lengthened 1777 by 10cm / 4" to get a more period-appropriate length, and clearly I was right to do so.

I forgot to allow for the centre back seam allowance in this layout

One of the major differences between the two patterns is in the dress front. 1777 has this as two pieces, whereas 4463 is a single piece. This means that the bodice is cut completely differently in relation to the grain; I've marked the grain lines in green to make it clear.

4463 is almost on the bias, while 1777 is on the straight grain

The skirts are also different shapes. I matched the two pieces up at the small hole which marks the end of the central pleats/gathering.

The hole is marked with a green circle

4463 is far more flared, while 1777 gets its width from deep pleats. At the bottom they are a similar width.

The corner of the 4463 piece is torn, so I've marked the line with a ruler

So those are the pattern pieces, what about the construction?

As I'd suspected, the original does have shoulder pads.

How to make your own, triangular, shoulder pads

At least one of the online reviews which I read of 1777 found the idea of pleating and gathering the dress front into the yoke over-complicated. 4463 only had gathers, which makes more sense. Obviously it's also missing the skirt pleats. I wonder whether these were deliberately added to give more ease, or if whoever drafted 1777 misinterpreted the original artwork?

The front gathers

And now comes the next major difference between the patterns.

Can you spot it? Clue - it's on the dress on the right

When I made up 1777 I had to pull the bodice in a lot at the waist to get it to fit. Now I know why - it's not meant to. The dress actually has a tie belt at the back! You can just see the edge of the bow in the line drawing of 4463, but on 1777 it's vanished.

The tie belt is sewn into the side seam

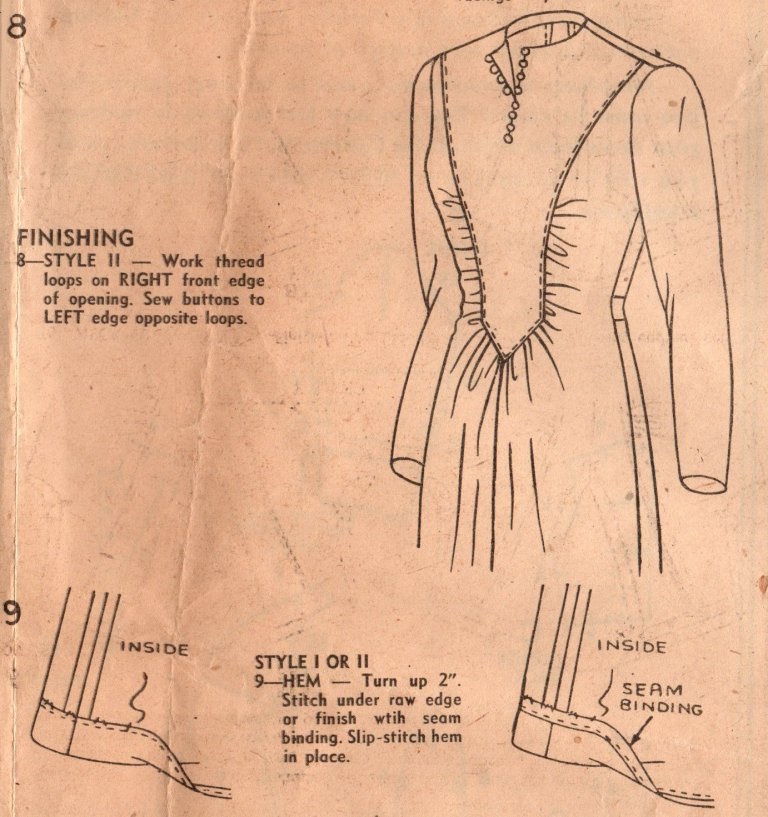
The yoke is laid over the gathered section and top-stitched, which is what I did. There is not a second yoke piece used as a facing however. Instead there is a straight facing, which is then slashed, and the neckline is finished with a bias facing.

Bias neckline facings for both views

This clears up the final mystery about this pattern. It dates from 1942, and the CC41 clothing restrictions at that time forbade the use of "Buttons for the purposes of ornament". 4463 could not have been sold in Britain with purely decorative buttons (at least not without some sort of warning about this stamped on the envelope).

Of course if I'd thought it through, this is blindingly obvious. With a side fasten, the dress would have to have a opening at the neck in order to get it over your head. Duh! How on earth did I manage to miss this?

So this is what the completed front would look like.


Leaving aside my complete stupidity, it's been an interesting exercise; I've long wanted to be able to compare a reissued pattern to an original. Now of course I'm tempted to make up 1777 again - properly!

Sunday 12 March 2017

Haul!

They're all at it! I've posted before about my friend F, who kindly lets me know about 'interesting' arrivals at the charity bookshop where she volunteers. Another friend, Kebi, volunteers at a different charity shop in town, and she recently texted me to say that someone had just donated lots of 1970s and 1980s dress patterns. They were mostly uncut (she's a fellow dressmaker, so had checked), and she thought I might be interested . . .

She added, "Tell them I sent you", so feeling like a character in a very surreal spy story, I went down to the shop and explained. Bags and bags of patterns were bought out for me to look at; nearly all Vogue, and nearly all my size. It was like Christmas coming early!

Which is how I ended up writing something I never thought I'd write; a 'haul' post.

This is a tiny proportion of what was donated

First up, this Vogue Couturier Design by Galitzine of Italy. "Photographed in Rome", no less, sound familiar?

Somewhere in Rome

This Molyneux design was "Photographed in Paris", but of more interest to me was the fact that it has the 'Vogue Paris Original' label attached.

Usually you had to ask for the label at the counter

The Vogue 'American Designer Original' line used the same blue, white and red lettering design as the Paris Originals. The fitting alterations for the pattern on the left will be awkward, but it's a chance to make a Diane von Fürstenberg wrap dress, so it's worth the effort. I'm not sure if I'll ever make the pattern on the right but hey, it's by Edith Head! I hadn't realized that she ever designed patterns.

Very Easy, but also designer originals

In the 1980s I made a coat from a Perry Ellis pattern, which I absolutely loved. If that pattern had been in this collection it would definitely have felt as though all my Christmases and all my birthdays had come at once. Sadly it was not to be, but I did find these instead.

'American Designer' rather than 'American Designer Original'

Another Vogue pattern line from the 1980s was 'Vogue Career'. I love the little office-related vignettes on these pattern envelopes - possibly just in case you weren't sure what a 'career' was! It was only when photographing the envelopes for this post that I noticed that the larger one is Perry Ellis again.

None of the offices I have ever worked in have looked remotely like this

All of the patterns seem to have been bought locally, from department stores such as Beatties (Birkenhead) and Browns (Chester). I've never heard of Hobb Bros in Birkenhead, though. I like the sleeve shape on this blouse, but looking at the dress I am getting worried about my apparent batwing-sleeve addiction!

1970s and 1980s

There were some earlier patterns in the collection. I have a soft spot for the artwork on Vogue patterns from the era where the word 'Vogue' appeared in blue on the left of the envelope; hence these three.

Vogue have always been really bad at putting a date on their patterns

Finally, the one non-Vogue pattern I bought; a Butterick pattern by 'young designer' Jean Muir. Very different from the jersey dresses I tend to associate her with.

1960s

Sadly no-one in the shop could give me any information about the donor, but she certainly had good taste in dress patterns. Thanks to Kebi for the insider information!

Sunday 5 March 2017

Gatsby cloche

Another completed hat!

Two weeks ago I went on another weekend course at Hat Works, this time to make a Gatsby-style cloche. To be honest, every cloche I've ever tried on a has looked entirely ridiculous on me, so I was firmly expecting this course to be a learning experience rather than coming away with something I would actually wear. But . . .

As ever, Sue the tutor (sadly Marie couldn't join us this time) had brought along lots of illustrations of different styles of cloche to inspire us; both from the 1920s and modern interpretations.

Just some of the 1920s examples

The big difference from previous courses was that we used unstiffened hoods, as we were aiming to create a softer look than, for example, the percher hat. We used basic domed blocks, and could either stretch the hood entirely smoothly, or add pleats and/or pinched folds. I decided to add both.

Showing the pleat on the left, and the pinched fold on the top

The blocked hoods were then left to dry overnight, and we moved onto making feather pads for trimming the hats. I made mine from partridge flank feathers, as I loved the colours and the markings.

The complete feathers, only the top section is used

When I got home on Saturday evening I had a look though my button box, and selected a few buttons inherited from Granny T, which I thought I might use when trimming the hat.

The button I eventually used - balanced on a small  cotton reel to photograph it

On Sunday we took the hats off the blocks, and experimented with how much, if any, brim we wanted. The brim is part of the hood, not separate as with the brimmed hat. I wasn't sure what I wanted to do, so just folded the excess felt up, with the intention of cutting it into a narrow brim.

Just experimenting

But actually, I quite liked it as it was. In the end all I did was cut off a tiny strip to smooth off the edge.

The pleat on one side, and the turned up brim on the other

In order to keep the pleat in place, and to stop the hat from stretching out of shape, I added a petersham band inside.

Inside view and the petersham band

The one problem with my turned-up brim was that visually it just merged with the crown. I decided that it needed to be trimmed with a contrasting petersham.

Before trimming - too plain

None of the petersham ribbons for sale in the Hat Works shop looked quite right with the hat and the feathers, but one of the staff kindly let me have a rummage through an extra box of ribbons which weren't on display. Bingo; the perfect match with the feathers and one of the buttons, and just the right contrast with the hat!

Ribbon, feather pad and button

The one problem with the ribbon was that it was ½" wider than I wanted. Fortunately because the brim is so close to the crown, the inside doesn't show, so I pressed and attached the ribbon with ½" on the outside and 1" on the inside. Sewing the ribbon on had to wait until I got home, in order to get the right colour of thread.

The brim is now obvious

I was able to press a bit of a curve into the ribbon, and once it was all sewn on I used a tip which Sue had told me; dab round the edge with a damp sponge. This shrinks the petersham just enough to smooth out any bumps.

The ribbon trim completed

I didn't sew the ribbon all the way round, as I had other plans for the base of the pleat.

Pins mark where the edge of the brim should lie

I positioned the feather pad on the hat, and marked the outline with yellow pins. Then I sewed down the brim at the ends of the ribbon.

The brim stitched down so that it comes to a point

Then I folded up the pointed section of the brim. Before I attached it to the crown, I cut a slit in the felt and pushed through the shank of the button. The idea was to make it look as though the brim is buttoned in place; but I'm not sure if this really works. I still like the effect, though.

The completed hat

And the thing I really like about this hat? I can actually wear it!

A wearable cloche hat!!

The pleat is just visible in the side view

Because we used unstiffened hoods the crown isn't rigid, so I can wear it with the feather pad slightly to one side (above), or centred.

Slightly turned round

Side view

From the other side

Because the crown is so deep, the hat stays on and keeps my ears warm. A definite success!

Wednesday 1 March 2017

Calling all hat-lovers . . .


If you love hats (which I do), and can be in Stockport on 25 March (which I can't, drat), then get yourself along to HATstock; an exciting new event at Hat Works. There will be talks, tours, a marketplace and a Milliners’ Showcase featuring the work of contemporary northern milliners. Plus, it's a fun way to raise awareness of Brain Tumour research in the lead up to Wear A Hat Day (31 March).

Click here for full details.