Pages

Sunday, 28 April 2024

Blue Dahlia completed

I have finished my Dahlia shawl, less than three months after I started it. Not bad going for something which was my 'secondary' knitting project and which I could only knit in bursts as long as my (limited) concentration span!

Finished!

Mistakes and unpicking continued to the end, but did lessen as I established a process. Once I understood it properly, the pattern was actually quite straightforward. The wrong side rows are just knit and purl with no increases or decreases, so in effect they are 'rest rows'. The 22 rows of the pattern are repeated throughout, with the motif section knitted an increasing number of times in each repeat.

I came across these lovely stitch markers from Rebecca's Room, which come in different colour combinations in each set. They were ideal for colour-coding each section of the pattern, so that I always knew where I was in a row. Also, I got into the habit of counting my stitches at the end of each section, which meant that I never had more than 22 stitches to undo when I did go wrong.

Sections separated with different markers

There were a couple of occasions when I started knitting the wrong row, but fortunately noticed in time. Juliana of Urban Simplicity, who is both a talented knitter and kindly generous with her knowledge, suggested a couple of ways to avoid this pitfall and, thanks to her, I remembered that I have this chart holder. It's a sheet of steel with magnetic strips, which you arrange to highlight the section you are working from.

Highlighting the row I'm working on

I had no idea how much of the shawl I would be able to knit with the wool I was using, but had the idea to weigh the ball after 64 rows and again after 72 rows. I then knew that I had used five grams, and knitted 1,112 stitches, so approximately 222 stitches per gram. I kept weighing the ball as I worked, and it averaged out at around 240 stitches per gram. When I was getting towards the end of the pattern as written I still had quite a lot of wool left, and was able to calculate that I had enough for an extra (sixth) row of motif, so that was what I did.

As it turned out, I would have had enough wool to have done the whole shawl in blue, but having knitted the centre section in black I stuck with my original plan and knitted the edging in black as well. It was a new type of bind-off for me (knitting through the back of the loops), so I practised with some spare wool first.

I must admit that once the piece was off the needles, it didn't look very impressive.

On a single blocking mat, for scale

But thanks to the magic of blocking, it was transformed.

Blocking still feels akin to magic to me!

The finished shawl came out slightly smaller than the pattern (measured at the row of five motifs) presumably due to using a different wool. I think that I may have been slightly over-aggressive in the blocking, as it seems a bit more holey than the photos of the original, but it's possible that the correct wool is a bit fluffier.

Unfortunately, while it was actually sunny when I came to take pictures this afternoon it was also absurdly windy, so I had to work indoors. Looking at the photos, I am glad that I went for the black edging as it adds contrast. All in all, I'm really pleased with the end result, and am delighted to have added lacework to my knitting repertoire.

Showing the back centre and edging

Arranged to show the centre 'spine'

Trying, and failing, to take photos outdoors

At some point, I may have to add a 'knitting gallery' page to this blog. Who would have thought it?

Sunday, 21 April 2024

Back to Hat Works

So many hats!

According to this post, it's almost exactly nine years since I first went to Hat Works, the hat museum in Stockport. It has been closed for some time, for a refurbishment which took far longer than intended (thanks, Covid), but reopened recently. I went to visit yesterday, and it was well worth the wait.

Seen from the new walkway

The factory floor isn't greatly changed. Old favourites such as the block-maker's workshop are still in place.

Block making

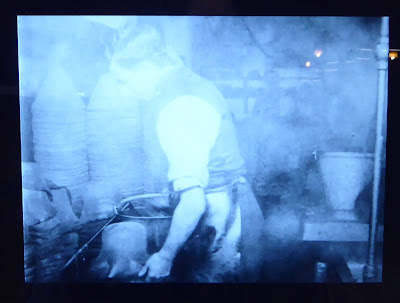
The hatting machines all have new information boards, however, which show short film clips, made in the 1930s, of the machinery in use. These really bring the processes to life.

One of the new display boards

So much steam!

The big change is upstairs in the Gallery of Hats, which has been completely transformed. The whole space has been opened up, and made much brighter.

The Gallery of Hats

New lighting makes the displays easier to see, without damaging the hats.

Light and open . . .

And the hats themselves? Well, there are so many more of them. Whereas previously there were around 400 hats on display, now there are over 1,000.

. . . but still packed full of hats

The hats are grouped by themes, which allows the displays to show a variety of items from different cultures and eras. For example, the display of head wraps covers both turbans and a hat by Christian Dior.

The Dior hat is in the centre

Themes include design inspirations, and how the hats were made.

Straw and natural fibres

The decor is light and bright throughout

Inspired by the natural world

I loved the way that the displays include extra, related, items. Naturally, I couldn’t help noticing that the sewing machine was displayed back-to-front, but I'm going to be charitable and assume that the front had a bad case of pin rash!

Made at home

Marine inspiration

The display of hatmaking methods; sculpting, blocking, and draping, also has a maker's workbench, which I loved. It has a very realistic air of organised chaos, complete with tools stored in old tins and jam jars!

Examples of sculpting, blocking and draping

This will look familiar to any maker

It's not just hats, either. The museum’s collection of hatpins is displayed in a large pincushion.

Fearsome!

Amid all this, I was delighted to spot one of my favourite hats in the collection on display. I'm not sure why a tiny percher in the shape of a cauliflower appeals to me so much, but it does!

Absurd, but adorable

As you might have guessed, the new look Hat Works is a definite winner for me. I'm sure that children and families will love it, but there's much for those with a more in-depth interest to enjoy, too - which is not a balancing act which every museum manages to pull off. It's currently open Thursday, Friday and Saturday, from 10am to 4pm, with last admission at 3:15pm - full details are here. General admission is free, but the guided tour of the factory floor, which is available on selected days, has to be booked separately. Currently the 'getting there' section of the website only covers car and bus, but the museum is also close to the railway station and the new walkway to Viaduct Park makes getting there a doddle - thanks to Sue at Hat Works for telling me about it!

Sunday, 14 April 2024

Mrs Exeter in 1960

All of my current projects are unfinished, but too far progressed to split into two posts, so instead I'm going back to my 1960 Vogue Patterns counter catalogue, to look at this section.

Mrs Exeter, getting ever younger

Given that the catalogue is for January 1960, I was initially confused as to why Mrs Exeter would be planning a Fall wardrobe. But in the very small print on the last page, I discovered that it was actually issued in December 1959 in the U.S. So perhaps she was just running a bit late with her dressmaking plans, or the section was reused from an earlier catalogue. Either way, clearly there was a delay in it reaching Britain.

Possibly new releases

The description on the section tab is accurate, but a little misleading. There are only two patterns in size 46 (a 48" bust); one dress and one slip.

The sole size 46 dress in the section

And a slip to go under it

In fact, of the 77 patterns deemed suitable for Mrs Exeter, 13 go up to size 44, 40 to size 42 and 22 to size 40 (46, 44 and 42-inch busts respectively).

One of the patterns which goes up to size 44

A typical double-page spread in this section

Quite a few of the larger sizes are for lingerie and housecoats.

9358 goes up to size 44

9491 goes up to size Extra Large, bust 42"-44"

Most of the patterns are for dresses and suits. There are two blouses, a single pattern for a skirt, and also one for a bathing suit.

I would love to make this

Despite this section being named for Mrs Exeter, there is only one illustration of an obviously older women, and even then it is only the hair which gives any indication of age.

White hair, but no wrinkles

Otherwise there is, at best, a hint of grey hair in a back view illustration.

Grey hair in the back view

Other than that, the models, whether illustrations or photographs, are all youthful and slim.

The bottom figures would be more at home in the 'Juniors and Misses' section

This pattern goes up to a size 42, but the model is clearly not that

I have seen this photograph used for Mrs Exeter somewhere

Even some of the dresses don't look like an obvious choice (for the time) for a woman described as "approaching sixty", when she first appeared in Vogue.

Oddly, this pattern only appears in the 'Mrs Exeter' section

It would be a few years before Mrs Exeter vanished from Vogue altogether, but the start of the decade does give hints of what is to come. Clearly the name had sufficient recognition among sewists who bought Vogue patterns for it to retain its own section, and it's easy to imagine that older women would turn to it for the inherent validation that Vogue had decreed these styles as suitable for them. But at the same time, there is a sense of Vogue Patterns wanting to have their cake and eat it, removing all hints of age to ensure that other would-be purchasers were not put off by the association. There had always been a disjoint between how Mrs Exeter was described and how she was depicted, but it does seem to get more marked over time.

Sunday, 7 April 2024

Making a 150 year-old toile

My coursework is all submitted, so I can finally admit to what I've been working on for the last few weeks.

Detail

Eight whole years ago, I blogged about a pattern from April 1874 which was in a box of 1940s/50s patterns which I bought at auction. It was from the Journal des Dames et des Demoiselles, and consisted of a single sheet of paper, printed on both sides with the overlapping pieces which were the norm at the time. Each side contains the pieces for two garments and an accessory, plus small illustrations and brief notes.

Side 1

Side 2

Then, four years later, making up one of the designs was one of my sewing goals for the year. I chose this one because a) I liked it the most and b) I had been able to find the associated fashion plate online, complete with a back view.

My choice - pattern illustration and fashion plate


Like a lot of people's goals for that year, that didn't happen, and the whole idea was shelved. However, when I discovered that I could make something as part of my submissions for my course, I went back to it.

I have never come across anything which gives any suggestion of how well, or otherwise, these magazine patterns were made, so I had no idea if this would actually work. I warned my tutors that this was very much an experiment and chose to just make a toile, exactly as it was on the pattern, from plain white cotton.

I traced off the relevant pieces, which was not that difficult as each piece has its own distinctive line style, and added standard ⅝" seam allowances.

Some of the different outlines

For positioning the pieces for cutting out, I relied on a mixture of costuming books and guesswork.

Cutting out

The deep front darts and the back with its pleated lower section were both easy to do, but when it came to sewing the bodice pieces together things became more confusing.

Left to right - front, side back, and back

From the illustration, it's clear that the side back is not attached to the back below the waist. However, I struggled to tell how far down it was attached to the front. The fact that the black trim goes up to the waist suggests that it is hanging free, but if this is the case then how does the front maintain its smooth line?

Close-up

I tried sewing the two sides to different lengths, and once the bodice was made up, it was obvious that sewing all down the side was incorrect. Once I had an actual garment to look at, the description "fastened at the side with small straps made from the same fabric as the trimming" made a lot more sense. The straps fasten the front to the back, and the long side back piece then covers them. The joys of actually making something rather than just reading about it!

Another thing which became apparent from making the pattern up is that the weakest point in the construction is the top of the pleats at the back waist. I suspect that the two buttons, as well as being decorative, anchor and hide any reinforcing which may be required here.

The pleat construction leaves little support at these points

Attaching the two collars was the next challenge, as there were a lot of differently-shaped curves to wrangle together. I had already stay-stitched the neckline, and decided to stay stitch the collars as well, so that I could snip to the stitching. This is probably not a period technique, but it did allow all the pieces to be pulled out straight, and they then fitted perfectly.

The sleeves were simple to construct, and once I had grasped that the back seam needed to meet the curved seam on the bodice back, they fitted perfectly.

Perfectly smooth sleeve heads

Initially I hadn't realised that the wrist straps were doubled, but that was easily rectified.

Adding the cuff and straps

A modern dressform is a very different shape from a corseted figure, so the fit on the dummy is not ideal. As this is a toile, I did not add a lining or bone the seams, but I doubt if these would have made much difference. As I haven't yet made a bustle cage, I improvised with a cushion pad tied tightly at one end, and stash fabric draped and pinned into pleats for the 'skirt'.

Side view

The front was hardest to fit on my dressform

My 'bustle' was surprisingly effective!

Interestingly, the finished garment, made with no alterations to the pattern, has a bust of 94cm/37" and a waist of 79cm/31". So the target audience was clearly not much different from that of 1930s magazines, in which the free patterns tend to be for a 36" bust. Nor does the waist/bust ration suggest particularly tight corset lacing.

There are, of course, things which I could have done better - but that is the point of a mock-up. I'm also well aware that the pattern would need altering to fit me. But overall, I'm thrilled with the end result. In fact, it's still on the dressform beside me as I type this, as I can't bear to put it away yet! The project was huge fun to do, and proves that these patterns were not just a basic giveaway but very well-drafted and eminently usable. I've definitely encountered modern patterns which were worse. Much worse. Even though the instructions were terrifyingly brief by modern standards, when combined with the illustration they turned out to include all the information which would not have been obvious to a contemporary dressmaker.

The instructions, and my translation

I think that this may have rekindled my interest in making the complete ensemble!